Woodworker's Journal fall-2010, страница 14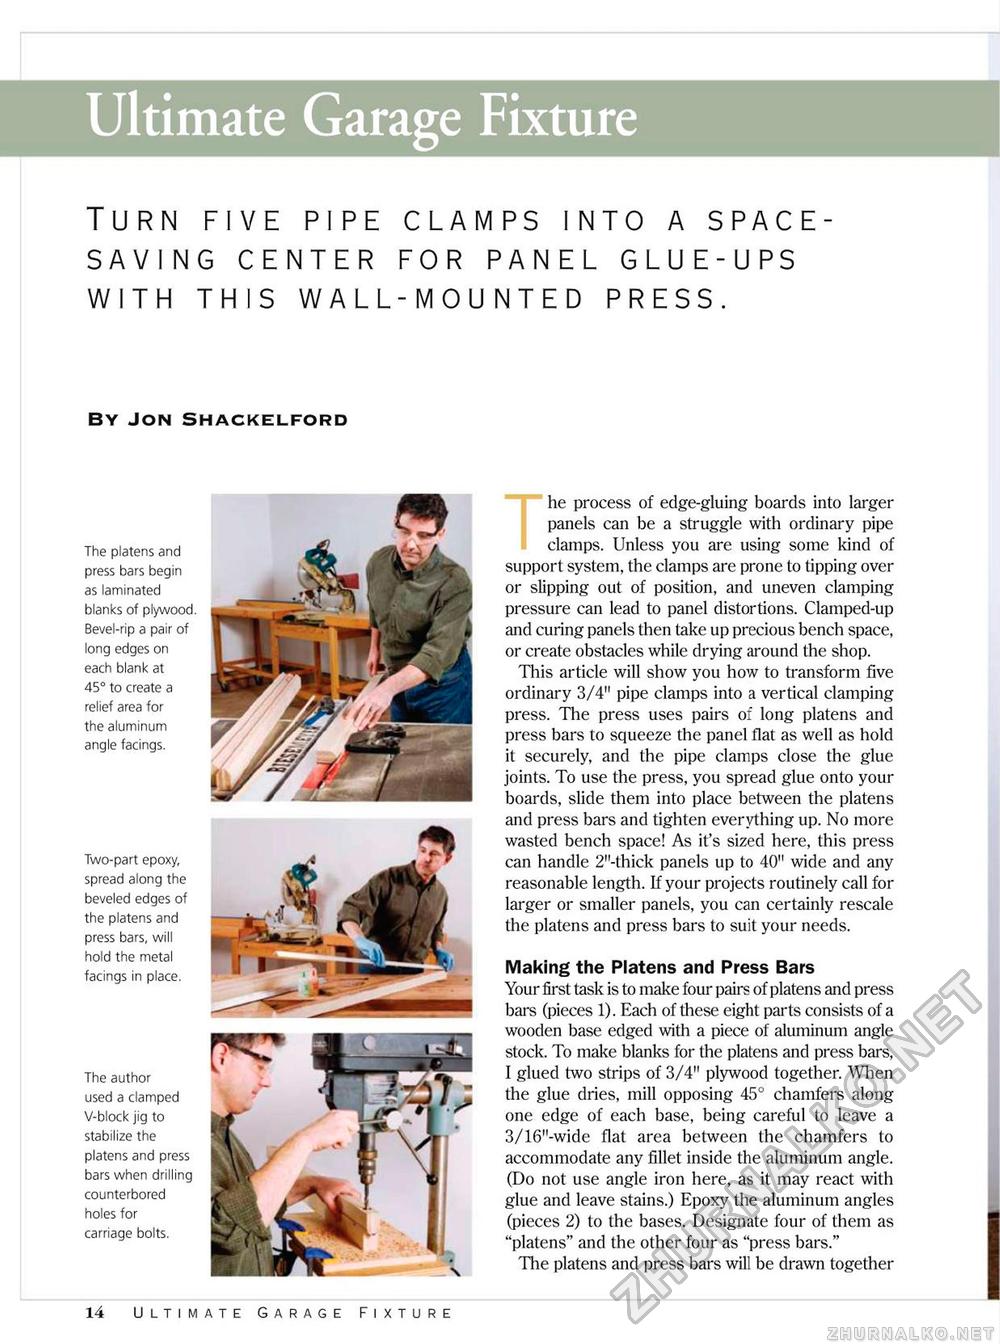
Ultimate Garage Fixture Turn five pipe clamps into a space- saving center for panel glue-ups with this wall-mounted press. By Jon Shackelford The platens and press bars begin as laminated blanks of plywood. Bevel-rip a pair of long edges on each blank at 45° to create a relief area for the aluminum angle facings. Two-part epoxy, spread along the beveled edges of the platens and press bars, will hold the metal facings in place. The author used a clamped V-block jig to stabilize the platens and press bars when drilling counterbored holes for carriage bolts. he process of edge-gluing boards into larger panels can be a struggle with ordinary pipe clamps. Unless you are using some kind of support system, the clamps are prone to tipping over or slipping out of position, and uneven clamping pressure can lead to panel distortions. Clamped-up and curing panels then take up precious bench space, or create obstacles while drying around the shop. This article will show you how to transform five ordinary 3/4" pipe clamps into a vertical clamping press. The press uses pairs of long platens and press bars to squeeze the panel flat as well as hold it securely, and the pipe clamps close the glue joints. To use the press, you spread glue onto your boards, slide them into place between the platens and press bars and tighten everything up. No more wasted bench space! As it's sized here, this press can handle 2"-thick panels up to 40" wide and any reasonable length. If your projects routinely call for larger or smaller panels, you can certainly rescale the platens and press bars to suit your needs. Making the Platens and Press Bars Your first task is to make four pairs of platens and press bars (pieces 1). Each of these eight parts consists of a wooden base edged with a piece of aluminum angle stock. To make blanks for the platens and press bars, I glued two strips of 3/4" plywood together. When the glue dries, mill opposing 45° chamfers along one edge of each base, being careful to leave a 3/16"-wide flat area between the chamfers to accommodate any fillet inside the aluminum angle. (Do not use angle iron here, as it may react with glue and leave stains.) Epoxy the aluminum angles (pieces 2) to the bases. Designate four of them as "platens" and the other four as "press bars." The platens and press bars will be drawn together 14 Ultimate Garage Fixture |


