Woodworker's Journal fall-2010, страница 20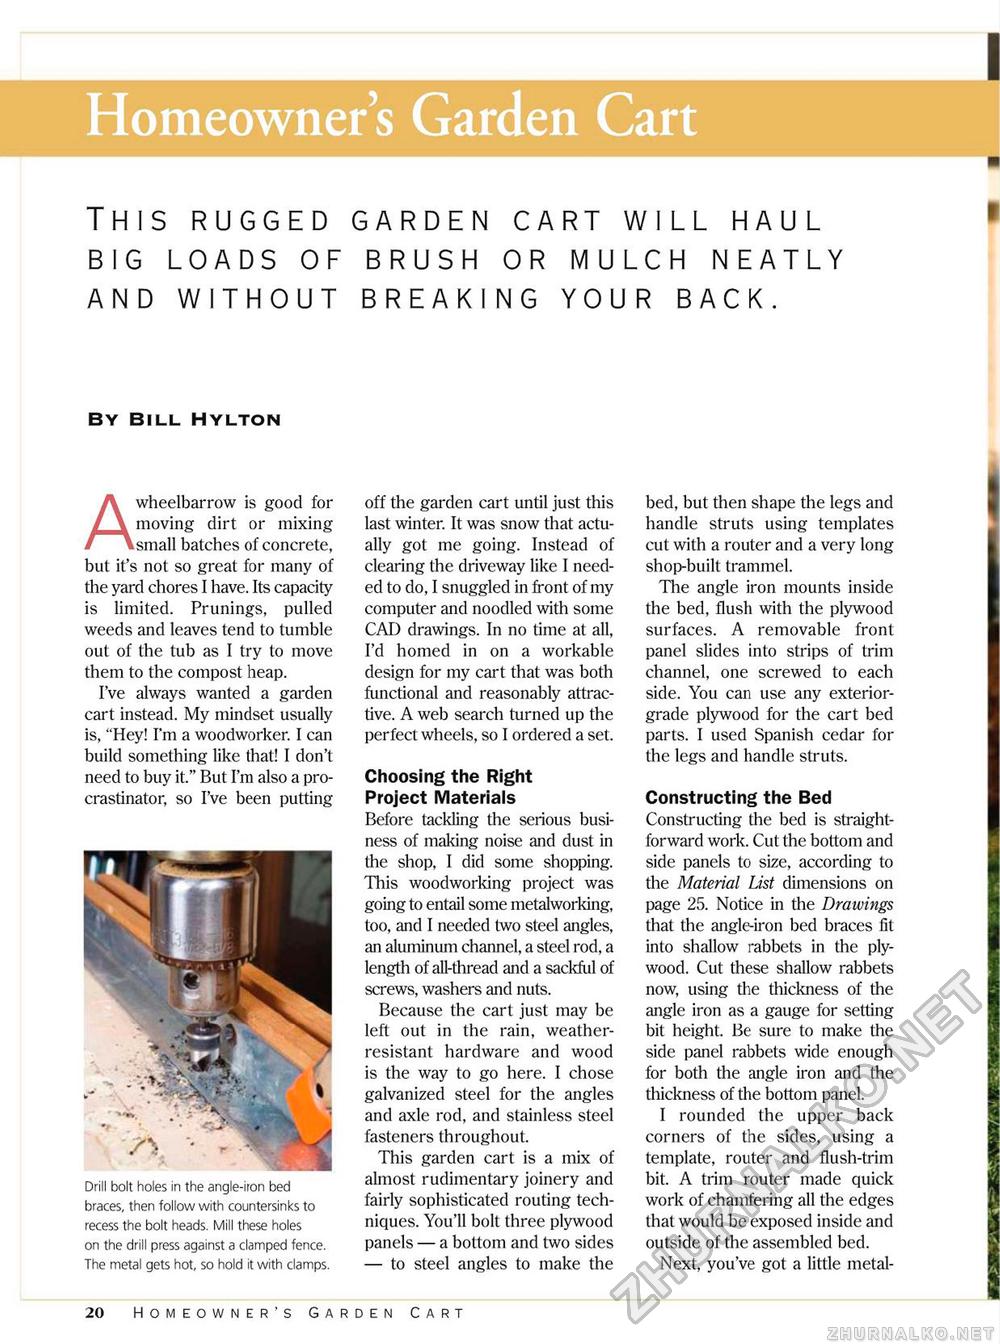
Homeowner s Garden Cart This rugged garden cart will haul big loads of brush or mulch neatly and without breaking your back. BY BILL HYLTON A wheelbarrow is good for moving dirt or mixing small batches of concrete, but it's not so great for many of the yard chores I have. Its capacity is limited. Prunings, pulled weeds and leaves tend to tumble out of the tub as I try to move them to the compost heap. I've always wanted a garden cart instead. My mindset usually is, "Hey! I'm a woodworker. I can build something like that! I don't need to buy it." But I'm also a pro-crastinator, so I've been putting Drill bolt holes in the angle-iron bed braces, then follow with countersinks to recess the bolt heads. Mill these holes on the drill press against a clamped fence. The metal gets hot, so hold it with clamps. off the garden cart until just this last winter. It was snow that actually got me going. Instead of clearing the driveway like I needed to do, I snuggled in front of my computer and noodled with some CAD drawings. In no time at all, I'd homed in on a workable design for my cart that was both functional and reasonably attractive. A web search turned up the perfect wheels, so I ordered a set. Choosing the Right Project Materials Before tackling the serious business of making noise and dust in the shop, I did some shopping. This woodworking project was going to entail some metalworking, too, and I needed two steel angles, an aluminum channel, a steel rod, a length of all-thread and a sackful of screws, washers and nuts. Because the cart just may be left out in the rain, weather-resistant hardware and wood is the way to go here. I chose galvanized steel for the angles and axle rod, and stainless steel fasteners throughout. This garden cart is a mix of almost rudimentary joinery and fairly sophisticated routing techniques. You'll bolt three plywood panels — a bottom and two sides — to steel angles to make the bed, but then shape the legs and handle struts using templates cut with a router and a very long shop-built trammel. The angle iron mounts inside the bed, flush with the plywood surfaces. A removable front panel slides into strips of trim channel, one screwed to each side. You can use any exterior-grade plywood for the cart bed parts. I used Spanish cedar for the legs and handle struts. Constructing the Bed Constructing the bed is straightforward work. Cut the bottom and side panels to size, according to the Material List dimensions on page 25. Notice in the Drawings that the angle-iron bed braces fit into shallow rabbets in the plywood. Cut these shallow rabbets now, using the thickness of the angle iron as a gauge for setting bit height. Be sure to make the side panel rabbets wide enough for both the angle iron and the thickness of the bottom panel. I rounded the upper back corners of the sides, using a template, router and flush-trim bit. A trim router made quick work of chamfering all the edges that would be exposed inside and outside of the assembled bed. Next, you've got a little metal- 20 Homeowner's Garden Cart |


