Woodworker's Journal fall-2010, страница 42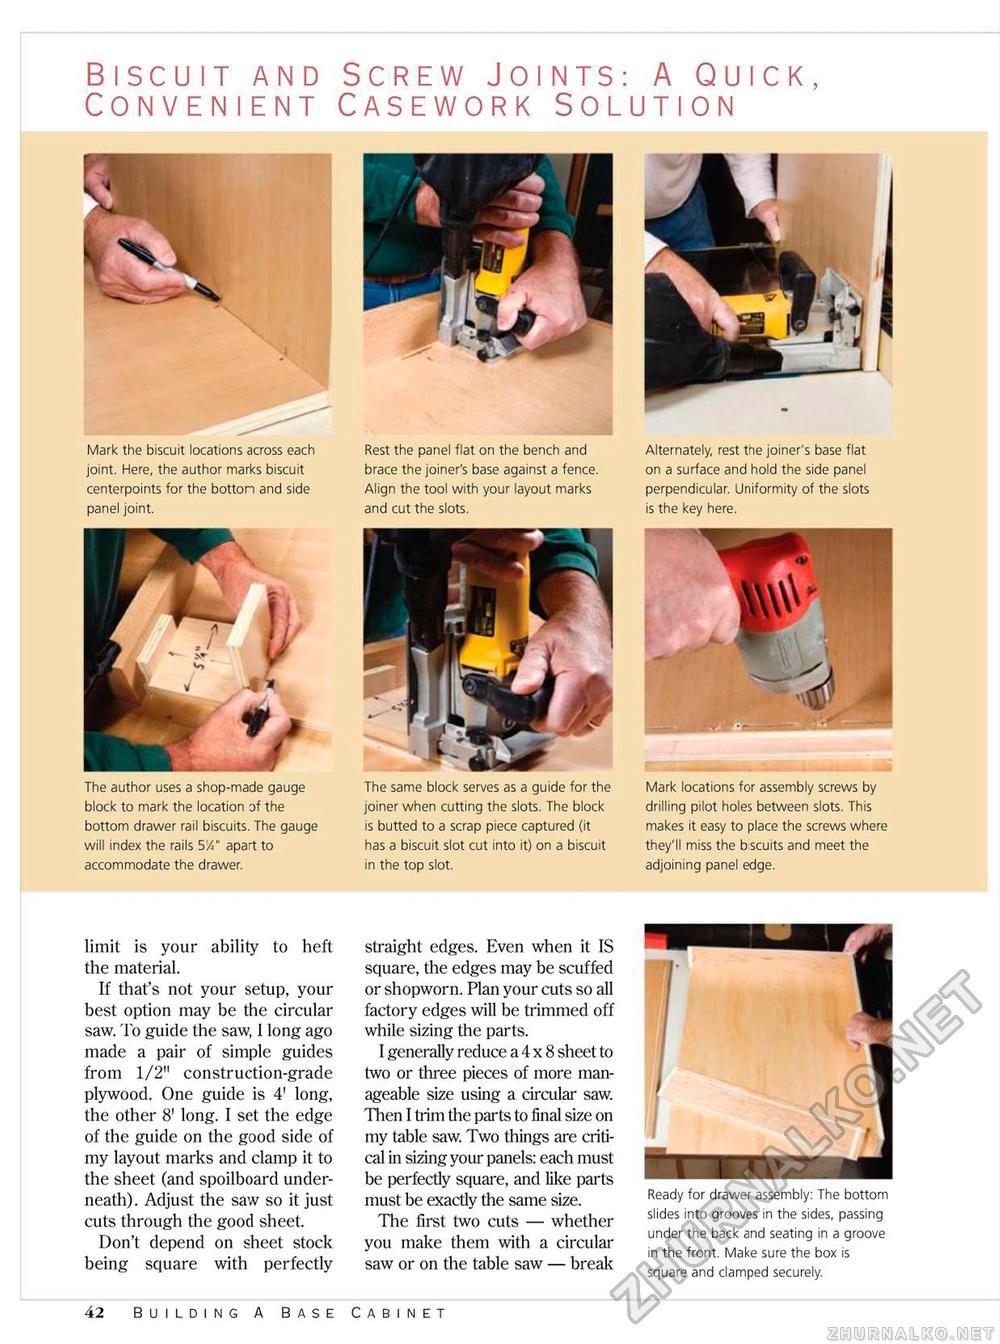
Biscuit and Screw Joints: A Quick, Convenient Casework Solution Rest the panel flat on the bench and brace the joiner's base against a fence. Align the tool with your layout marks and cut the slots. The same block serves as a guide for the joiner when cutting the slots. The block is butted to a scrap piece captured (it has a biscuit slot cut into it) on a biscuit in the top slot. Mark locations for assembly screws by drilling pilot holes between slots. This makes it easy to place the screws where they'll miss the bscuits and meet the adjoining panel edge. Mark the biscuit locations across each joint. Here, the author marks biscuit centerpoints for the botton and side panel joint. The author uses a shop-made gauge block to mark the location of the bottom drawer rail biscuits. The gauge will index the rails S'A" apart to accommodate the drawer. Alternately, rest the joiner's base flat on a surface and hold the side panel perpendicular. Uniformity of the slots is the key here. limit is your ability to heft the material. If that's not your setup, your best option may be the circular saw. To guide the saw, I long ago made a pair of simple guides from 1/2" construction-grade plywood. One guide is 4' long, the other 8' long. I set the edge of the guide on the good side of my layout marks and clamp it to the sheet (and spoilboard underneath). Adjust the saw so it just cuts through the good sheet. Don't depend on sheet stock being square with perfectly straight edges. Even when it IS square, the edges may be scuffed or shopworn. Plan your cuts so all factory edges will be trimmed off while sizing the parts. 1 generally reduce a 4 x 8 sheet to two or three pieces of more manageable size using a circular saw. Then I trim the parts to final size on my table saw. Two things are critical in sizing your panels: each must be perfectly square, and like parts must be exactly the same size. The first two cuts — whether you make them with a circular saw or on the table saw — break Ready for drawer assembly: The bottom slides into grooves in the sides, passing under the back and seating in a groove in the front. Make sure the box is square and clamped securely. 42 Building A Base Cabinet |


