Woodworker's Journal fall-2010, страница 43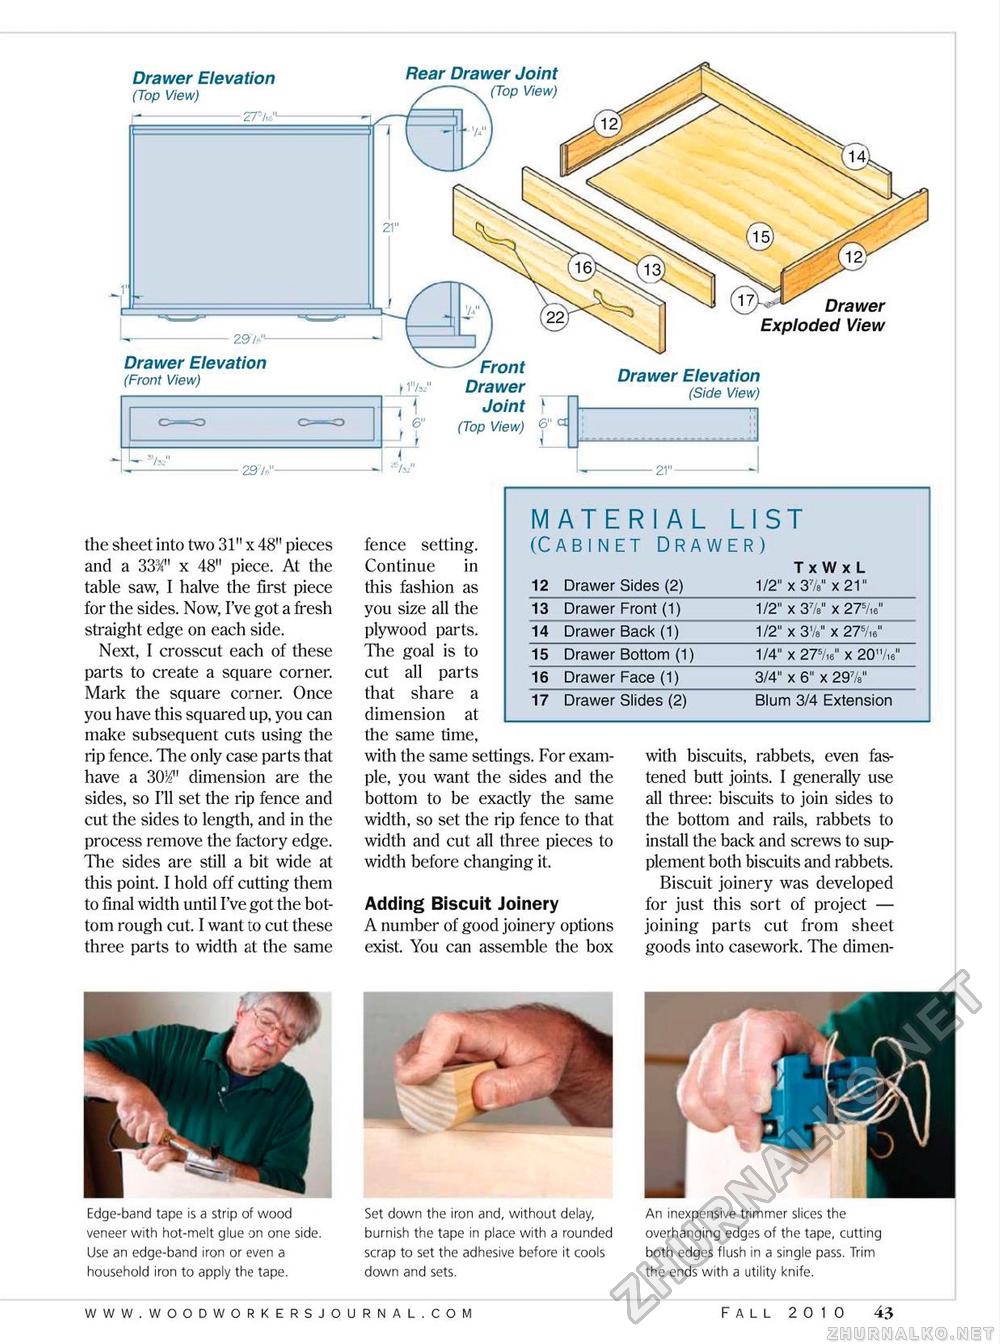
Drawer Elevation (Top View) I--27W Drawer Elevation (Front View) Rear Drawer Joint View) Front Drawer Joint (Top View) Drawer Elevation (Side View) Drawer Exploded View the sheet into two 31" x 48" pieces and a 33%M x 48" piece. At the table saw, I halve the first piece for the sides. Now, I've got a fresh straight edge on each side. Next, I crosscut each of these parts to create a square corner. Mark the square corner. Once you have this squared up, you can make subsequent cuts using the rip fence. The only case parts that have a dimension are the sides, so I'll set the rip fence and cut the sides to length, and in the process remove the factory edge. The sides are still a bit wide at this point. I hold off cutting them to final width until I've got the bottom rough cut. I want to cut these three parts to width at the same fence setting. Continue in this fashion as you size all the plywood parts. The goal is to cut all parts that share a dimension at the same time, with the same settings. For example, you want the sides and the bottom to be exactly the same width, so set the rip fence to that width and cut all three pieces to width before changing it. Adding Biscuit Joinery A number of good joinery options exist. You can assemble the box
with biscuits, rabbets, even fastened butt joints. I generally use all three: biscuits to join sides to the bottom and rails, rabbets to install the back and screws to supplement both biscuits and rabbets. Biscuit joinery was developed for just this sort of project — joining parts cut from sheet goods into casework. The dimen- Edge-band tape is a strip of wood veneer with hot-melt glue on one side. Use an edge-band iron or even a household iron to apply the tape. Set down the iron and, without delay, burnish the tape in place with a rounded scrap to set the adhesive before it cools down and sets. An inexpensive trimmer slices the overhanging edges of the tape, cutting both edges flush in a single pass. Trim the ends with a utility knife. Fall 2010 43 |
||||||||||||||||||


