Woodworker's Journal fall-2010, страница 59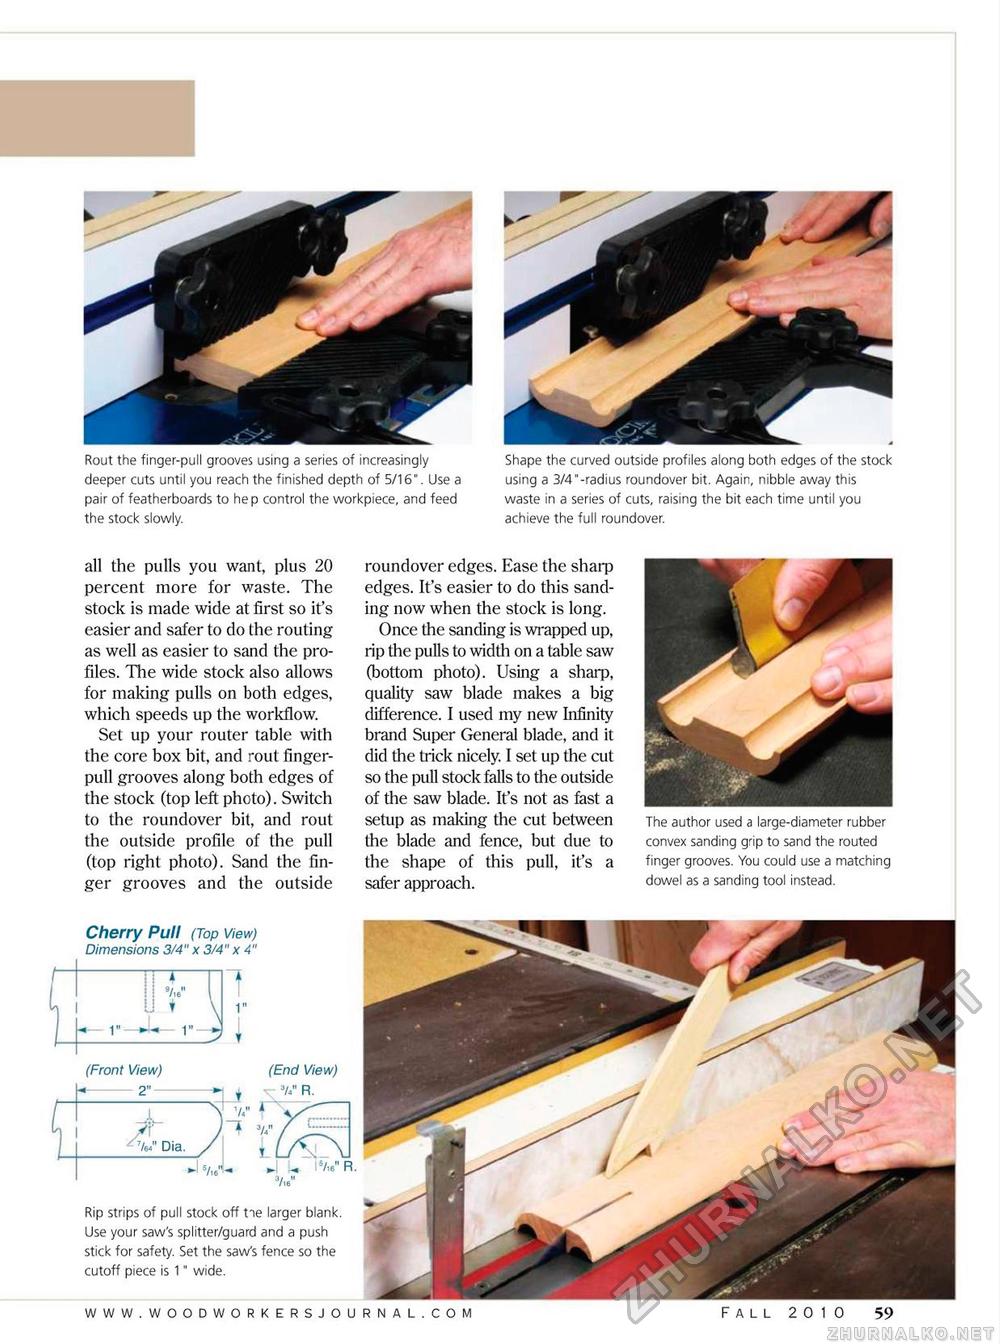
Rout the finger-pull grooves using a series of increasingly deeper cuts until you reach the finished depth of 5/16". Use a pair of featherboards to hep control the workpiece, and feed the stock slowly. Shape the curved outside profiles along both edges of the stock using a 3/4"-radius roundover bit. Again, nibble away this waste in a series of cuts, raising the bit each time until you achieve the full roundover. all the pulls you want, plus 20 percent more for waste. The stock is made wide at first so it's easier and safer to do the routing as well as easier to sand the profiles. The wide stock also allows for making pulls on both edges, which speeds up the workflow. Set up your router table with the core box bit, and rout finger-pull grooves along both edges of the stock (top left photo). Switch to the roundover bit, and rout the outside profile of the pull (top right photo). Sand the finger grooves and the outside roundover edges. Ease the sharp edges. It's easier to do this sanding now when the stock is long. Once the sanding is wrapped up, rip the pulls to width on a table saw (bottom photo). Using a sharp, quality saw blade makes a big difference. I used my new Infinity brand Super General blade, and it did the trick nicely. I set up the cut so the pull stock falls to the outside of the saw blade. It's not as fast a setup as making the cut between the blade and fence, but due to the shape of this pull, it's a safer approach. The author used a large-diameter rubber convex sanding grip to sand the routed finger grooves. You could use a matching dowel as a sanding tool instead. Cherry Pull (Top View) Dimensions 3/4" x 3/4" x 4" -m— i u ▼ (Front View) 1 1" (End View) U" R. Rip strips of pull stock off tie larger blank. Use your saw's splitter/guard and a push stick for safety. Set the saw's fence so the cutoff piece is 1" wide. fall 2010 59 |


