Woodworker's Journal fall-2010, страница 60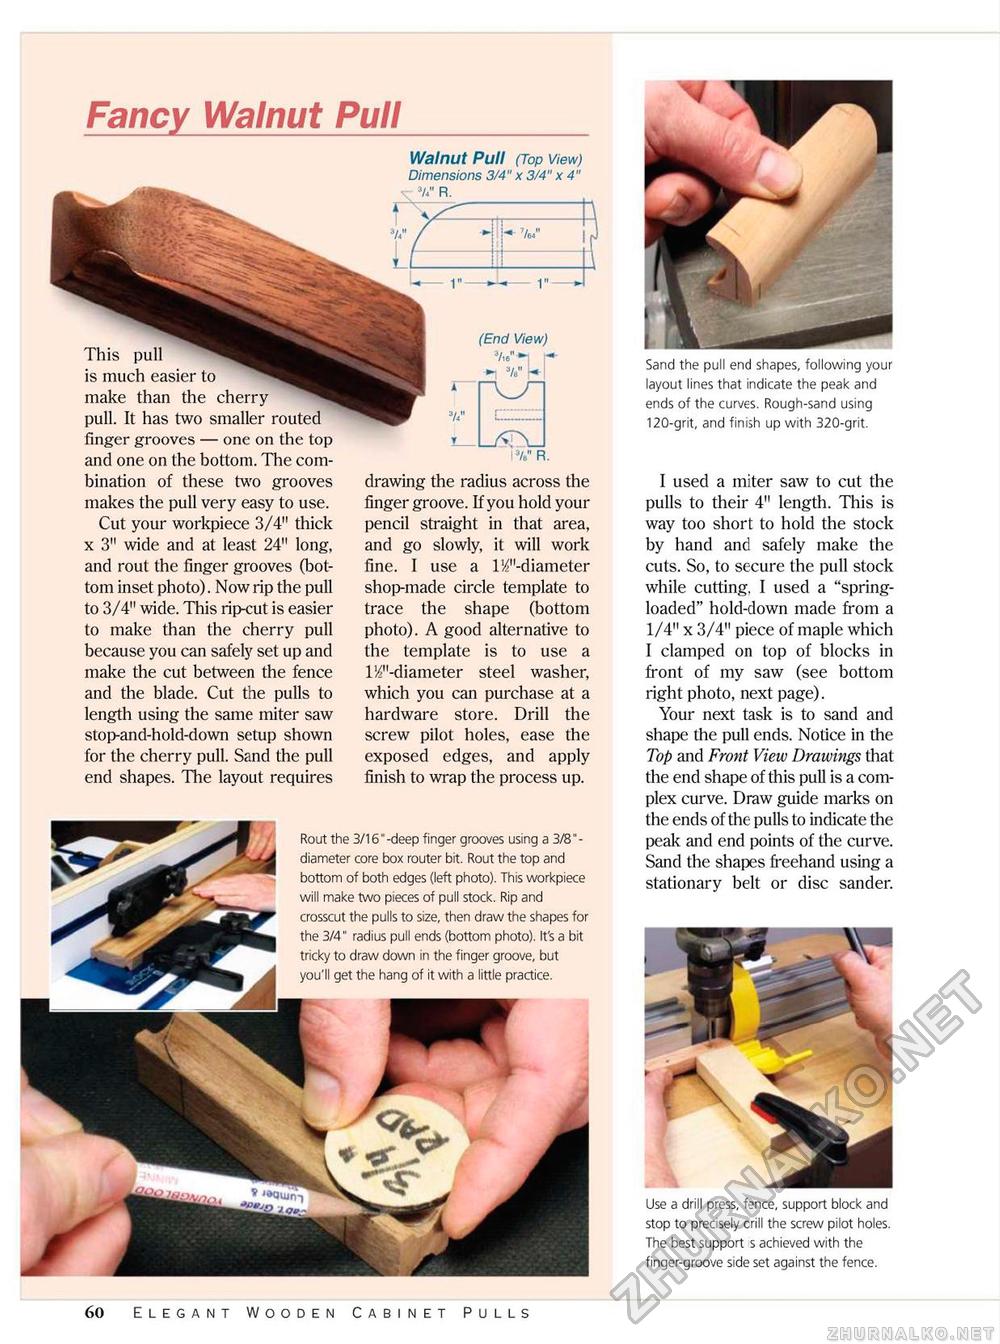
Fancy Walnut Pull Sand the pull end shapes, following your layout lines that indicate the peak and ends of the curves. Rough-sand using 120-grit, and finish up with 320-grit. This pull is much easier to make than the cherry pull. It has two smaller routed finger grooves — one on the top and one on the bottom. The combination of these two grooves makes the pull very easy to use. Cut your workpiece 3/4" thick x 3" wide and at least 24" long, and rout the finger grooves (bottom inset photo). Now rip the pull to 3/4" wide. This rip-cut is easier to make than the cherry pull because you can safely set up and make the cut between the fence and the blade. Cut the pulls to length using the same miter saw stop-and-hold-down setup shown for the cherry pull. Sand the pull end shapes. The layout requires I used a miter saw to cut the pulls to their 4" length. This is way too short to hold the stock by hand and safely make the cuts. So, to secure the pull stock while cutting, I used a "spring-loaded" hold-down made from a 1/4" x 3/4" piece of maple which I clamped on top of blocks in front of my saw (see bottom right photo, next page). Your next task is to sand and shape the pull ends. Notice in the Tbp and Front View Drawings that the end shape of this pull is a complex curve. Draw guide marks on the ends of the pulls to indicate the peak and end points of the curve. Sand the shapes freehand using a stationary belt or disc sander. Walnut Pull (Top View) Dimensions 3/4" x 3/4" x 4" (End View) drawing the radius across the finger groove. If you hold your pencil straight in that area, and go slowly, it will work fine. I use a 1 '/"-diameter shop-made circle template to trace the shape (bottom photo). A good alternative to the template is to use a lJf'-diameter steel washer, which you can purchase at a hardware store. Drill the screw pilot holes, ease the exposed edges, and apply finish to wrap the process up. Rout the 3/16"-deep finger grooves using a 3/8"-diameter core box router bit. Rout the top and bottom of both edges (left photo). This workpiece will make two pieces of pull stock. Rip and crosscut the pulls to size, then draw the shapes for the 3/4" radius pull ends (bottom photo). It's a bit tricky to draw down in the finger groove, but you'll get the hang of it with a little practice. Use a drill press, fence, support block and stop to precisely crill the screw pilot holes. The best support s achieved with the finger-groove side set against the fence. 60 Elegant Wooden Cabinet Pulls |


