Woodworker's Journal fall-2010, страница 61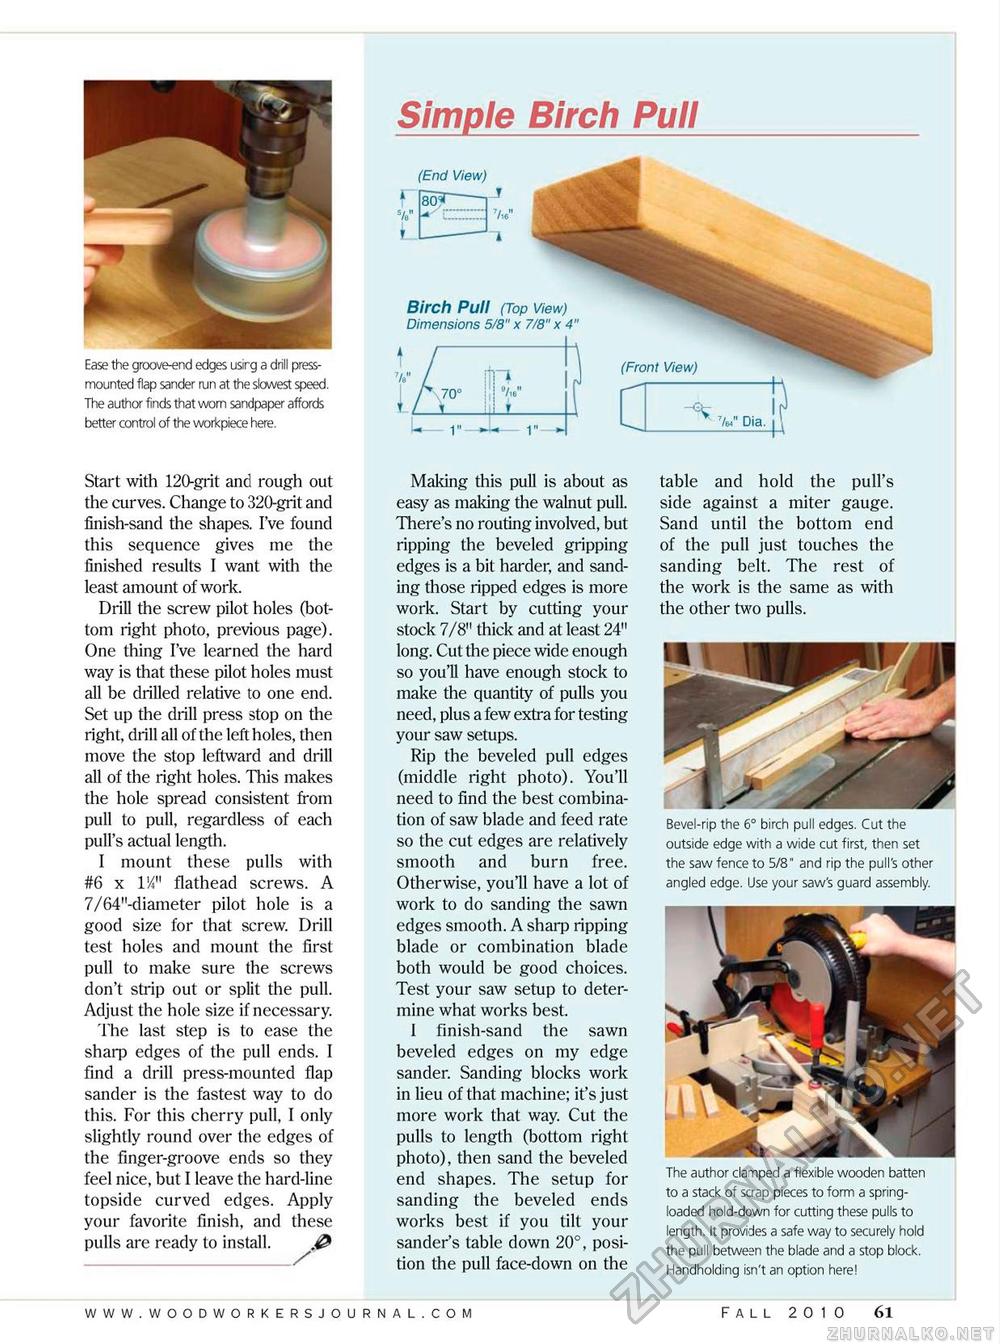
Ease the groove-end edges usirg a drill press-mounted flap sander run at the slowest speed. The author finds that worn sandpaper affords better control of the workpiece here. Simple Birch Pull (End View)
J 7U" I Birch Pull (Top View) Dimensions 5/8" x 7/8" x 4" Birch Pull (Top View) Dimensions 5/8" x 7/8" x 4"
(Front View) > 7/64n Dia. Start with 120-grit and rough out the curves. Change to 320-grit and finish-sand the shapes. I've found this sequence gives me the finished results I want with the least amount of work. Drill the screw pilot holes (bottom right photo, previous page). One thing I've learned the hard way is that these pilot holes must all be drilled relative to one end. Set up the drill press stop on the right, drill all of the left holes, then move the stop leftward and drill all of the right holes. This makes the hole spread consistent from pull to pull, regardless of each pull's actual length. I mount these pulls with #6 x l1/*" flathead screws. A 7/64M-diameter pilot hole is a good size for that screw. Drill test holes and mount the first pull to make sure the screws don't strip out or split the pull. Adjust the hole size if necessary. The last step is to ease the sharp edges of the pull ends. I find a drill press-mounted flap sander is the fastest way to do this. For this cherry pull, I only slightly round over the edges of the finger-groove ends so they feel nice, but I leave the hard-line topside curved edges. Apply your favorite finish, and these pulls are ready to install. Making this pull is about as easy as making the walnut pull. There's no routing involved, but ripping the beveled gripping edges is a bit harder, and sanding those ripped edges is more work. Start by cutting your stock 7/8" thick and at least 24" long. Cut the piece wide enough so you'll have enough stock to make the quantity of pulls you need, plus a few extra for testing your saw setups. Rip the beveled pull edges (middle right photo). You'll need to find the best combination of saw blade and feed rate so the cut edges are relatively smooth and burn free. Otherwise, you'll have a lot of work to do sanding the sawn edges smooth. A sharp ripping blade or combination blade both would be good choices. Test your saw setup to determine what works best. 1 finish-sand the sawn beveled edges on my edge sander. Sanding blocks work in lieu of that machine; it's just more work that way. Cut the pulls to length (bottom right photo), then sand the beveled end shapes. The setup for sanding the beveled ends works best if you tilt your sander's table down 20°, position the pull face-down on the table and hold the pull's side against a miter gauge. Sand until the bottom end of the pull just touches the sanding belt. The rest of the work is the same as with the other two pulls. Bevel-rip the 6° birch pull edges. Cut the outside edge with a wide cut first, then set the saw fence to 5/8" and rip the pull's other angled edge. Use your saw's guard assembly. The author clamped a flexible wooden batten to a stack of scrap pieces to form a spring-loaded hold-down for cutting these pulls to length. It provides a safe way to securely hold the pull between the blade and a stop block. Handholding isn't an option here! Fall 2010 61 |
||||||||||||


