Woodworker's Journal winter-2009, страница 60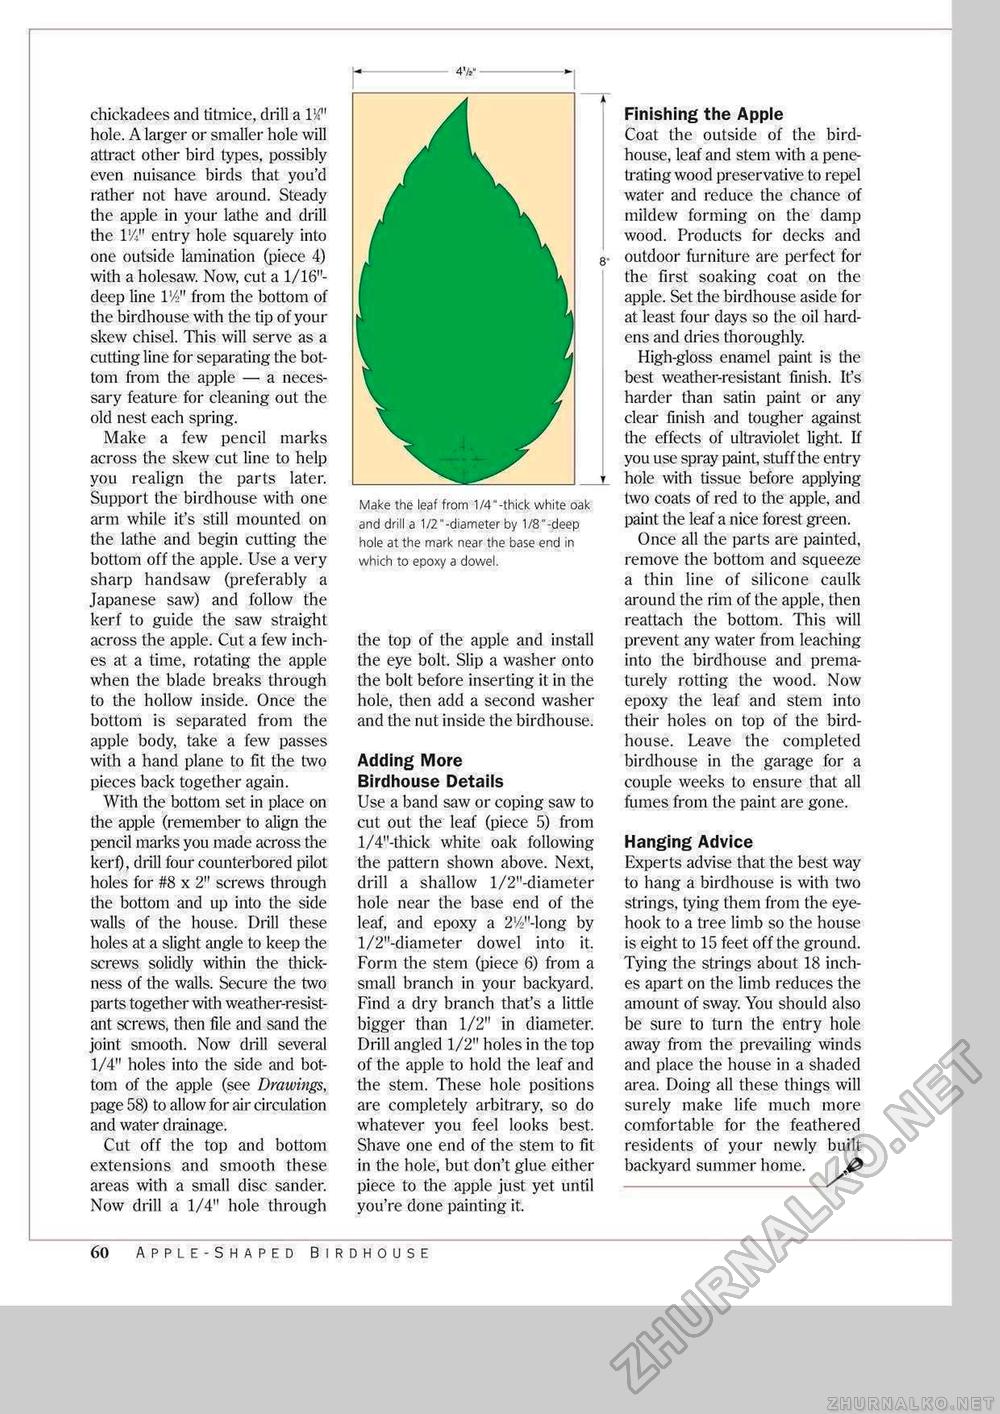
chickadees and titmice, drill a W hole. A larger or smaller hole will attract other bird types, possibly even nuisance birds that you'd rather not have around. Steady the apple in your lathe and drill the l'/i" entry hole squarely into one outside lamination (piece 4) with a holesaw. Now, cut a 1/16"-deep line l'/!>" from the bottom of die birdhouse with the tip of your skew chisel. This will serve as a cutting line for separating the bottom from the apple — a necessary feature for cleaning out the old nest each spring. Make a few pencil marks across the skew cut line to help you realign the parts later. Support the birdhouse with one arm while it's still mounted on the lathe and begin cutting the bottom off the apple. Use a very sharp handsaw (preferably a Japanese saw) and follow the kerf to guide the saw straight across the apple. Cut a few inches at a time, rotating the apple when the blade breaks through to the hollow inside. Once the bottom is separated from the apple body, take a few passes with a hand plane to fit the two pieces back together again. With the bottom set in place on the apple (remember to align the pencil marks you made across the kerf), drill four counterbored pilot holes for #8 x 2" screws through the bottom and up into the side walls of the house. Drill these holes at a slight angle to keep the screws solidly within the thickness of the walls. Secure the two parts together with weather-resistant screws, then file and sand the joint smooth. Now drill several 1/4" holes into the side and bottom of the apple (see Drawings, page 58) to allow for air circulation and water drainage. Cut off the top and bottom extensions and smooth these areas with a small disc sander. Now drill a 1/4" hole through Make the leaf from 1/4"-thick white oak and drill a 1/2"-diameter by 1/8"-deep hole at the mark near the base end in which to epoxy a dowel. the top of the apple and install the eye bolt. Slip a washer onto the bolt before inserting it in the hole, then add a second washer and the nut inside the birdhouse. Adding More Birdhouse Details Use a band saw or coping saw to cut out the leaf (piece 5) from l/4"-thick white oak following the pattern shown above. Next, drill a shallow l/2"-diameter hole near the base end of the leaf, and epoxy a 2V2"-long by l/2"-diameter dowel into it. Form the stem (piece 6) from a small branch in your backyard. Find a dry branch that's a little bigger than 1/2" in diameter. Drill angled 1/2" holes in the top of the apple to hold the leaf and the stem. These hole positions are completely arbitrary, so do whatever you feel looks best. Shave one end of the stem to fit in the hole, but don't glue either piece to the apple just yet until you're done painting it. Finishing the Apple Coat the outside of the bird-house, leaf and stem with a penetrating wood preservative to repel water and reduce the chance of mildew forming on the damp wood. Products for decks and outdoor furniture are perfect for the first soaking coat on the apple. Set the birdhouse aside for at least four days so the oil hardens and dries thoroughly. High-gloss enamel paint is the best weather-resistant finish. It's harder than satin paint or any clear finish and tougher against die effects of ultraviolet light. If you use spray paint, stuff the entry hole with tissue before applying two coats of red to the apple, and paint the leaf a nice forest green. Once all the parts are painted, remove the bottom and squeeze a thin line of silicone caulk around the rim of the apple, then reattach the bottom. This will prevent any water from leaching into the birdhouse and prematurely rotting the wood. Now epoxy the leaf and stem into their holes on top of the bird-house. Leave the completed birdhouse in the garage for a couple weeks to ensure that all fumes from the paint are gone. Hanging Advice Experts advise that the best way to hang a birdhouse is with two strings, tying them from the eyehook to a tree limb so the house is eight to 15 feet off the ground. Tying the strings about 18 inches apart on the limb reduces the amount of sway. You should also be sure to turn the entry hole away from the prevailing winds and place the house in a shaded area. Doing all these things will surely make life much more comfortable for the feathered residents of your newly built backyard summer home. & 60 Apple-Shaped Birdhouse |


