Woodworker's Journal winter-2010, страница 19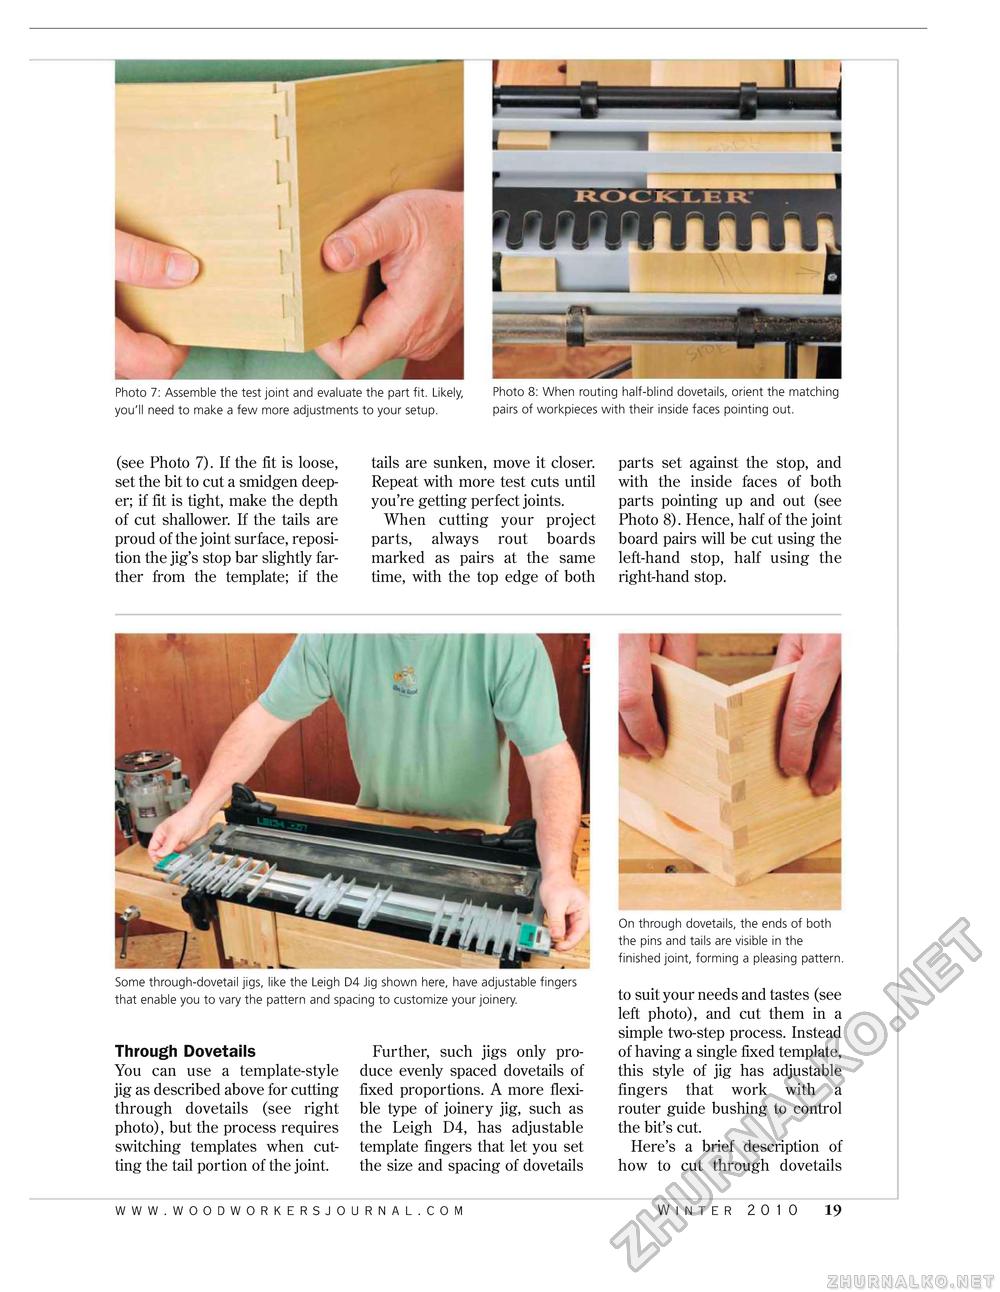
(see Photo 7). If the fit is loose, set the bit to cut a smidgen deeper; if fit is tight, make the depth of cut shallower. If the tails are proud of the joint surface, reposition the jig's stop bar slightly farther from the template; if the tails are sunken, move it closer. Repeat with more test cuts until you're getting perfect joints. When cutting your project parts, always rout boards marked as pairs at the same time, with the top edge of both parts set against the stop, and with the inside faces of both parts pointing up and out (see Photo 8). Hence, half of the joint board pairs will be cut using the left-hand stop, half using the right-hand stop. Photo 7: Assemble the test joint and evaluate the part fit. Likely, you'll need to make a few more adjustments to your setup. Photo 8: When routing half-blind dovetails, orient the matching pairs of workpieces with their inside faces pointing out. Some through-dovetail jigs, like the Leigh D4 Jig shown here, have adjustable fingers that enable you to vary the pattern and spacing to customize your joinery. Through Dovetails You can use a template-style jig as described above for cutting through dovetails (see right photo), but the process requires switching templates when cutting the tail portion of the joint. Further, such jigs only produce evenly spaced dovetails of fixed proportions. A more flexible type of joinery jig, such as the Leigh D4, has adjustable template fingers that let you set the size and spacing of dovetails On through dovetails, the ends of both the pins and tails are visible in the finished joint, forming a pleasing pattern. to suit your needs and tastes (see left photo), and cut them in a simple two-step process. Instead of having a single fixed template, this style of jig has adjustable fingers that work with a router guide bushing to control the bit's cut. Here's a brief description of how to cut through dovetails winter 2010 19 |


