Woodworker's Journal winter-2010, страница 20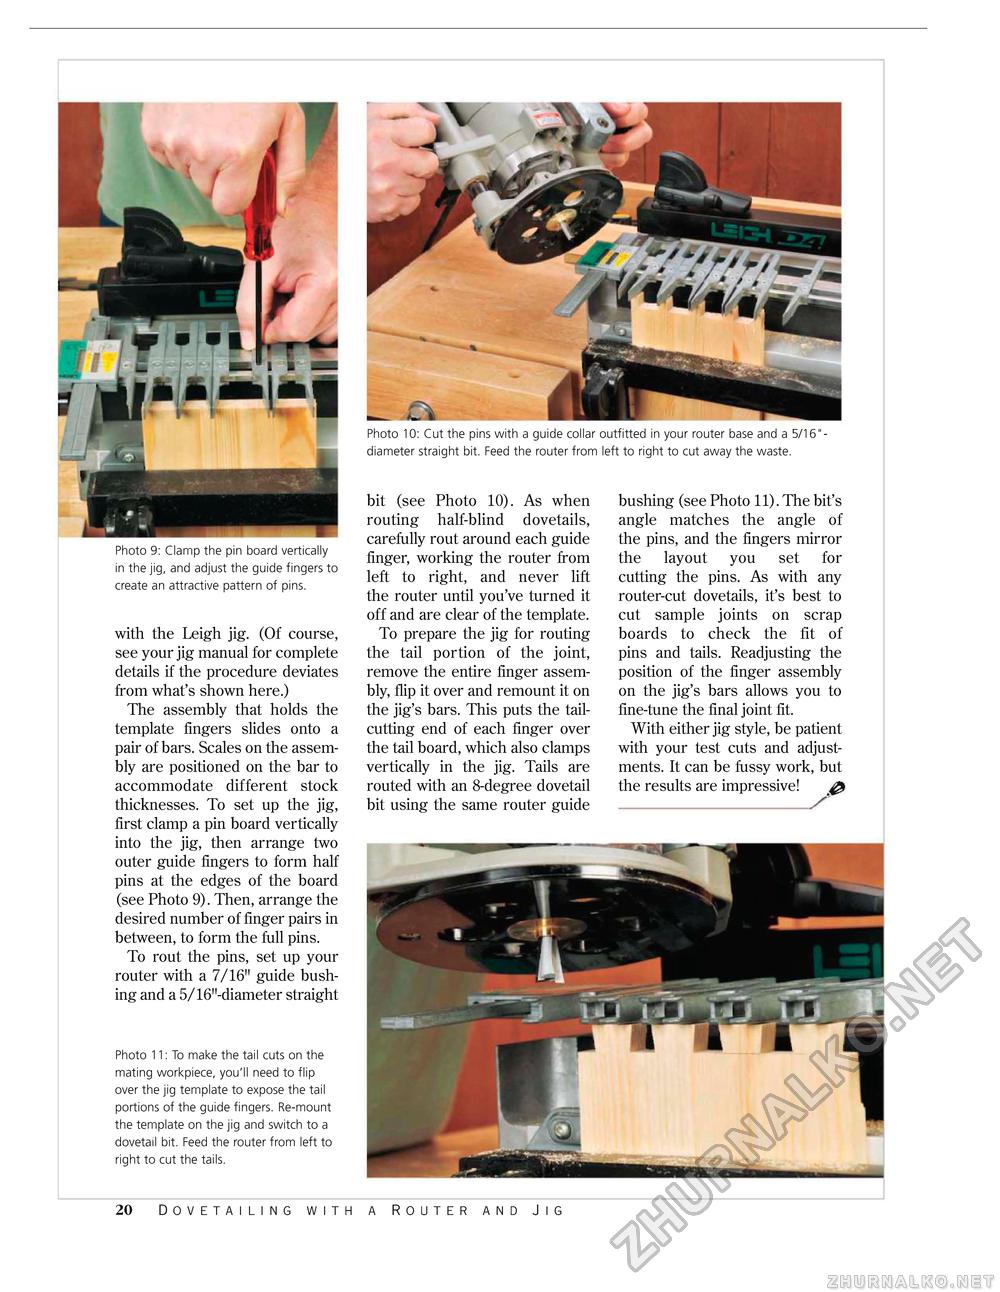
Photo 9: Clamp the pin board vertically in the jig, and adjust the guide fingers to create an attractive pattern of pins. with the Leigh jig. (Of course, see your jig manual for complete details if the procedure deviates from what's shown here.) The assembly that holds the template fingers slides onto a pair of bars. Scales on the assembly are positioned on the bar to accommodate different stock thicknesses. To set up the jig, first clamp a pin board vertically into the jig, then arrange two outer guide fingers to form half pins at the edges of the board (see Photo 9). Then, arrange the desired number of finger pairs in between, to form the full pins. To rout the pins, set up your router with a 7/16" guide bushing and a 5/16"-diameter straight Photo 11: To make the tail cuts on the mating workpiece, you'll need to flip over the jig template to expose the tail portions of the guide fingers. Re-mount the template on the jig and switch to a dovetail bit. Feed the router from left to right to cut the tails. Photo 10: Cut the pins with a guide collar outfitted in your router base and a 5/16"-diameter straight bit. Feed the router from left to right to cut away the waste. bushing (see Photo 11). The bit's angle matches the angle of the pins, and the fingers mirror the layout you set for cutting the pins. As with any router-cut dovetails, it's best to cut sample joints on scrap boards to check the fit of pins and tails. Readjusting the position of the finger assembly on the jig's bars allows you to fine-tune the final joint fit. With either jig style, be patient with your test cuts and adjustments. It can be fussy work, but the results are impressive! & bit (see Photo 10). As when routing half-blind dovetails, carefully rout around each guide finger, working the router from left to right, and never lift the router until you've turned it off and are clear of the template. To prepare the jig for routing the tail portion of the joint, remove the entire finger assembly, flip it over and remount it on the jig's bars. This puts the tail-cutting end of each finger over the tail board, which also clamps vertically in the jig. Tails are routed with an 8-degree dovetail bit using the same router guide 20 Dovetailing with a Router and Jig |


