Woodworker's Journal winter-2010, страница 17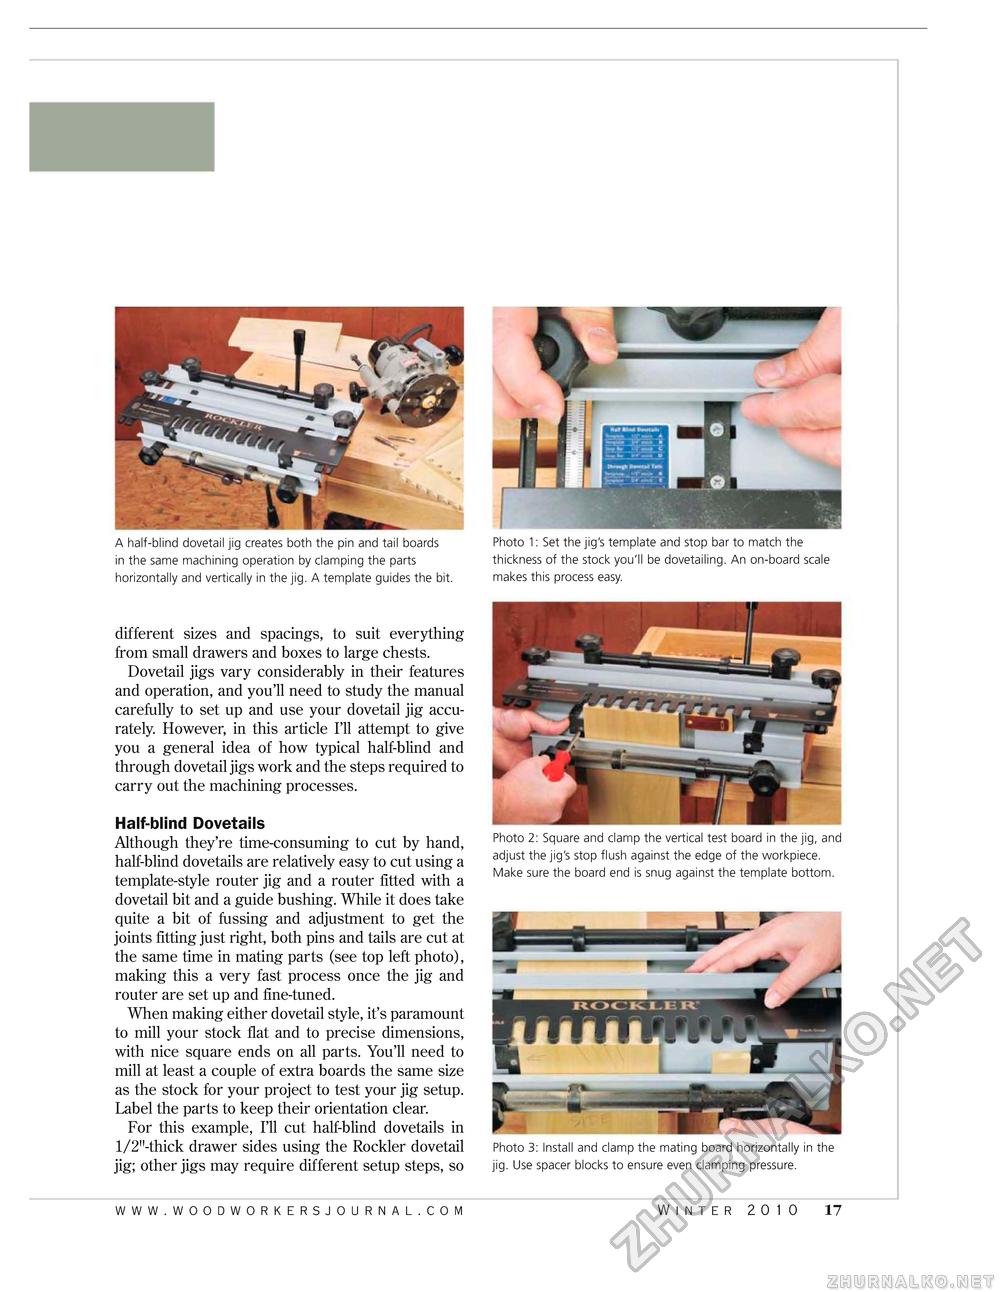
Photo 1: Set the jig's template and stop bar to match the thickness of the stock you'll be dovetailing. An on-board scale makes this process easy. A half-blind dovetail jig creates both the pin and tail boards in the same machining operation by clamping the parts horizontally and vertically in the jig. A template guides the bit. different sizes and spacings, to suit everything from small drawers and boxes to large chests. Dovetail jigs vary considerably in their features and operation, and you'll need to study the manual carefully to set up and use your dovetail jig accurately. However, in this article I'll attempt to give you a general idea of how typical half-blind and through dovetail jigs work and the steps required to carry out the machining processes. Half-blind Dovetails Although they're time-consuming to cut by hand, half-blind dovetails are relatively easy to cut using a template-style router jig and a router fitted with a dovetail bit and a guide bushing. While it does take quite a bit of fussing and adjustment to get the joints fitting just right, both pins and tails are cut at the same time in mating parts (see top left photo), making this a very fast process once the jig and router are set up and fine-tuned. When making either dovetail style, it's paramount to mill your stock flat and to precise dimensions, with nice square ends on all parts. You'll need to mill at least a couple of extra boards the same size as the stock for your project to test your jig setup. Label the parts to keep their orientation clear. For this example, I'll cut half-blind dovetails in l/2M-thick drawer sides using the Rockier dovetail jig; other jigs may require different setup steps, so Photo 2: Square and clamp the vertical test board in the jig, and adjust the jig's stop flush against the edge of the workpiece. Make sure the board end is snug against the template bottom. Photo 3: Install and clamp the mating board horizontally in the jig. Use spacer blocks to ensure even clamping pressure. winter 2010 17 |


