Woodworker's Journal winter-2010, страница 63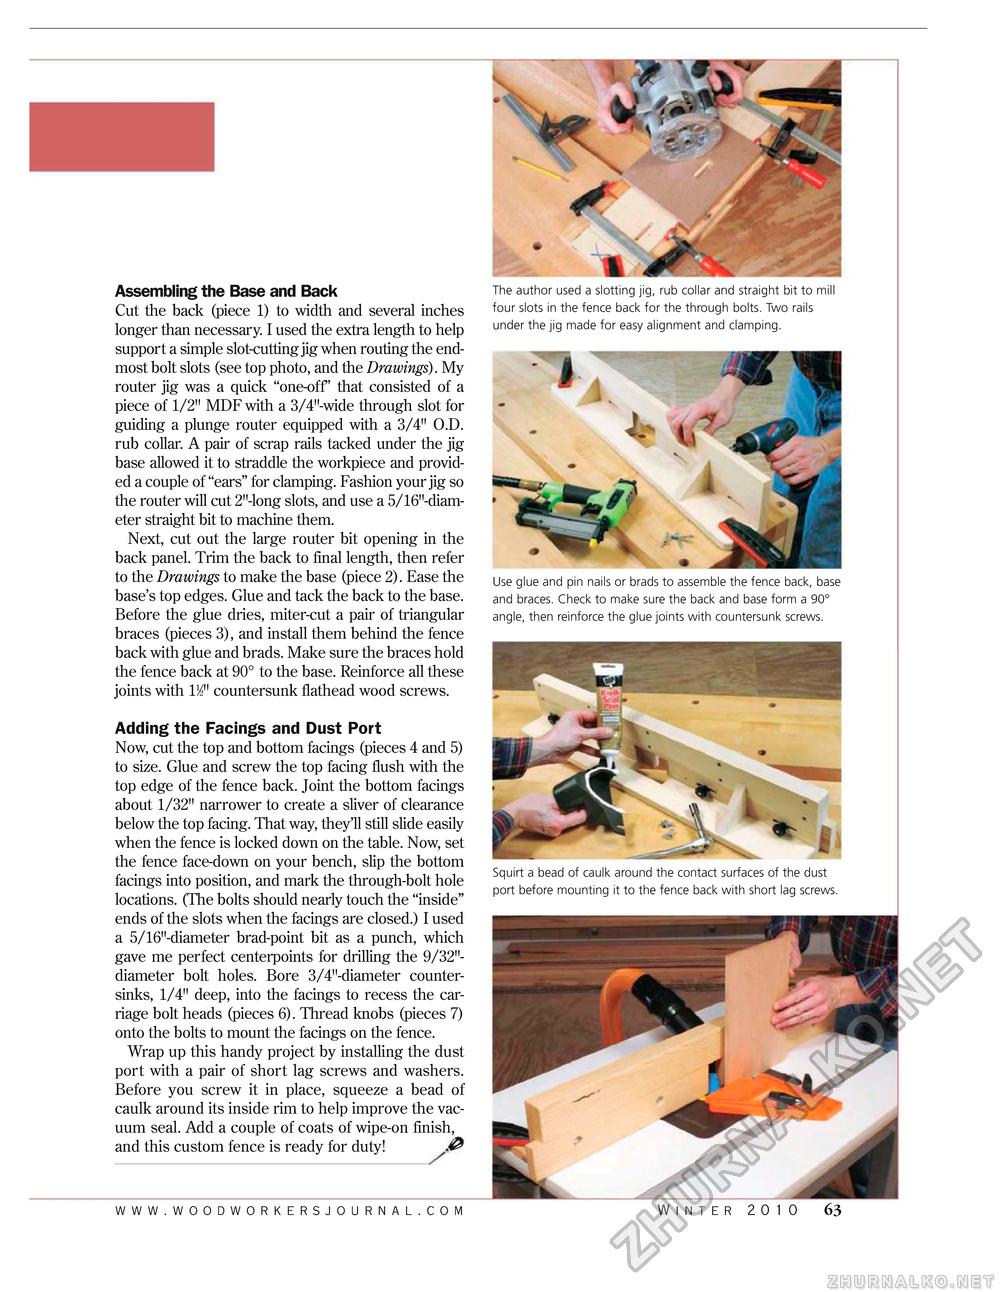
Assembling the Base and Back Cut the back (piece 1) to width and several inches longer than necessary. I used the extra length to help support a simple slot-cutting jig when routing the end-most bolt slots (see top photo, and the Drawings). My router jig was a quick "one-off' that consisted of a piece of 1/2" MDF with a 3/4M-wide through slot for guiding a plunge router equipped with a 3/4" O.D. rub collar. A pair of scrap rails tacked under the jig base allowed it to straddle the workpiece and provided a couple of "ears" for clamping. Fashion your jig so the router will cut 2M-long slots, and use a 5/16M-diam-eter straight bit to machine them. Next, cut out the large router bit opening in the back panel. Trim the back to final length, then refer to the Drawings to make the base (piece 2). Ease the base's top edges. Glue and tack the back to the base. Before the glue dries, miter-cut a pair of triangular braces (pieces 3), and install them behind the fence back with glue and brads. Make sure the braces hold the fence back at 90° to the base. Reinforce all these joints with VS] countersunk flathead wood screws. Adding the Facings and Dust Port Now, cut the top and bottom facings (pieces 4 and 5) to size. Glue and screw the top facing flush with the top edge of the fence back. Joint the bottom facings about 1/32" narrower to create a sliver of clearance below the top facing. That way, they'll still slide easily when the fence is locked down on the table. Now, set the fence face-down on your bench, slip the bottom facings into position, and mark the through-bolt hole locations. (The bolts should nearly touch the "inside" ends of the slots when the facings are closed.) I used a 5/16M-diameter brad-point bit as a punch, which gave me perfect centerpoints for drilling the 9/32"-diameter bolt holes. Bore 3/4M-diameter countersinks, 1/4" deep, into the facings to recess the carriage bolt heads (pieces 6). Thread knobs (pieces 7) onto the bolts to mount the facings on the fence. Wrap up this handy project by installing the dust port with a pair of short lag screws and washers. Before you screw it in place, squeeze a bead of caulk around its inside rim to help improve the vacuum seal. Add a couple of coats of wipe-on finish, and this custom fence is ready for duty! p The author used a slotting jig, rub collar and straight bit to mill four slots in the fence back for the through bolts. Two rails under the jig made for easy alignment and clamping. Use glue and pin nails or brads to assemble the fence back, base and braces. Check to make sure the back and base form a 90° angle, then reinforce the glue joints with countersunk screws. Squirt a bead of caulk around the contact surfaces of the dust port before mounting it to the fence back with short lag screws. winter 2010 63 |


