Woodworker's Journal winter-2010, страница 64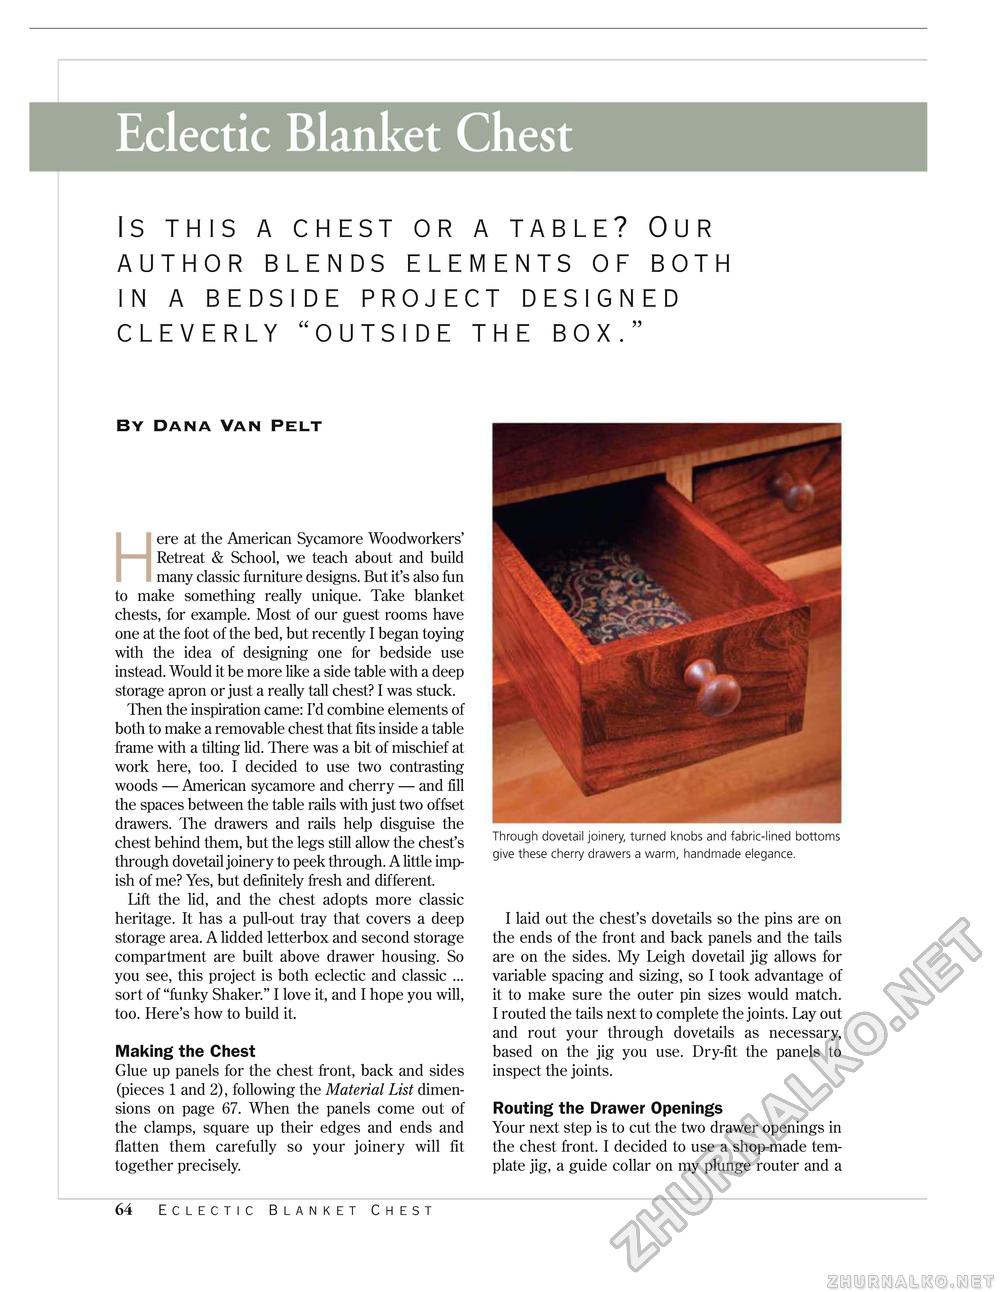
Eclectic Blanket Chest is this a chest or a table? our author blends elements of both in a bedside project designed cleverly "outside the box." By Dana Van Pelt Here at the American Sycamore Woodworkers' Retreat & School, we teach about and build many classic furniture designs. But it's also fun to make something really unique. Take blanket chests, for example. Most of our guest rooms have one at the foot of the bed, but recently I began toying with the idea of designing one for bedside use instead. Would it be more like a side table with a deep storage apron or just a really tall chest? I was stuck. Then the inspiration came: I'd combine elements of both to make a removable chest that fits inside a table frame with a tilting lid. There was a bit of mischief at work here, too. I decided to use two contrasting woods — American sycamore and cherry — and fill the spaces between the table rails with just two offset drawers. The drawers and rails help disguise the chest behind them, but the legs still allow the chest's through dovetail joinery to peek through. A little impish of me? Yes, but definitely fresh and different. Lift the lid, and the chest adopts more classic heritage. It has a pull-out tray that covers a deep storage area. A lidded letterbox and second storage compartment are built above drawer housing. So you see, this project is both eclectic and classic ... sort of "funky Shaker." I love it, and I hope you will, too. Here's how to build it. Making the Chest Glue up panels for the chest front, back and sides (pieces 1 and 2), following the Material List dimensions on page 67. When the panels come out of the clamps, square up their edges and ends and flatten them carefully so your joinery will fit together precisely. Through dovetail joinery, turned knobs and fabric-lined bottoms give these cherry drawers a warm, handmade elegance. I laid out the chest's dovetails so the pins are on the ends of the front and back panels and the tails are on the sides. My Leigh dovetail jig allows for variable spacing and sizing, so I took advantage of it to make sure the outer pin sizes would match. I routed the tails next to complete the joints. Lay out and rout your through dovetails as necessary, based on the jig you use. Dry-fit the panels to inspect the joints. Routing the Drawer Openings Your next step is to cut the two drawer openings in the chest front. I decided to use a shop-made template jig, a guide collar on my plunge router and a 64 Eclectic Blanket Chest |


