Woodworker's Journal winter-2010, страница 66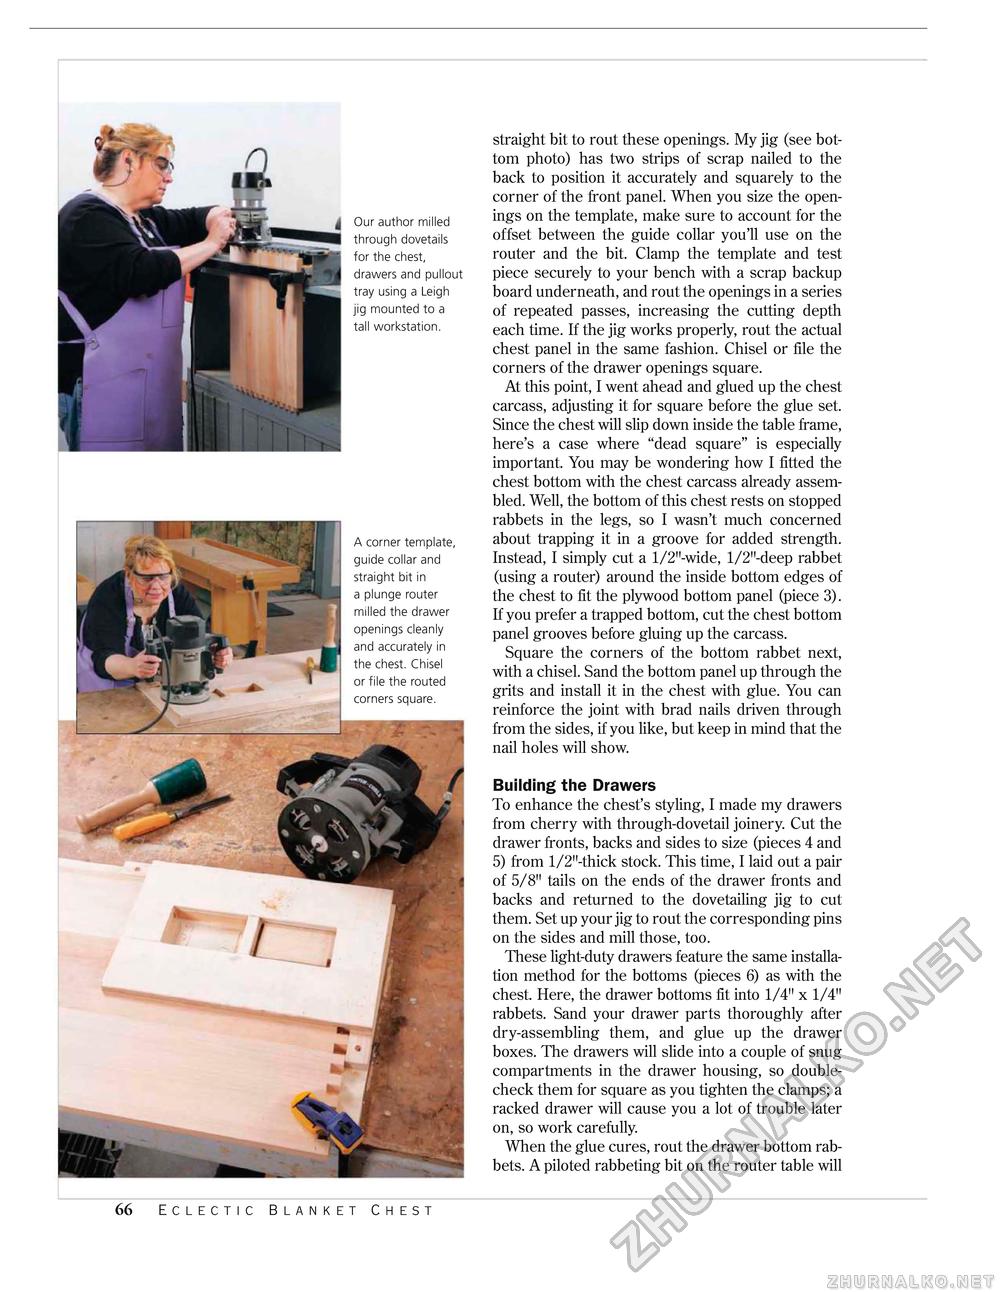
Our author milled through dovetails for the chest, drawers and pullout tray using a Leigh jig mounted to a tall workstation. straight bit to rout these openings. My jig (see bottom photo) has two strips of scrap nailed to the back to position it accurately and squarely to the corner of the front panel. When you size the openings on the template, make sure to account for the offset between the guide collar you'll use on the router and the bit. Clamp the template and test piece securely to your bench with a scrap backup board underneath, and rout the openings in a series of repeated passes, increasing the cutting depth each time. If the jig works properly, rout the actual chest panel in the same fashion. Chisel or file the corners of the drawer openings square. At this point, I went ahead and glued up the chest carcass, adjusting it for square before the glue set. Since the chest will slip down inside the table frame, here's a case where "dead square" is especially important. You may be wondering how I fitted the chest bottom with the chest carcass already assembled. Well, the bottom of this chest rests on stopped rabbets in the legs, so I wasn't much concerned about trapping it in a groove for added strength. Instead, I simply cut a l/2M-wide, l/2M-deep rabbet (using a router) around the inside bottom edges of the chest to fit the plywood bottom panel (piece 3). If you prefer a trapped bottom, cut the chest bottom panel grooves before gluing up the carcass. Square the corners of the bottom rabbet next, with a chisel. Sand the bottom panel up through the grits and install it in the chest with glue. You can reinforce the joint with brad nails driven through from the sides, if you like, but keep in mind that the nail holes will show. Building the Drawers To enhance the chest's styling, I made my drawers from cherry with through-dovetail joinery. Cut the drawer fronts, backs and sides to size (pieces 4 and 5) from l/2M-thick stock. This time, I laid out a pair of 5/8" tails on the ends of the drawer fronts and backs and returned to the dovetailing jig to cut them. Set up your jig to rout the corresponding pins on the sides and mill those, too. These light-duty drawers feature the same installation method for the bottoms (pieces 6) as with the chest. Here, the drawer bottoms fit into 1/4" x 1/4" rabbets. Sand your drawer parts thoroughly after dry-assembling them, and glue up the drawer boxes. The drawers will slide into a couple of snug compartments in the drawer housing, so double-check them for square as you tighten the clamps; a racked drawer will cause you a lot of trouble later on, so work carefully. When the glue cures, rout the drawer bottom rabbets. A piloted rabbeting bit on the router table will A corner template, guide collar and straight bit in a plunge router milled the drawer openings cleanly and accurately in the chest. Chisel or file the routed corners square. 66 Eclectic Blanket Chest |


