Woodworker's Journal winter-2010, страница 69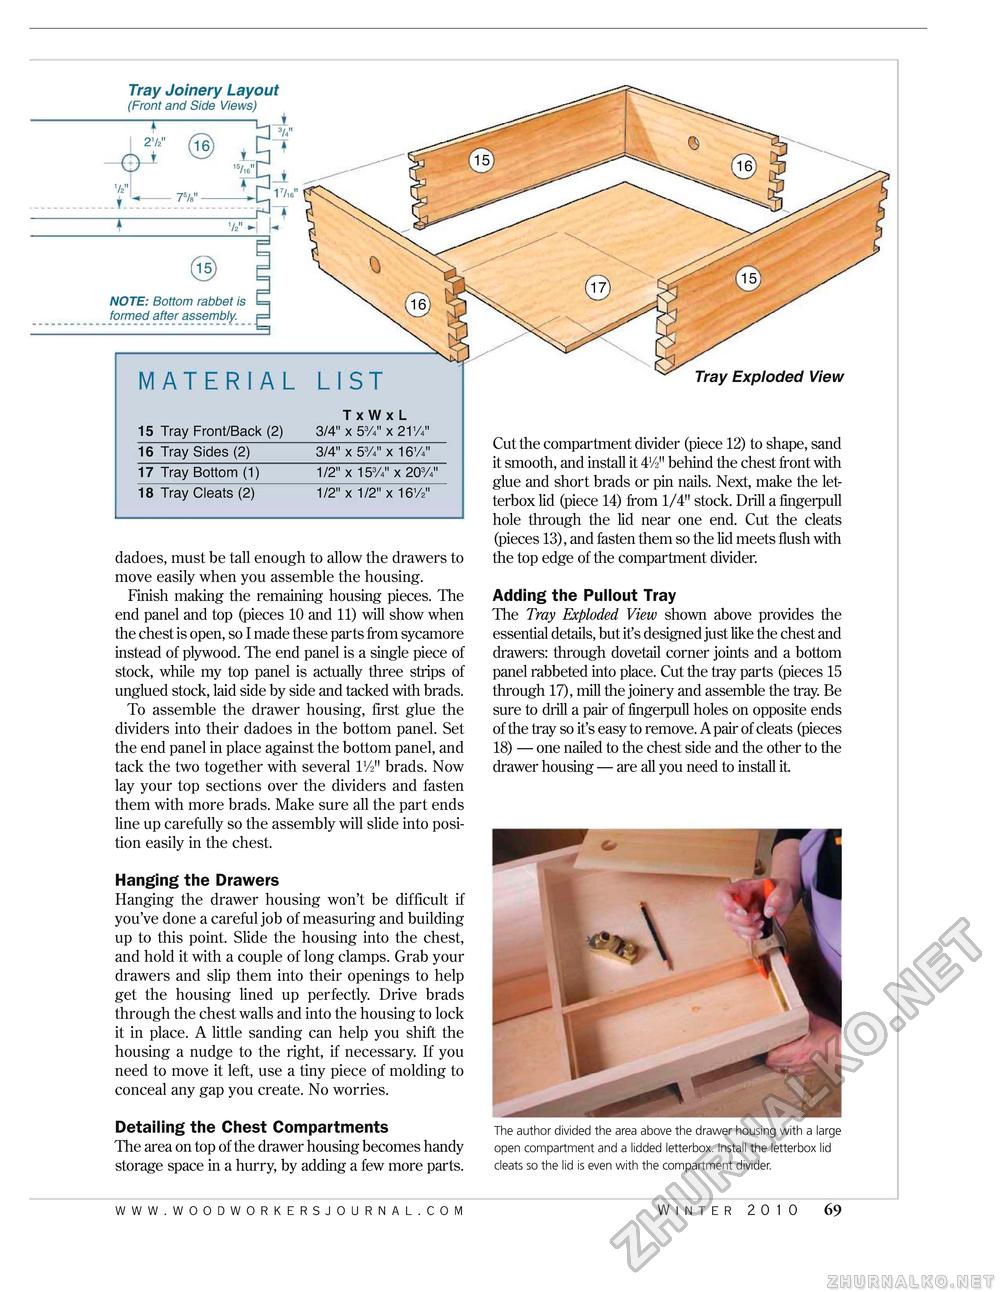
Tray Joinery Layout (Front and Side Views) "H 3/4" (15) NOTE: Bottom rabbet is formed after assembly. material 15 Tray Front/Back (2) TxWxL 3/4" x 53/4" x 211/4" 15 Tray Front/Back (2) TxWxL 3/4" x 53/4" x 211/4"
dadoes, must be tall enough to allow the drawers to move easily when you assemble the housing. Finish making the remaining housing pieces. The end panel and top (pieces 10 and 11) will show when the chest is open, so I made these parts from sycamore instead of plywood. The end panel is a single piece of stock, while my top panel is actually three strips of unglued stock, laid side by side and tacked with brads. To assemble the drawer housing, first glue the dividers into their dadoes in the bottom panel. Set the end panel in place against the bottom panel, and tack the two together with several lVz" brads. Now lay your top sections over the dividers and fasten them with more brads. Make sure all the part ends line up carefully so the assembly will slide into position easily in the chest. Hanging the Drawers Hanging the drawer housing won't be difficult if you've done a careful job of measuring and building up to this point. Slide the housing into the chest, and hold it with a couple of long clamps. Grab your drawers and slip them into their openings to help get the housing lined up perfectly. Drive brads through the chest walls and into the housing to lock it in place. A little sanding can help you shift the housing a nudge to the right, if necessary. If you need to move it left, use a tiny piece of molding to conceal any gap you create. No worries. Detailing the Chest Compartments The area on top of the drawer housing becomes handy storage space in a hurry, by adding a few more parts. Cut the compartment divider (piece 12) to shape, sand it smooth, and install it 4V2M behind the chest front with glue and short brads or pin nails. Next, make the letterbox lid (piece 14) from 1/4" stock. Drill a fingerpull hole through the lid near one end. Cut the cleats (pieces 13), and fasten them so the lid meets flush with the top edge of the compartment divider. Adding the Pullout Tray The Tray Exploded View shown above provides the essential details, but if s designed just like the chest and drawers: through dovetail corner joints and a bottom panel rabbeted into place. Cut the tray parts (pieces 15 through 17), mill the joinery and assemble the tray. Be sure to drill a pair of fingerpull holes on opposite ends of the tray so it's easy to remove. A pair of cleats (pieces 18) — one nailed to the chest side and the other to the drawer housing — are all you need to install it The author divided the area above the drawer housing with a large open compartment and a lidded letterbox. Install the letterbox lid cleats so the lid is even with the compartment divider. Tray Exploded View winter 2010 69 |


