Creative Woodworks & crafts 1997-08, страница 14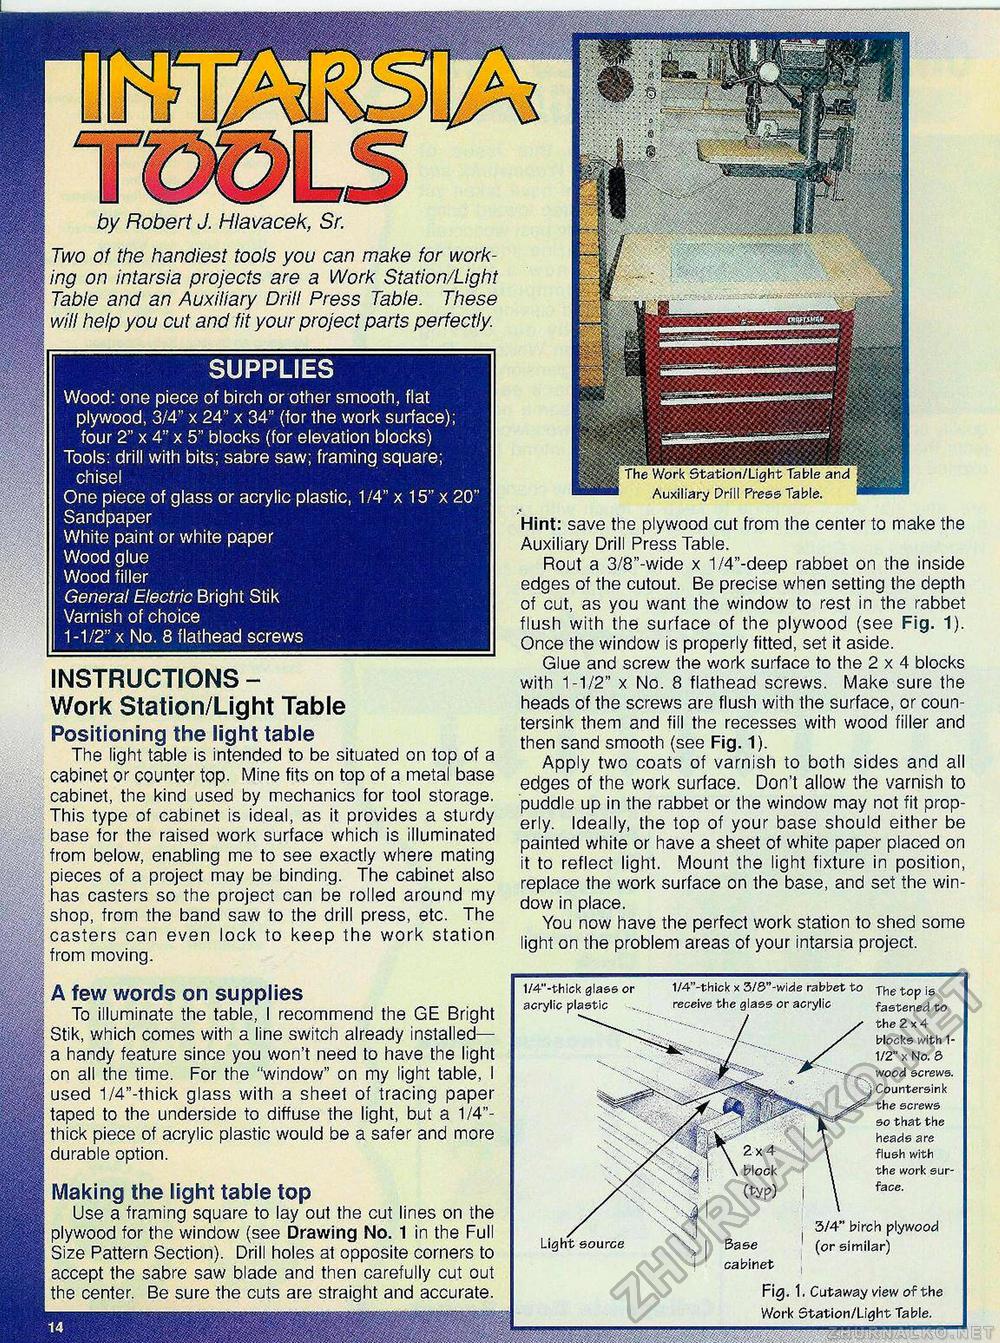
SUPPLIES " t V • by Robert J. Hlavacek, Sr. Two of the handiest tools you can make for working on intarsia projects are a Work Station/Light Table and an Auxiliary Drill Press Table. These will help you cut and fit your project parts perfectly. Wood: one piece of birch or other smooth, fiat plywood, 3/4" x 24" x 34" (for the work surface); four 2" x 4" x 5" blocks (for elevation blocks) Tools: drill with bits; sabre saw; framing square; chisel One piece of glass or acrylic plastic, 1/4" x 15" x 20" Sandpaper White paint or white paper Wood glue Wood filler General Electric Bright Stik Varnish of choice 1-1/2" x No. 8 flathead screws INSTRUCTIONS -Work Station/Light Table Positioning the light table The light table is intended to be situated on top of a cabinet or counter top. Mine fits on top of a metal base cabinet, the kind used by mechanics for tool storage. This type of cabinet is ideal, as it provides a sturdy base for the raised work surface which is illuminated from below, enabling me to see exactly where mating | pieces of a project may be binding. The cabinet also i; has casters so the project can be rolled around my I shop, from the band saw to the drill press, etc. The casters can even lock to keep the work station from moving. | A few words on supplies | To illuminate the table, I recommend the GE Bright I Stik, which comes with a line switch already installed— I a handy feature since you won't need to have the light on all the time. For the "window" on my light table, I | used 1/4"-thick glass with a sheet of tracing paper ! taped to the underside to diffuse the light, but a 1/4"-thick piece of acrylic plastic would be a safer and more I durable option. Making the light table top Use a framing square to lay out the cut lines on the plywood for the window (see Drawing No. 1 in the Full Size Pattern Section). Drill holes at opposite corners to accept the sabre saw blade and then carefully cut out center. Be sure the cuts are straight and accurate. ! The Work Station/Light Table and Auxiliary Prill Press Table. Hint: save the plywood cut from the center to make the Auxiliary Drill Press Table. Rout a 3/8"-wide x 1/4"-deep rabbet on the inside edges of the cutout. Be precise when setting the depth of cut, as you want the window to rest in the rabbet flush with the surface of the plywood (see Fig. 1). Once the window is properly fitted, set it aside. Glue and screw the work surface to the 2 x 4 blocks with 1-1/2" x No. 8 flathead screws. Make sure the heads of the screws are flush with the surface, or countersink them and fill the recesses with wood filler and then sand smooth (see Fig. 1). Apply two coats of varnish to both sides and all edges of the work surface. Don't allow the varnish to puddle up in the rabbet or the window may not fit properly. Ideally, the top of your base should either be painted white or have a sheet of white paper placed on it to reflect light. Mount the light fixture in position, replace the work surface on the base, and set the window in place. You now have the perfect work station to shed some light on the problem areas of your intarsia project. 1/4"-thick glass or acrylic elastic 1/4"-thick x 3/8"-wide rabbet to receive the glass or acrylic Base cabinet The top is fastened to the 2x4 blocks with 1-1/2" x No. a wood screws. Countersink the screws so that the heads are flush with the work surface. 3/4" birch plywood (or similar) Fig. 1. Cutaway view of the Work Station/Light Table. |


