Creative Woodworks & crafts 1997-08, страница 15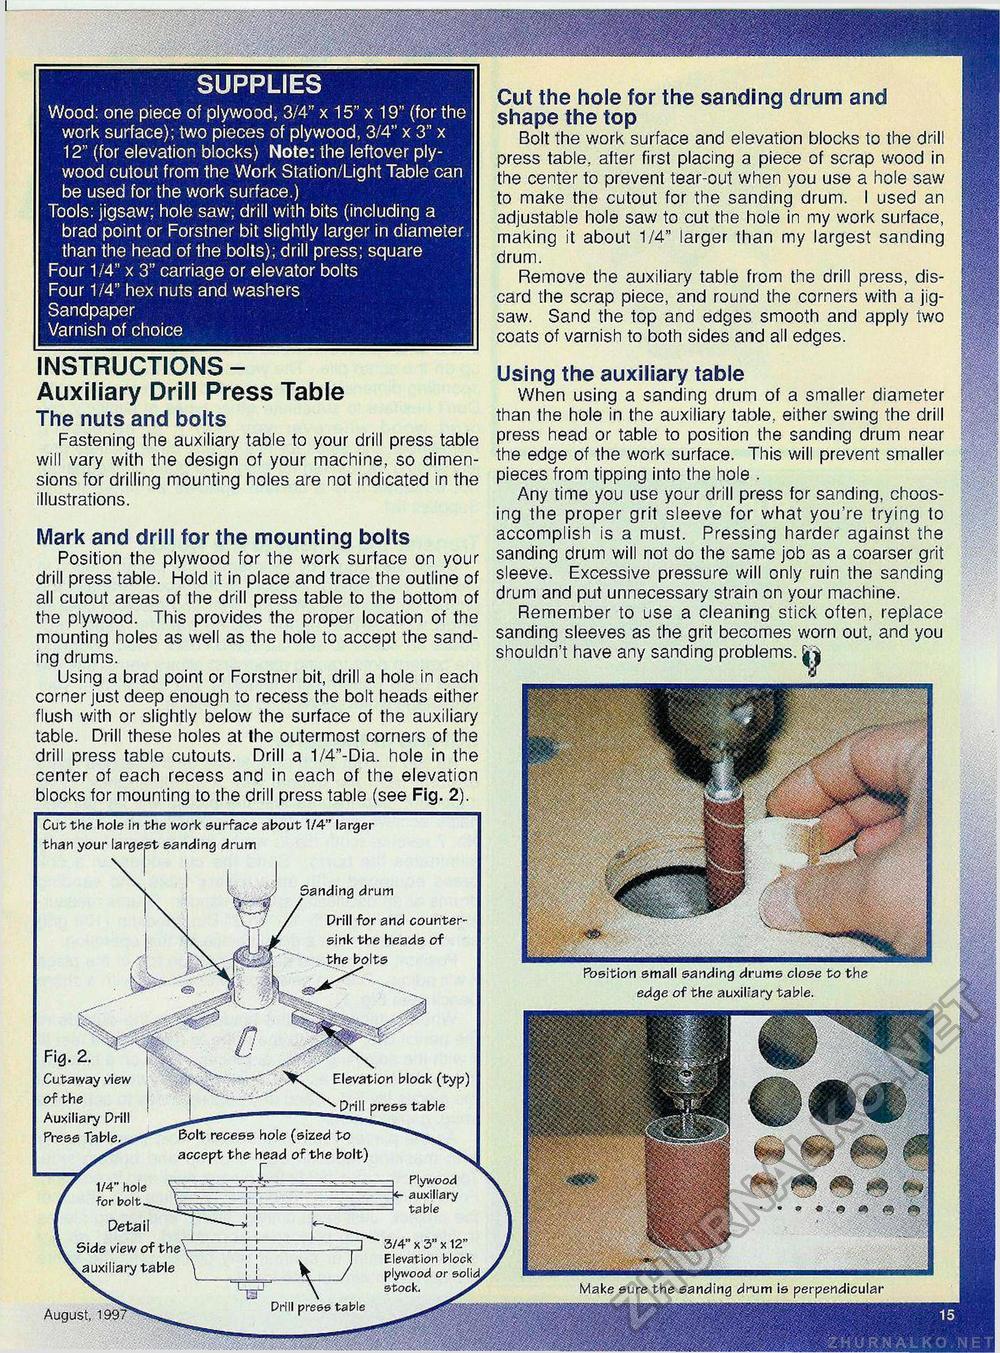
SUPPLIES Wood: one piece of plywood, 3/4" x 15" x 19" (for the j work surface); two pieces of plywood, 3/4" x 3" x 12" (for elevation blocks) Note: the leftover plywood cutout from the Work Station/Light Table can be used for the work surface.) Tools: jigsaw; hole saw; drill with bits (including a brad point or Forstner bit slightly larger in diameter than the head of the bolts); drill press; square Four 1/4" x 3" carriage or elevator bolts Four 1/4" hex nuts and washers Sandpaper Varnish of choice than your largest sanding drum Sanding drum Drill for and countersink the heads of the bolts Fig. 2. Cutaway view of the Auxiliary Drill Press Table.- Elevation block (typ) *• Prill press table Bolt recess hole (sized to accept the head of the bolt) n Plywood auxiliary table 1/4" hole for bolt^ t Detail Side view of the' ^auxiliary table 3/4" x 3" x 12" Elevation block ply wood or eoiiti stock. August, 1997 INSTRUCTIONS -Auxiliary Drill Press Table The nuts and bolts Fastening the auxiliary table to your drill press table will vary with the design of your machine, so dimensions for drilling mounting holes are not indicated in the illustrations. Mark and drill for the mounting bolts Position the plywood for the work surface on your drill press table. Hold it in place and trace the outline of all cutout areas of the drill press table to the bottom of the plywood. This provides the proper location of the mounting holes as well as the hole to accept the sanding drums. Using a brad point or Forstner bit, drill a hole in each corner just deep enough to recess the bolt heads either flush with or slightly below the surface of the auxiliary table. Drill these holes at the outermost corners of the drill press table cutouts. Drill a 1/4"-Dia. hole in the center of each recess and in each of the elevation blocks for mounting to the drill press table (see Fig. 2). Cut the hole for the sanding drum and shape the top Bolt the work surface and elevation blocks to the drill press table, after first placing a piece of scrap wood in the center to prevent tear-out when you use a hole saw to make the cutout for the sanding drum. I used an adjustable hole saw to cut the hole in my work surface, making it about 1/4" larger than my largest sanding drum. Remove the auxiliary table from the drill press, discard the scrap piece, and round the corners with a jigsaw. Sand the top and edges smooth and apply two coats of varnish to both sides and all edges. Using the auxiliary table When using a sanding drum of a smaller diameter than the hole in the auxiliary table., either swing the drill press head or table to position the sanding drum near the edge of the work surface. This will prevent smaller pieces from tipping into the hole . Any time you use your drill press for sanding, choosing the proper grit sleeve for what you're trying to accomplish is a must. Pressing harder against the sanding drum will not do the same job as a coarser grit sleeve. Excessive pressure will only ruin the sanding drum and put unnecessary strain on your machine. Remember to use a cleaning stick often, replace sanding sleeves as the grit becomes worn out, and you shouldn't have any sanding problems. j| Position small sanding drums close to the edge of the auxiliary table. Make sure the sanding drum is perpendicular |


