Creative Woodworks & crafts 1998-09, страница 58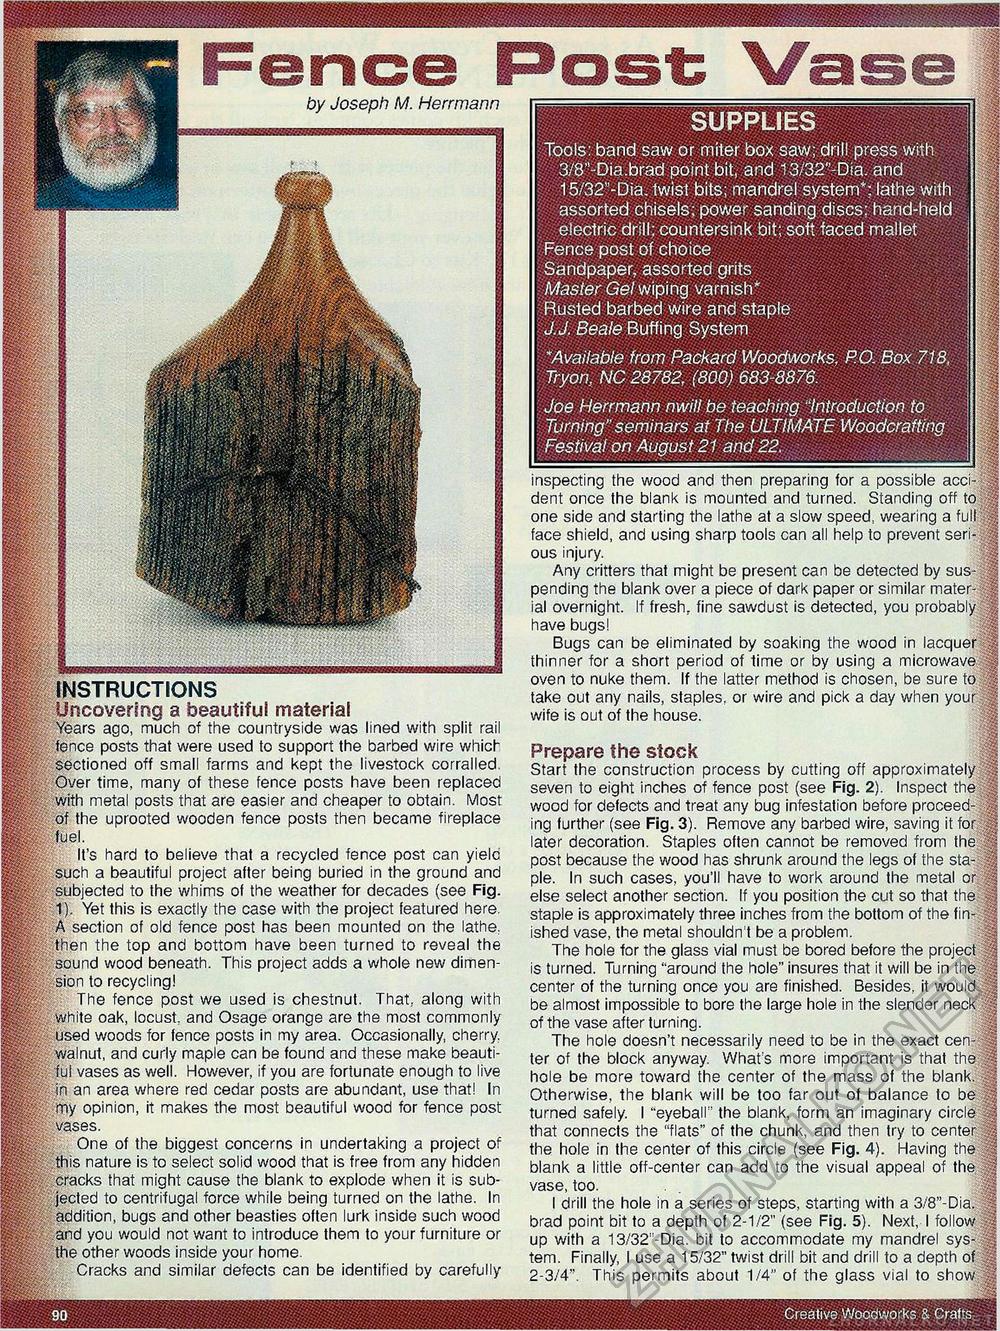
SUPPLIES Tools: band saw or miter box saw; drill press with 3/8"-Dia.brad point bit, and 13/32"-Dia. and 15/32"-Dia. twist bits; mandrel system*; lathe with assorted chisels; power sanding discs; hand-held electric drill; countersink bit; soft faced mallet Fence post of choice Sandpaper, assorted grits Master Gel wiping varnish* Rusted barbed wire and staple J.J. Beale Buffing System * Available from Packard Woodworks, P.O. Box 718, Tryon, NC 28782, (800) 683-8876. Joe Herrmann nwill be teaching "Introduction to Turning" seminars at The ULTIMATE Woodcrafting Festival on Augus 121 and 22. Creative Woodworks & Crafts by Joseph M. Herrmann inspecting the wood and then preparing for a possible acci-dent once the blank is mounted and turned. Standing off to one side and starting the lathe at a slow speed, wearing a full face shield, and using sharp tools can all help to prevent seri- ;J ous injury. Any critters that might be present can be detected by sus-pending the blank over a piece of dark paper or similar mater- ? ial overnight. If fresh, fine sawdust is detected, you probably |§ have bugs! Bugs can be eliminated by soaking the wood in lacquer ?| thinner for a short period of time or by using a microwave | oven to nuke them. If the latter method is chosen, be sure to || take out any nails, staples, or wire and pick a day when your ij wife is out of the house. INSTRUCTIONS Uncovering a beautiful material Years ago, much of the countryside was lined with split rail fence posts that were used to support the barbed wire which sectioned off small farms and kept the livestock corralled. Over time, many of these fence posts have been replaced with metal posts that are easier and cheaper to obtain. Most of the uprooted wooden fence posts then became fireplace fuel. It's hard to believe that a recycled fence post can yielc such a beautiful project after being buried in the ground and subjected to the whims of the weather for decades (see Fig. 1). Yet this is exactly the case with the project featured here. A section of old fence post has been mounted on the lathe, then the top and bottom have been turned to reveal the sound wood beneath. This project adds a whole new dimension to recycling! The fence post we used is chestnut. That, along with white oak, locust, and Osage orange are the most commonly used woods for fence posts in my area. Occasionally, cherry, walnut, and curly maple can be found and these make beautiful vases as well. However, if you are fortunate enough to live in an area where red cedar posts are abundant, use that! In my opinion, it makes the most beautiful wood for fence post vases. One of the biggest concerns in undertaking a project of this nature is to select solid wood that is free from any hidden cracks that might cause the blank to explode when it is subjected to centrifugal force while being turned on the lathe. In addition, bugs and other beasties often lurk inside such wood and you would not want to introduce them to your furniture or the other woods inside your home. Cracks and similar defects can be identified by carefully Prepare the stock Start the construction process by cutting off approximately |jj seven to eight inches of fence post (see Fig. 2). Inspect the wood for defects and treat any bug infestation before proceed- 9 ing further (see Fig. 3). Remove any barbed wire, saving it for c|| later decoration. Staples often cannot be removed from the :|| post because the wood has shrunk around the legs of the sta- :•§ pie. In such cases, you'll have to work around the metal or H else select another section. If you position the cut so that the §1 staple is approximately three inches from the bottom of the fin- % ished vase, the metal shouldn't be a problem. The hole for the glass vial must be bored before the project is turned. Turning "around the hole" insures that it will be in the ;J center of the turning once you are finished. Besides, it would f| be almost impossible to bore the large hole in the slender neck f| of the vase after turning. The hole doesn't necessarily need to be in the exact cen• | ter of the block anyway. What's more important is that the |§j hole be more toward the center of the mass of the blank. || Otherwise, the blank will be too far out of balance to be If turned safely. I "eyeball" the blank, form an imaginary circle J that connects the "flats" of the chunk, and then try to center the hole in the center of this circle (see Fig. 4). Having the || blank a little off-center can add to the visual appeal of the i| vase, too. I drill the hole in a series of steps, starting with a 3/8"-Dia. S brad point bit to a depth of 2-1/2" (see Fig. 5). Next, I follow | up with a 13/32::-Dia. bit to accommodate my mandrel sys- 4 tem. Finally, I use a 15/32" twist drill bit and drill to a depth of :|| 2-3/4". This permits about 1/4" of the glass vial to show _ |


