Creative Woodworks & crafts 1998-09, страница 60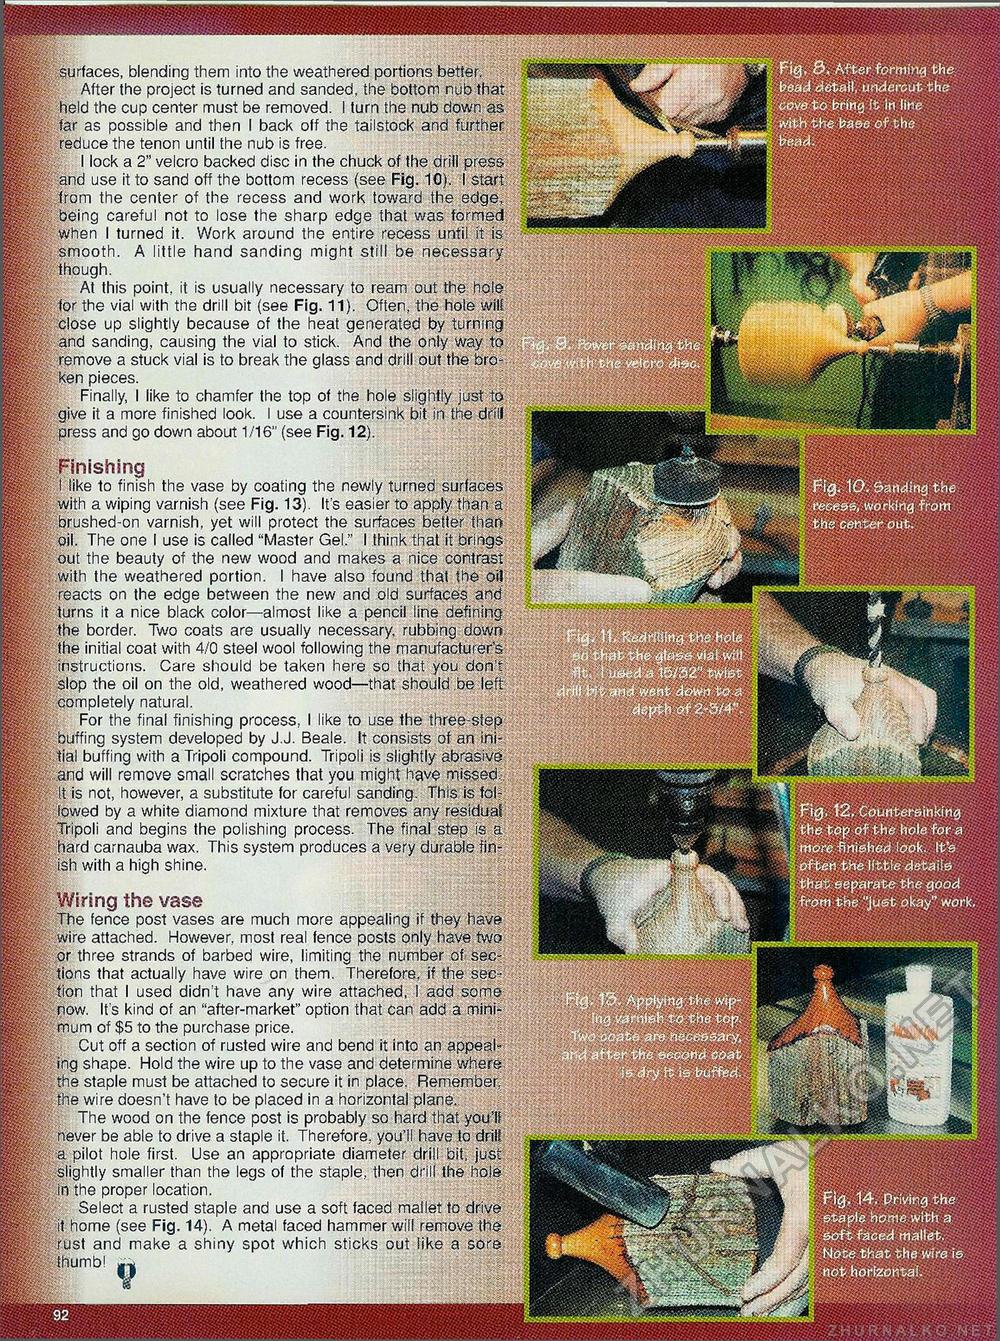
IIP " Pig. 8. After forming the. f i bead detail, undercut the ' Oove to bring it in line - <vith the base of the Fig. 10. Sanding the recess, working from the center out. F'i0, 12. Countersinking the top of the hole for a more finished look. It's often the little deta; is that separate the good from the "just okay" work, >0 W llsl is-burfetf'. Fig. 14. Driving the staple home with a soft faced mallet. Note that the wire is not horizontal. .surfaces, blending them into the weathered portions better. : After the project is turned and sanded, the bottom nub that held the cup center must be removed. I turn the nub down as far as possible and then I back off the tailstock and further reduce the tenon until the nub is free. I lock a 2" velcro backed disc in the chuck of the drill press and use it to sand off the bottom recess (see Fig. 10). I start from the center of the recess and work toward the edge, being careful not to lose the sharp edge that was formed when I turned it. Work around the entire recess until it is-; smooth. A little hand sanding might still be necessary though. At this point, it is usually necessary to ream out the hole for the vial with the drill bit (see Fig. 11). Often, the hole wilt close up slightly because of the heat generated by turning and sanding, causing the vial to stick. And the only way: to remove a stuck vial is to break the glass and drill out the brc ken pieces. Finally, I like to chamfer the top of the hole slightly just to give it a more finished look. I use a countersink bit in the drilj: press and go down about 1/16" (see Fig. 12). Finishing I like to finish the vase by coating the newly turned surfaces: with a wiping varnish (see Fig. 13). It's easier to apply than a brushed-on varnish, yet will protect the surfaces better thart oil. The one I use is called "Master Gel." I think that it brings out the beauty of the new wood and makes a nice contrast with the weathered portion. I have also found that the oil reacts on the edge between the new and old surfaces and turns it a nice black color—almost like a pencil line defining the border. Two coats are usually necessary, rubbing down the initial coat with 4/0 steel wool following the manufacturer's, instructions. Care should be taken here so that you don't slop the oil on the old, weathered wood—that should be left: completely natural. For the final finishing process, I like to use the three-step buffing system developed by J.J. Beale. It consists of an initial buffing with a Tripoli compound. Tripoli is slightly abrasive and will remove small scratches that you might have missed It is not, however, a substitute for careful sanding. This is followed by a white diamond mixture that removes any residual Tripoli and begins the polishing process. The final step is a hard carnauba wax. This system produces a very durable finish with a high shine. Wiring the vase The fence post vases are much more appealing if they have wire attached. However, most real fence posts only have two or three strands of barbed wire, limiting the number of sections that actually have wire on them. Therefore, if the section that I used didn't have any wire attached, I add some now. It's kind of an "after-market" option that can add a mirii-mum of $5 to the purchase price. Cut off a section of rusted wire and bend it into an appealing shape. Hold the wire up to the vase and determine where the staple must be attached to secure it in place. Remember; the wire doesn't have to be placed in a horizontal plane. The wood on the fence post is probably so hard that you'll never be able to drive a staple it. Therefore, you'll have to drill a pilot hole first. Use an appropriate diameter drill bit, just slightly smaller than the legs of the staple, then drill the hole in the proper location. Select a rusted staple and use a soft faced mallet to drive it home (see Fig. 14). A metal faced hammer will remove the rust and make a shiny spot which sticks out like a sore thumb! |


