Creative Woodworks & crafts 1999-11, страница 30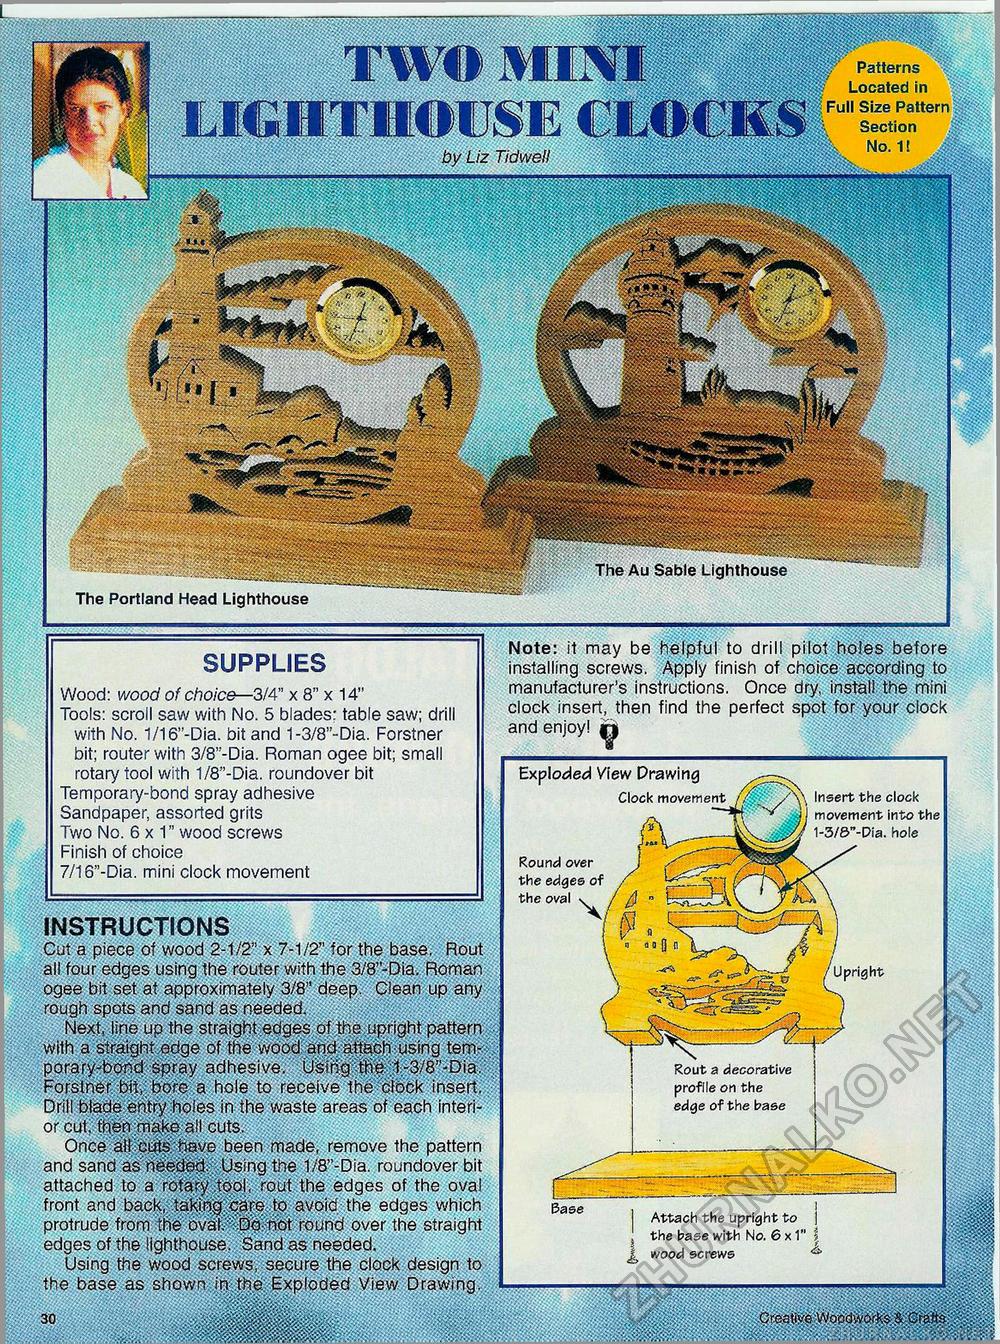
Patterns Located in Full Size Pattern Section No. 1! sami^!:.^ by Liz Tidwell The Au Sable Lighthouse The Portland Head Lighthouse Note: it may be helpful to drill pilot holes before installing screws. Apply finish of choice according to manufacturer's instructions. Once dry, install the mini clock insert, then find the perfect spot for your clock and enjoy! ft supplies Wood: wood of choice—3/4" x 8" x 14" Tools: scroll saw with No. 5 blades: table saw; drill with No. 1/16"-Dia. bit and 1-3/8"-Dia. Forstner bit; router with 3/8':-Dia. Roman ogee bit; small rotary tool with 1/8"-Dia. roundover bit Temporary-bond spray adhesive Sandpaper, assorted grits Two No. 6x1" wood screws Finish of choice 7/16"-Dia. mini clock movement Exploded View Drawing Clock movement Insert the clock movement into the 1-3/6"-Pia. hole Round over the edges of the oval v instructions Cut a piece of wood 2-1/2" x 7-1/2" for the base. Rout all four edges using the router with the 3/8"-Dia, Roman ogee bit set at approximately 3/8" deep. Clean up any rough spots and sand as needed. . Next, line up the straight edges of the upright pattern with a straight edge of the wood and attach using temporary-bond spray adhesive. Using the ,l-3/8:'-Dia. Forstner bit, bore a hole to receive the clock insert. Drill blade entry holes in the waste areas of each interior cut. then make at cuts. Once all?behave been made, remove the pattern and sand as needed. Using the 1/8"-Dia. roundover bit attached to a rotary tool, rout the edges of the oval front and back, taking, care to avoid the edges which protrude from the oval. Do not round over the straight edges of the lighthouse. Sand as needed. Using the wood screws, secure the clock design to the base as shown in the Exploded View Drawing. 30 Rout a decorative profile on the edge of the base I Attach the upright to j ! the base with No. 6x1" | wood screws ® .Creatiyie^vqcaivi wmm% |


