Creative Woodworks & crafts 2000-04, страница 50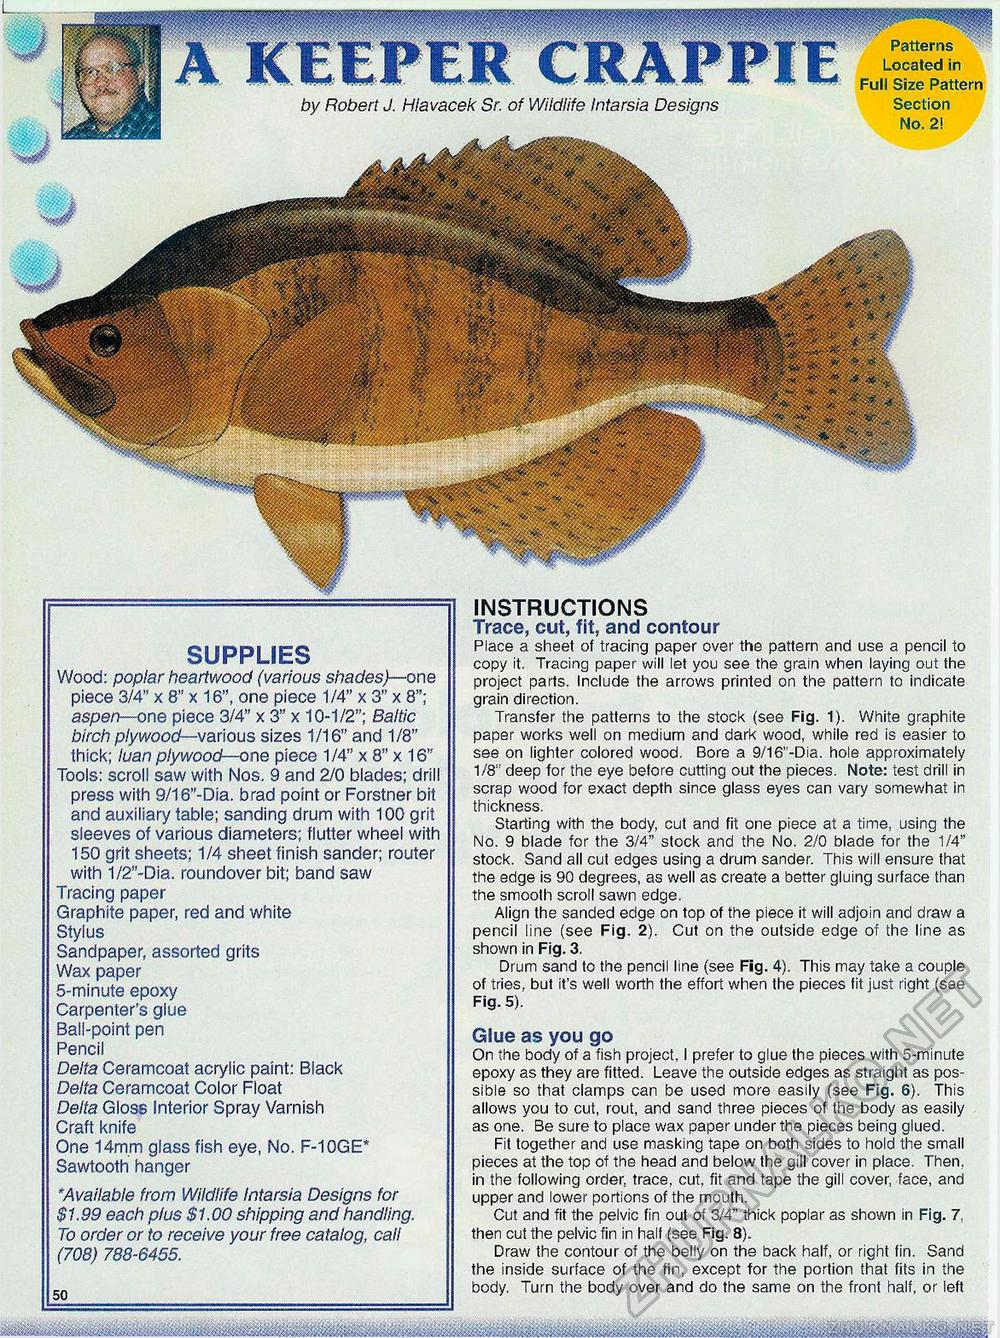
INSTRUCTIONS Trace, cut, fit, and contour Place a sheet of tracing paper over the pattern and use a pencil to copy it. Tracing paper will let you see the grain when laying out the project parts. Include the arrows printed on the pattern to indicate grain direction. Transfer the patterns to the stock (see Fig. 1). White graphite paper works well on medium and dark wood, while red is easier to see on lighter colored wood. Bore a 9/16'!-Dia. hole approximately 1/8" deep for the eye before cutting out the pieces. Note: test drill in scrap wood for exact depth since glass eyes can vary somewhat in thickness. Starting with the body, cut and fit one piece at a time, using the No. 9 blade for the 3/4" stock and the No. 2/0 blade for the 1/4" stock. Sand all cut edges using a drum sander. This will ensure that the edge is 90 degrees, as well as create a better gluing surface than the smooth scroll sawn edge. Align the sanded edge on top of the piece it will adjoin and draw a pencil line (see Fig. 2). Cut on the outside edge of the line as shown in Fig. 3. Drum sand to the pencil line (see Fig. 4). This may take a couple of tries, but it's well worth the effort when the pieces fit just right (see Fig. 5). Glue as you go On the body of a fish project. I prefer to glue the pieces with 5-minute epoxy as they are fitted. Leave the outside edges as straight as possible so that clamps can be used more easily (see Fig. 6). This allows you to cut, rout, and sand three pieces of the body as easily as one. Be sure to place wax paper under the pieces being glued. Fit together and use masking tape on both sides to hold the small pieces at the top of the head and below the gill cover in place. Then, in the following order, trace, cut, fit and tape the gill cover, face, and upper and lower portions of the mouth. Cut and fit the pelvic fin out of 3/4" thick poplar as shown in Fig. 7. then cut the pelvic fin in half (see Fig. 8). Draw the contour of the belly on the back half, or right fin. Sand the inside surface of the fin, except for the portion that fits in the body. Turn the body over and do the same on the front half, or left SUPPLIES Wood: poplar heartwood (various shades)—one piece 3/4" x 8" x 16", one piece 1/4" x 3" x 8"; aspen—one piece 3/4" x 3" x 10-1/2"; Baltic birch plywood—various sizes 1/16" and 1/8" thick; luan plywood—one piece 1/4" x 8" x 16" Tools: scroll saw with Nos. 9 and 2/0 blades; drill press with 9/16"-Dia. brad point or Forstner bit and auxiliary table; sanding drum with 100 grit sleeves of various diameters; flutter wheel with 150 grit sheets; 1/4 sheet finish sander; router with 1/2"-Dia. roundover bit; band saw Tracing paper Graphite paper, red and white Stylus Sandpaper, assorted grits Wax paper 5-minute epoxy Carpenter's glue Ball-point pen Pencil Delta Ceramcoat acrylic paint: Black Delta Ceramcoat Color Float Delta Gloss Interior Spray Varnish Craft knife One 14mm glass fish eye, No. F-10GE* Sawtooth hanger *Available from Wildlife Intarsia Designs for $1.99 each plus $1.00 shipping and handling. To order or to receive your free catalog, call (708) 788-6455. 50 |


