Creative Woodworks & crafts 2000-06, страница 53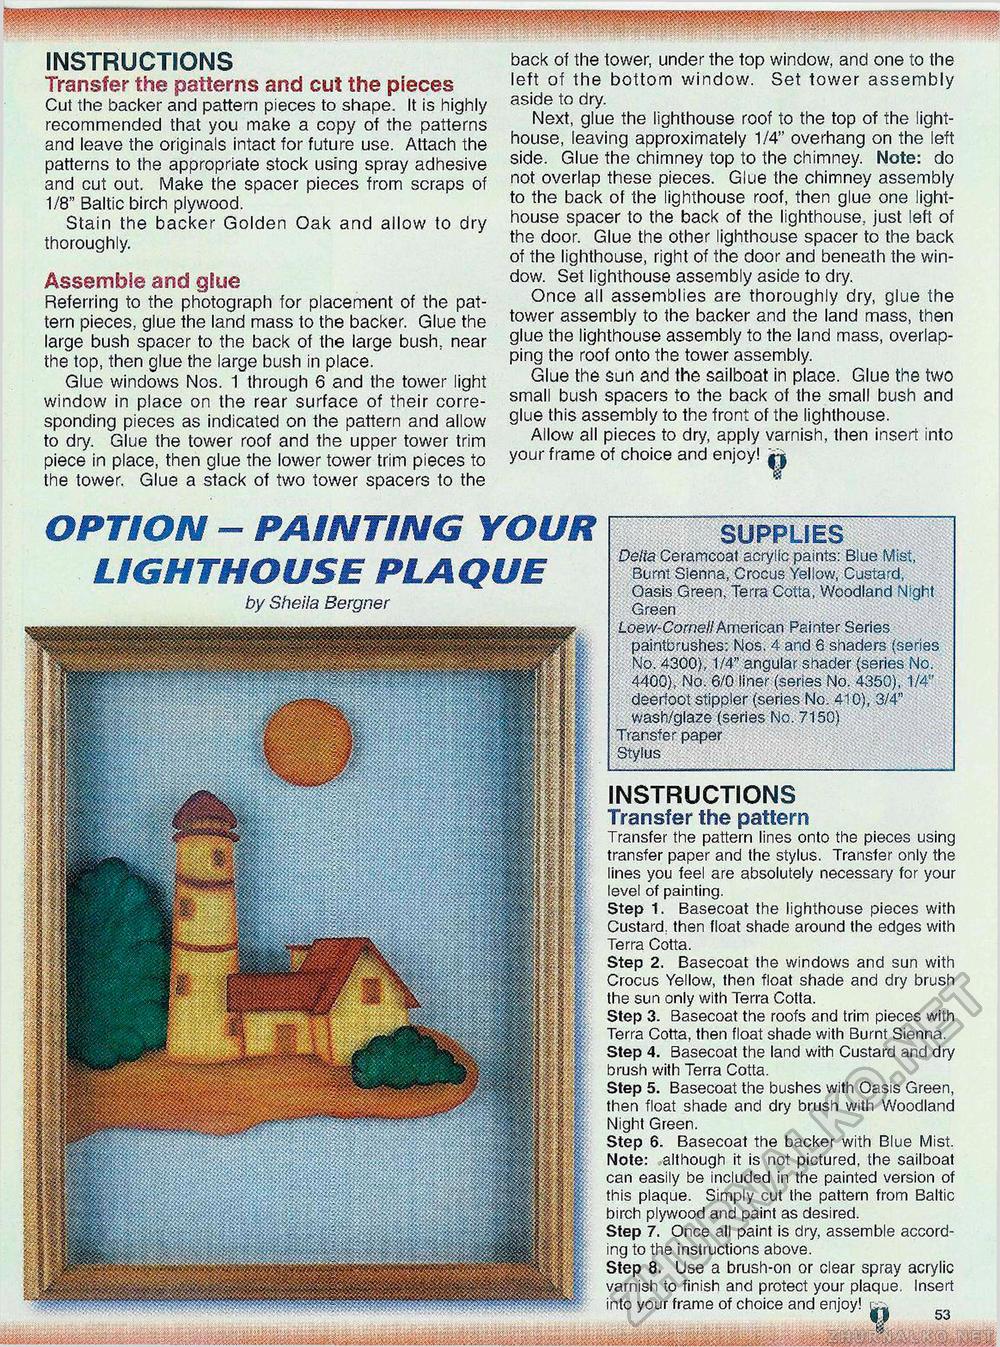
INSTRUCTIONS Transfer the patterns and cul the pieces Cut the backer and pattern pieces to shape. It is highly recommended that you make a copy of the patterns and leave the originals intact for future use. Attach the patterns to the appropriate stock using spray adhesive and cut out. Make the spacer pieces from scraps of 1/8" Baltic birch plywood. Stain the backer Golden Oak and allow to dry thoroughly. Assemble and glue Referring to the photograph for placement of the pattern pieces, glue the land mass to the backer. Glue the large bush spacer to the back of the large bush, near the top, then glue the large bush in place. Glue windows Nos. 1 through 6 and the tower light window in place on the rear surface of their corresponding pieces as indicated on the pattern and allow to dry. Glue the tower roof and the upper tower trim piece in place, then glue the lower tower trim pieces to the tower. Glue a stack of two tower spacers to the back of the tower, under the top window, and one to the left of the bottom window. Set tower assembly aside to dry. Next, glue the lighthouse roof to the top of the lighthouse, leaving approximately 1/4" overhang on the left side. Glue the chimney top to the chimney. Note: do not overlap these pieces. Glue the chimney assembly to the back of the lighthouse roof, then glue one lighthouse spacer to the back of the lighthouse, just left of the door. Glue the other lighthouse spacer to the back of the lighthouse, right of the door and beneath the window. Set lighthouse assembly aside to dry. Once all assemblies are thoroughly dry, glue the tower assembly to the backer and the land mass, then glue the lighthouse assembly to the land mass, overlapping the roof onto the tower assembly. Glue the sun and the sailboat in place. Glue the two small bush spacers to the back of the small bush and glue this assembly to the front of the lighthouse. Allow all pieces to dry, apply varnish, then insert into your frame of choice and enjoy! « SUPPLIES Delia Ceramcoat acrylic paints: Blue Mist, Burnt Sienna, Crocus Yellow, Custard, Oasis Green, Terra Cotta, Woodland Night Green Loew-ComellAmerican Painter Series paintbrushes: Nos. 4 and 6 shaders (series No. 4300), 1/4" angular shader (series No. 4400), No. 6/0 liner (series No. 4350), 1/4" deerfoot stippler (series No. 410), 3/4" wash/glaze (series No. 7150) Transfer paper Stylus OPTION - PAINTING YOUR LIGHTHOUSE PLAQUEby Sheila Bergner INSTRUCTIONS Transfer the pattern Transfer the pattern lines onto the pieces using transfer paper and the stylus. Transfer only the lines you feel are absolutely necessary for your level of painting. Step 1. Basecoat the lighthouse pieces with Custard, then float shade around the edges with Terra Cotta. Step 2. Basecoat the windows and sun with Crocus Yellow, then float shade and dry brush the sun only with Terra Cotta. Step 3. Basecoat the roofs and trim pieces with Terra Cotta, then float shade with Burnt Sienna. Step 4. Basecoat the land with Custard and dry brush with Terra Cotta. Step 5. Basecoat the bushes with Oasis Green, then float shade and dry brush with Woodland Night Green. Step 6. Basecoat the backer with Blue Mist. Note: although it is not pictured, the sailboat can easily be included in the painted version of this plaque. Simply cut the pattern from Baltic birch plywood and paint as desired. Step 7. Once all paint is dry, assemble according to the instructions above. Step 8, Use a brush-on or clear spray acrylic varnish to finish and protect your plaque. Insert into your frame of choice and enjoy! |


