Creative Woodworks & crafts 2000-06, страница 56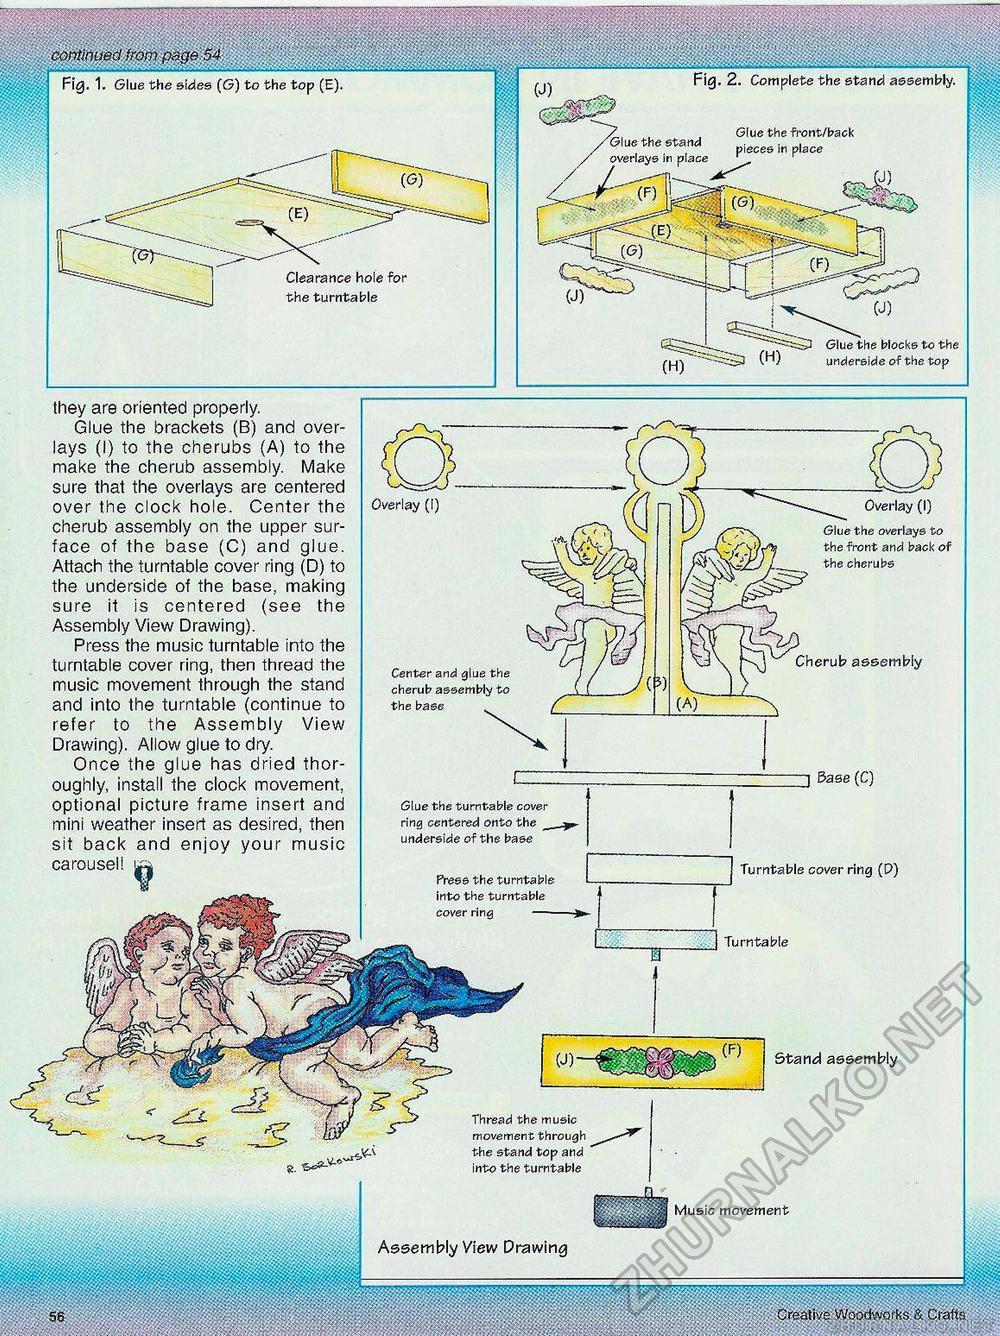
ess wm m ominued from page 54 Fig. 1. Glue the sides (G) to the top (E). j—__—__:_, ......._.......................................... ,Fig. 2. Complete the stand assembly. Glue the front/back pieces in place Glue the stand overlays in place Glue the blocks to the underside of the top Clearance hole for the turntable Music movement Assembly View Drawing Creative Woo iMm^MlMiiP ilfffl they are oriented properly. Glue the brackets (B) and overlays (I) to the cherubs (A) to the make the cherub assembly. Make sure that the overlays are centered over the clock hole. Center the cherub assembly on the upper surface of the base (C) and glue. Attach the turntable cover ring (D) to the underside of the base, making sure it is centered (see the Assembly View Drawing). Press the music turntable into the turntable cover ring, then thread the music movement through the stand and into the turntable (continue to refer to the Assembly View Drawing). Allow glue to dry. Once the glue has dried thoroughly, install the clock movement, optional picture frame insert and mini weather insert as desired, then sit back and enjoy your music carousel! ui Stand assembly 3 Base (C) Glue the turntable cover ring centered onto the _ underside of the base Thread the music movement through the stand top and into the turntable Center and glue the cherub assembly to the base Turntable cover ring (P) Turntable Cherub assembly Press the turntable into the turntable cover ring - Overlay (I) Glue the overlays to the front and back of the cherubs |


