Creative Woodworks & crafts 2000-06, страница 54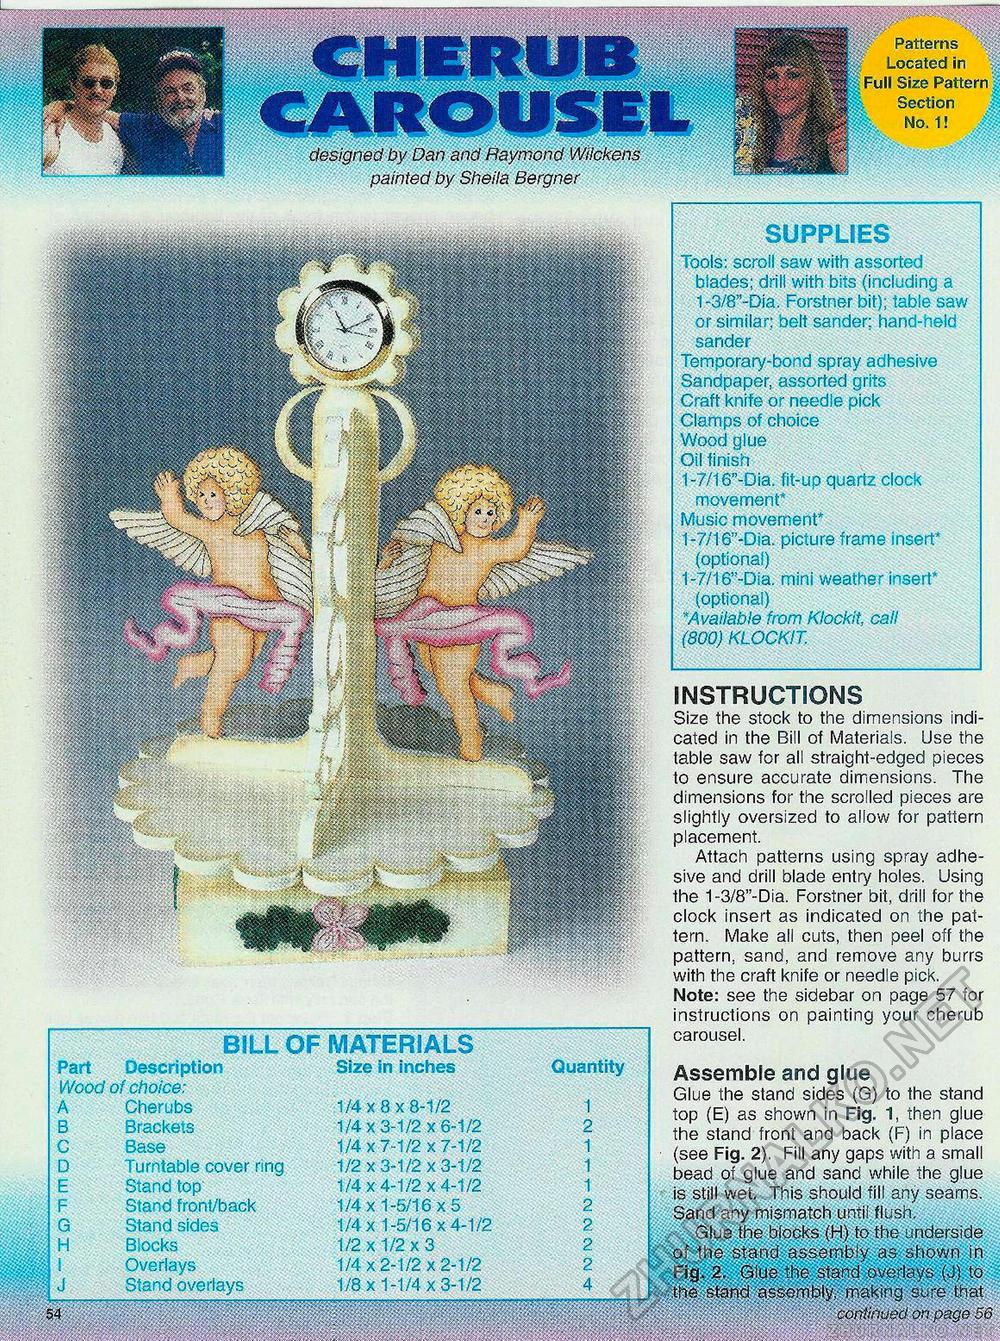
BILL OF MATERIALS Size in inches Quantity Part Description Wood of choice: A Cherubs B Brackets C Base D Turntable cover ring E Stand top' F Stand front/back G Stand sides H Blocks I Overlays J Stand overlays W Patterns % Located in Full Size Pattern Section No, 1! J designed by Dan and Raymond Wiickens painted by Sheila Bergner SUPPLIES Tools: scroll saw with assorted blades; drill with bits (including a 1-3/8"-Dia. Forstner bit); table saw or similar; belt sander; hand-held sander Temporary-bond spray adhesive Sandpaper, assorted grits Craft knife or needle pick Clamps of choice Wood glue Oil finish 1-7/16"-Dia. fit-up quartz clock movement* Music movement* 1-7/16"-Dia. picture frame insert* (optional) 1-7/16"-Dia. mini weather insert* (optional) *Available from Klockit, call (800) KLOCKIT. Assemble and glue Glue the stand sides (G) to the stand top (E) as shown in Fig. 1, then glue the stand front and back (F) in place • (see Fig. 2). Fill any gaps with a small bead of glue and sand while the glue is still wet. This should fill any seams. Sand any mismatch until flush. Glue the bfocks (H) to the underside of the stand assembly as shown in Fig. 2. Glue the stand overlays (J) to the stand assembly, making sure that continued on page 56 INSTRUCTIONS Size the stock to the dimensions indicated in the Bill of Materials. Use the table saw for all straight-edged pieces to ensure accurate dimensions. The dimensions for the scrolled pieces are slightly oversized to allow for pattern placement. Attach patterns using spray adhesive and drill blade entry holes. Using the 1-3/8"-Dia. Forstner bit, drill for the clock insert as indicated on the pattern. Make all cuts, then peel off the pattern, sand, and remove any burrs with the craft knife or needle pick. Note: see the sidebar on page 57 for instructions on painting your cherub carousel. |


