Creative Woodworks & crafts 2001-03, страница 28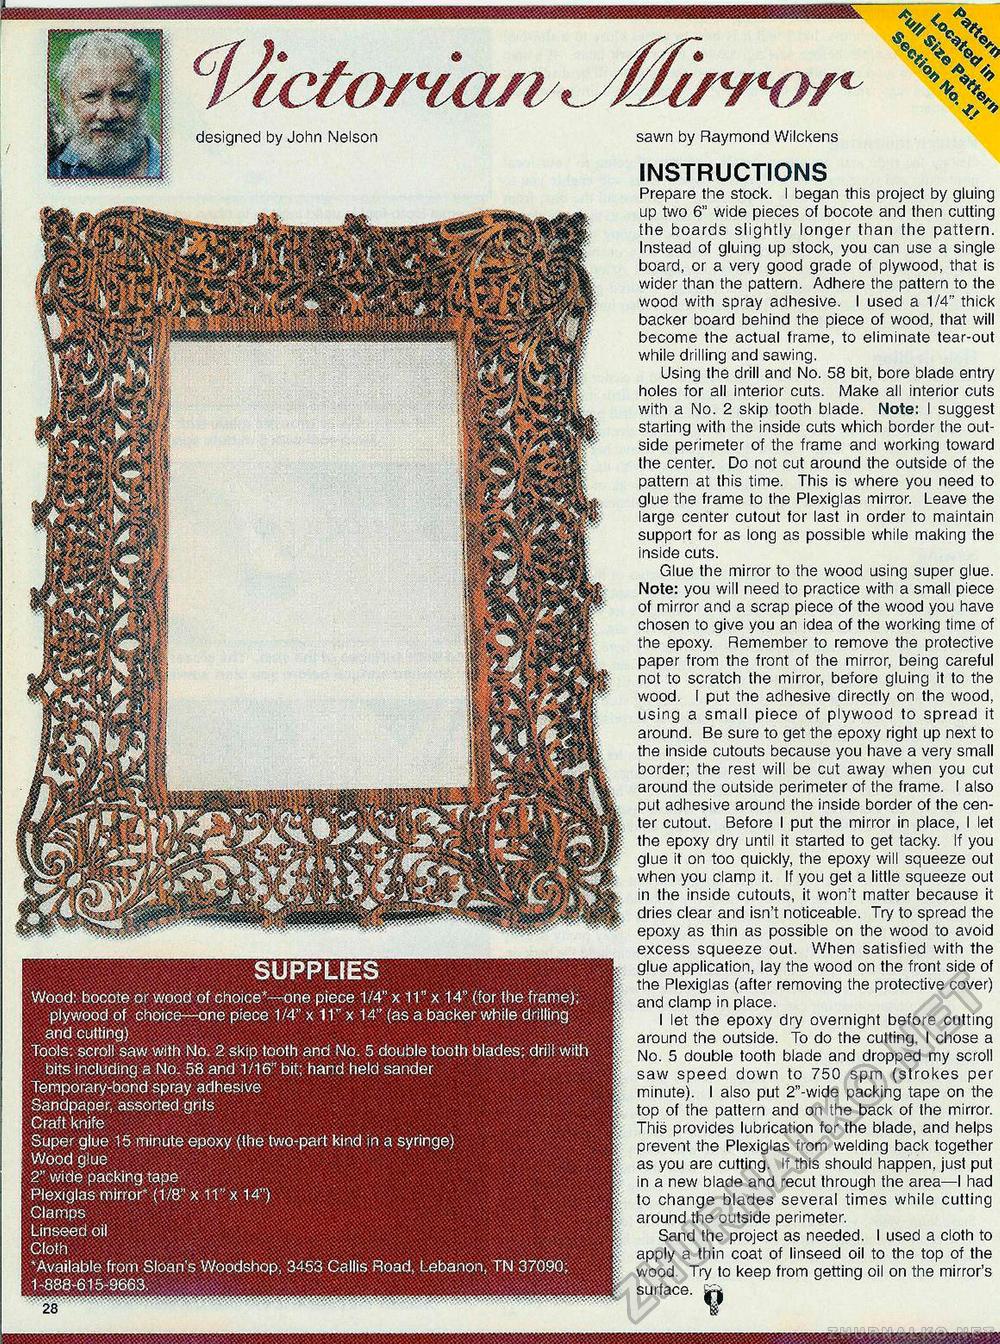
SUPPLIES Wood: bocote or wood of choice*—one piece 1/4" x 11" x 14" (for (he frame); plywood of choice—one piece 1/4" x IT" x 14" (as a backer while drilling and cutting) Tools: scroll saw With No. 2 skip tooth and No. 5 double tooth blades; drill with bits including a No. 58 and 1/16" bit; hand held sander Temporary-bond spray adhesive Sandpaper, assorted grits Craft knife Super glue 15 minute epoxy (the two-part kind in a syringe) Wood glue 2" wide packing tape Plexiglas mirror* (1/8" x 11" x 14") Clamps Linseed oil Cloth ^Available from Sloan's Woodshop, 3453 Callis Road, Lebanon, TN 37090; 1-888-615-9663. designed by John Nelson sawn by Raymond Wilckens INSTRUCTIONS Prepare the stock. I began this project by gluing up two 6" wide pieces of bocote and then cutting the boards slightly longer than the pattern. Instead of gluing up stock, you can use a single board, or a very good grade of plywood, that is wider than the pattern. Adhere the pattern to the wood with spray adhesive. I used a 1/4" thick backer board behind the piece of wood, that will become the actual frame, to eliminate tear-out while drilling and sawing. Using the drill and No. 58 bit, bore blade entry holes for all interior cuts. Make all interior cuts with a No. 2 skip tooth blade. Note: I suggest starling with the inside cuts which border the outside perimeter of the frame and working toward the center. Do not cut around the outside of the pattern at this time. This is where you need to glue the frame to the Plexiglas mirror. Leave the large center cutout for last in order to maintain support for as long as possible while making the inside cuts. Glue the mirror to the wood using super glue. Note: you will need to practice with a small piece of mirror and a scrap piece of the wood you have chosen to give you an idea of the working time of the epoxy. Remember to remove the protective paper from the front of the mirror, being careful not to scratch the mirror, before gluing it to the wood. I put the adhesive directly on the wood, using a small piece of plywood to spread it around. Be sure to get the epoxy right up next to the inside cutouts because you have a very small border; the rest will be cut away when you cut around the outside perimeter of the frame. I also put adhesive around the inside border of the center cutout. Before I put the mirror in place, I let the epoxy dry until it started to get tacky. If you glue it on too quickly, the epoxy will squeeze out when you clamp it. If you get a little squeeze out in the inside cutouts, it won't matter because it dries clear and isn't noticeable. Try to spread the epoxy as thin as possible on the wood to avoid excess squeeze out. When satisfied with the glue application, lay the wood on the front side of the Plexiglas (after removing the protective cover) and clamp in place. I let the epoxy dry overnight before cutting around the outside. To do the cutting, I chose a No. 5 double tooth blade and dropped my scroll saw speed down to 750 spm (strokes per minute). I also put 2"-wide packing tape on the top of the pattern and on the back of the mirror. This provides lubrication for the blade, and helps prevent the Plexiglas from welding back together as you are cutting. If this should happen, just put in a new blade and recut through the area—I had to change blades several times while cutting around the outside perimeter. Sand the project as needed. I used a cloth to apply a thin coat of linseed oil to the top of the wood. Try to keep from getting oil on the mirror's surface. Si mmmmmmsmmm |


