Creative Woodworks & crafts 2001-03, страница 27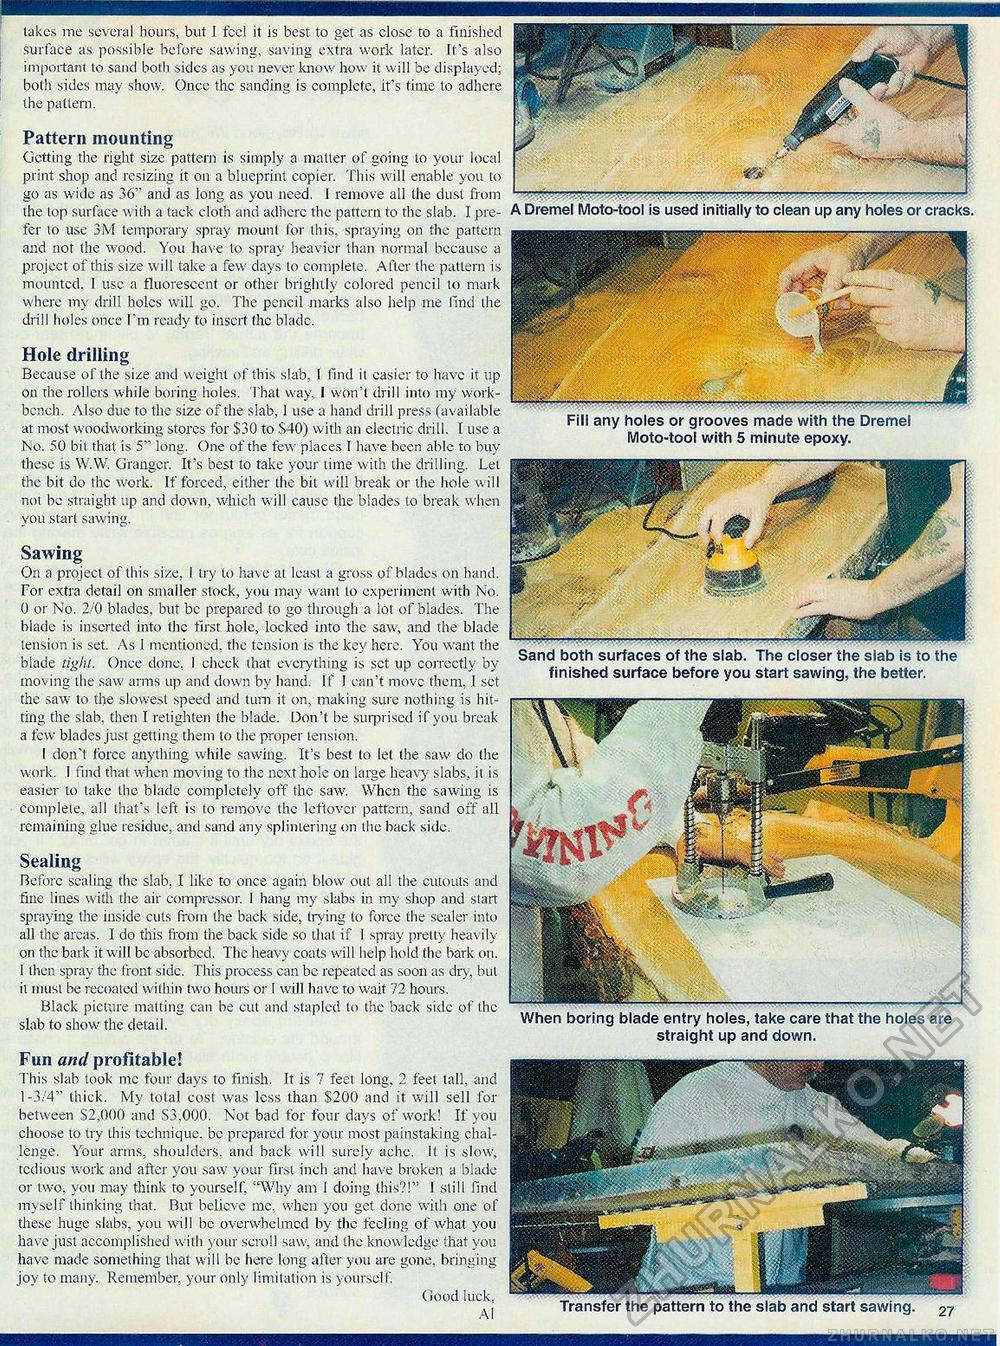
lakes me several hours, but I feel it is best to get as close to a finished surface as possible before sawing, saving extra work later. It's also important to sand both sides as you never know how it will be displayed; both sides may show. Once the sanding is complete, it's time to adhere the pattern. Pattern mounting Getting the right size pattern is simply a matter of going to your local print shop and resizing it 011 a blueprint copier. This will enable you to go as wide as 36" and as long as you need. I remove all the dust from the top surface with a tack cloth and adhere the pattern to the slab. I prefer 10 use 3M temporary spray mount for this, spraying on the pattern and not the wood. You have to spray heavier than normal because a project of this size will take a few days to complete. After the pattern is mounted. I use a fluorescent or other brightly colored pencil to mark where my drill holes will go. The pencil marks also help me find the drill holes once I'm ready to insert the blade. A Dremel Moto-tool is used initially to clean up any holes or cracks. Sawing Or. a project of this size, I try to have at leasi a gross of blades on hand. For extra detail on smaller stock, you may want to experiment with No. 0 or No. 2/0 blades, but be prepared to go through a lot of blades. The blade is inserted into (he first hole, locked into the saw, and the blade tension is set. As 1 mentioned, the tension is the key here. You want the blade tight. Once done, 1 check that everything is set up correctly by moving the saw arms up and down by hand. If I can't move them. I set the saw to the slowest speed and turn it on, making sure nothing is hitting the slab, then I retighten the blade. Don't be surprised if you break a few blades just getting them to the proper tension. I don't force anything while sawing. It's best to let (he saw do (he work. 1 find thai when moving to the next hole 011 large heavy slabs, il is easier to take the blade completely off the saw. When the sawing is complete, all that's left is to remove the leftover pattern, sand off all remaining glue residue, and sand any splintering on the back side. finished surface before you start sawing, the better. Hole drilling Because of the size and weight of this slab, I find il easier to have it up 011 the rollers while boring holes. That way, I won't drill into my workbench. Also due to the size of the slab, 1 use a hand drill press (available at most woodworking stores for $30 to $40) with an electric drill. I use a No. 50 bit that is 5" long. One of the few places I have been able to buy these is WAV. Granger. It's best to take your time with the drilling. Lei the bit do the work. If forced, either the bit will break or the hole will not be straight up and down, which will cause the blades to break when you starl sawing. Fill any holes or grooves made with the Dremel Moto-tool with 5 minute epoxy. Sealing Before scaling the slab, I like to once again blow out all the cutouts and fine lines with the air compressor. 1 hang my slabs in my shop and start spraying the inside culs from the back side, trying to force the sealer into all the areas. I do this from the back side so that if 1 spray pretty heavily on the bark it will be absorbed. The heavy coats will help hold the bark on. I then spray the front side. This process can be repeated as soon as dry, but il must be recoated within (wo hours or I will have to wait 72 hours. Black picture matting can be cut and stapled to the back side of the slab to show the detail. Fun and profitable! This slab took me four days to finish. If is 7 feet long, 2 feet tall, and 1-3/4" thick. My total cost was less than $200 and it will sell for between $2,000 and $3,000. Not bad for four days of work! If you choose lo try this technique, be prepared for your most painstaking challenge. Your arms, shoulders, and back will surely ache. It is slow, tedious work and after you saw your first inch and have broken a blade or two, you may think to yourself. "Why am I doing this?!" I slili find myself thinking that. But believe me, when you get done with one of these huge slabs, you will be overwhelmed by the tceling of what you have just accomplished with your scroll saw, and the knowledge that you have made something that will be here long after you are gone, bringing joy to many. Remember, your only limitation is yourself. Good luck, AI straight up and down. |


