Creative Woodworks & crafts 2001-03, страница 37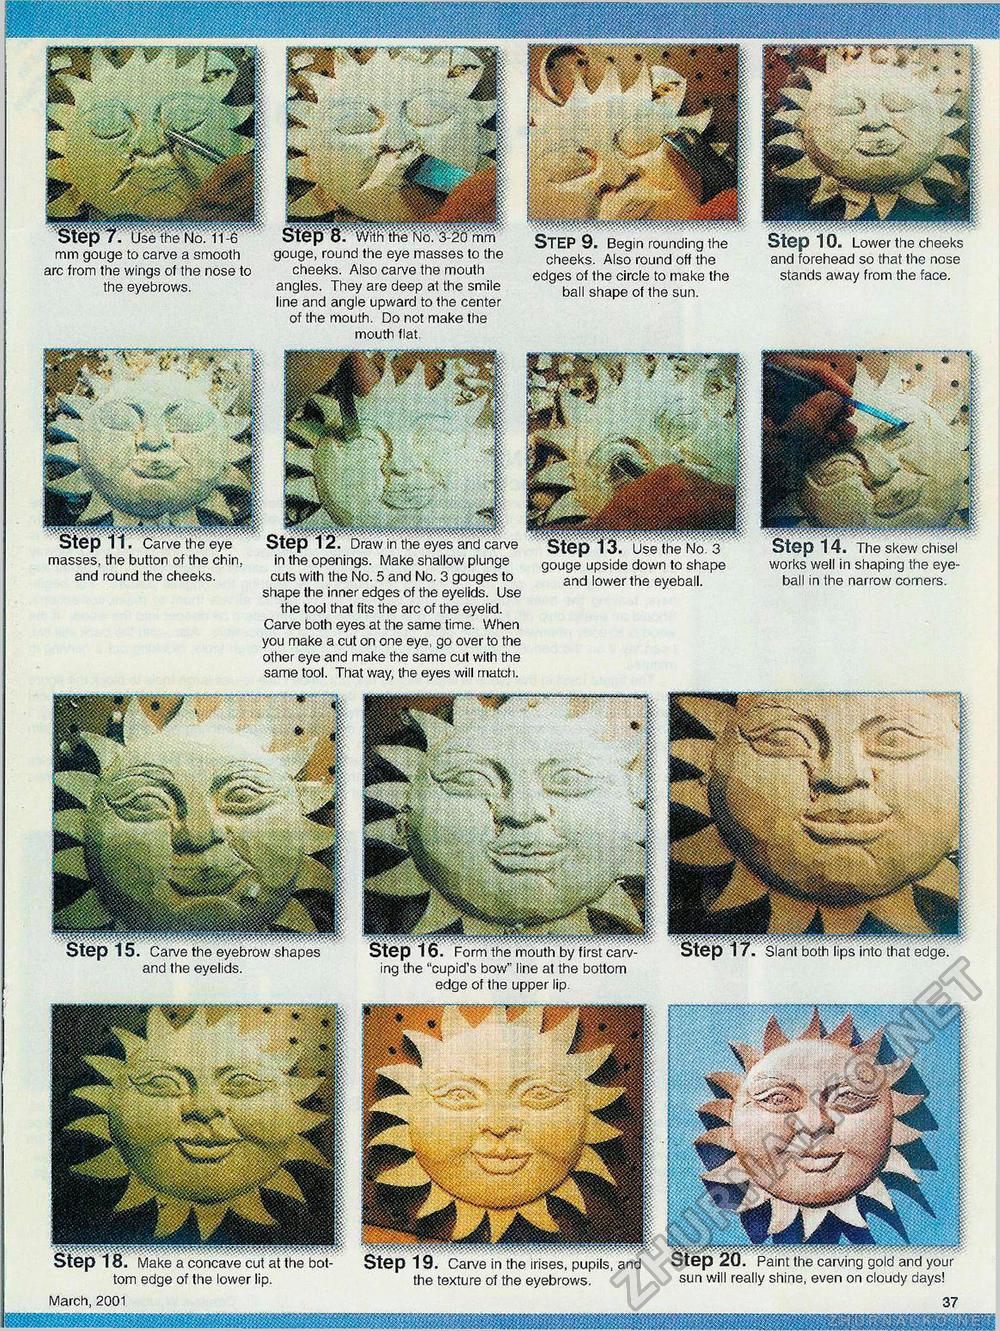
Use the No. 11-6 mm gouge to carve a smooth arc from the wings of the nose to the eyebrows. . 8.''WiiBW'KioT'^Mm'm' gouge, round the eye masses to the cheeks. Also carve the mouth angles. They are deep at the smile line and angle upward to the center of the mouth. Do not make the mouth flat. iispi STEP 9. Begin rounding the cheeks. Also round off the edges of the circle to make the ball shape of the sun. Step 10. Lower the cheeks and forehead so that the nose stands away from the face. Step 11. Carve the eye masses, the button of the chin, and round the cheeks. Step 12. Draw in the eyes and carve in the openings. Make shallow plunge cuts with the No. 5 and No. 3 gouges to shape the inner edges of the eyelids. Use the tool that fits the arc of the eyelid. Carve both eyes at the same time. When you make a cut on one eye, go over to the other eye and make the same cut with the same tool. That way, the eyes will match. Step 13. Use the No. 3 gouge upside down to shape and lower the eyeball. Step 14. The skew chisel works well in shaping the eyeball in the narrow corners. torn edge of the lower lip. March, 2001 the texture of the eyebrows. sun will really shine, even on cloudy days! carv-bottom the upper lip. |


