Creative Woodworks & crafts 2001-03, страница 38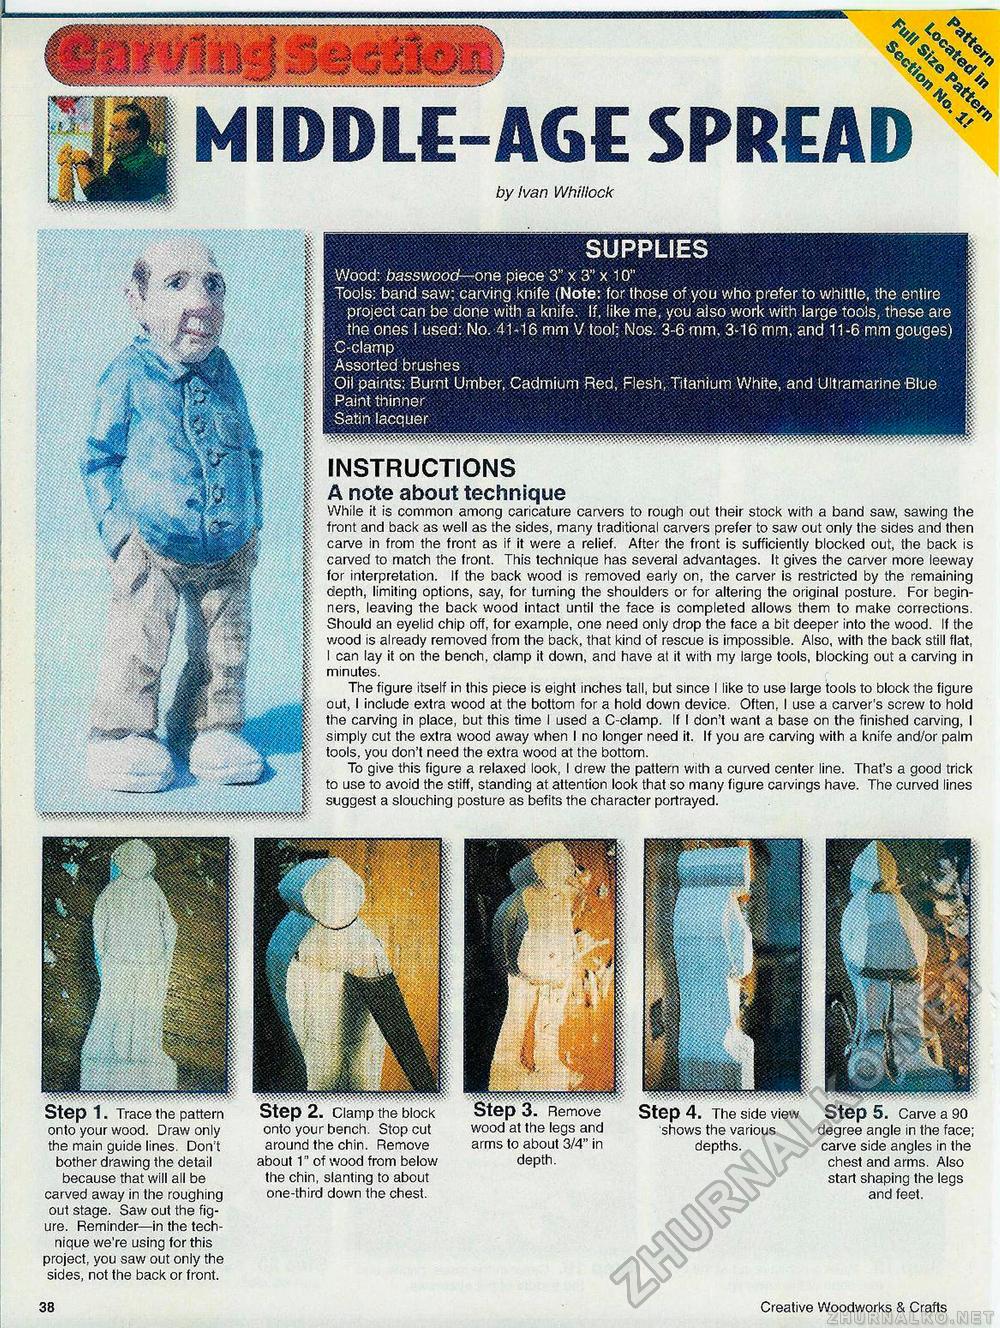
1 HIDDLE-AGE SPREAD by Ivan Whillock SUPPLIES Wood: basswood—one piece 3" x 3" x 10" Tools: band saw; carving knife (Note: for those of you who prefer to whittle, the entire project can be done with a knife. If, like me, you also work with large tools, these are . the ones I used: No. 41-16 mm V fool; Nos. 3-6 mm, 3-16 mm, and 11-6 mm gouges) C-clamp Assorted brushes Oil paints; Burnt Umber, Cadmium Red, Flesh, Titanium White, and Ultramarine Blue Paint thinner Satin lacquer onto your wood. Draw only the main guide lines. Don't bother drawing the detail because that will all be carved away in the roughing out stage. Saw out the figure. Reminder—in the technique we're using for this project, you saw out only the sides, not the back or front. INSTRUCTIONS A note about technique While it is common among caricature carvers to rough out their stock with a band saw, sawing the front and back as well as the sides, many traditional carvers prefer to saw out only the sides and then caive in from the front as if it were a relief. After the front is sufficiently blocked out, the back is carved to match the front. This technique has several advantages. It gives the carver more leeway for interpretation. If the back wood is removed early on, the carver is restricted by the remaining depth, limiting options, say, for turning the shoulders or for altering the original posture. For beginners, leaving the back wood intact until the face is completed allows them to make corrections. Should an eyelid chip off, for example, one need only drop the face a bit deeper into the wood. If the wood is already removed from the back, that kind of rescue is impossible. Also, with the back still flat, I can lay it on the bench, clamp it down, and have at it with my large tools, blocking out a carving in minutes. The figure itself in this piece is eight inches tall, but since I like to use large tools to block the figure out, I include extra wood at the bottom for a hold down device. Often, I use a carver's screw to hold the carving in place, but this time I used a C-clamp. If I don't want a base on the finished carving, I simply cut the extra wood away when I no longer need it. If you are carving with a knife and/or palm tools, you don't need the extra wood at the bottom. To give this figure a relaxed look, I drew the pattern with a curved center line. That's a good trick to use to avoid the stiff, standing at attention look that so many figure carvings have. The curved lines suggest a slouching posture as befits the character portrayed. onto your bench. Stop cut around the chin. Remove about 1" of wood from below the chin, slanting to about one-third down the chest. wuuu at the legs and arms to about 3/4" in depth. Step 5. Carve a 90 degree angle in the face; carve side angles in the chest and arms. Also start shaping the legs and feet. The side view the various depths. 38 Creative Woodworks & Crafts |


