Creative Woodworks & crafts 2001-03, страница 42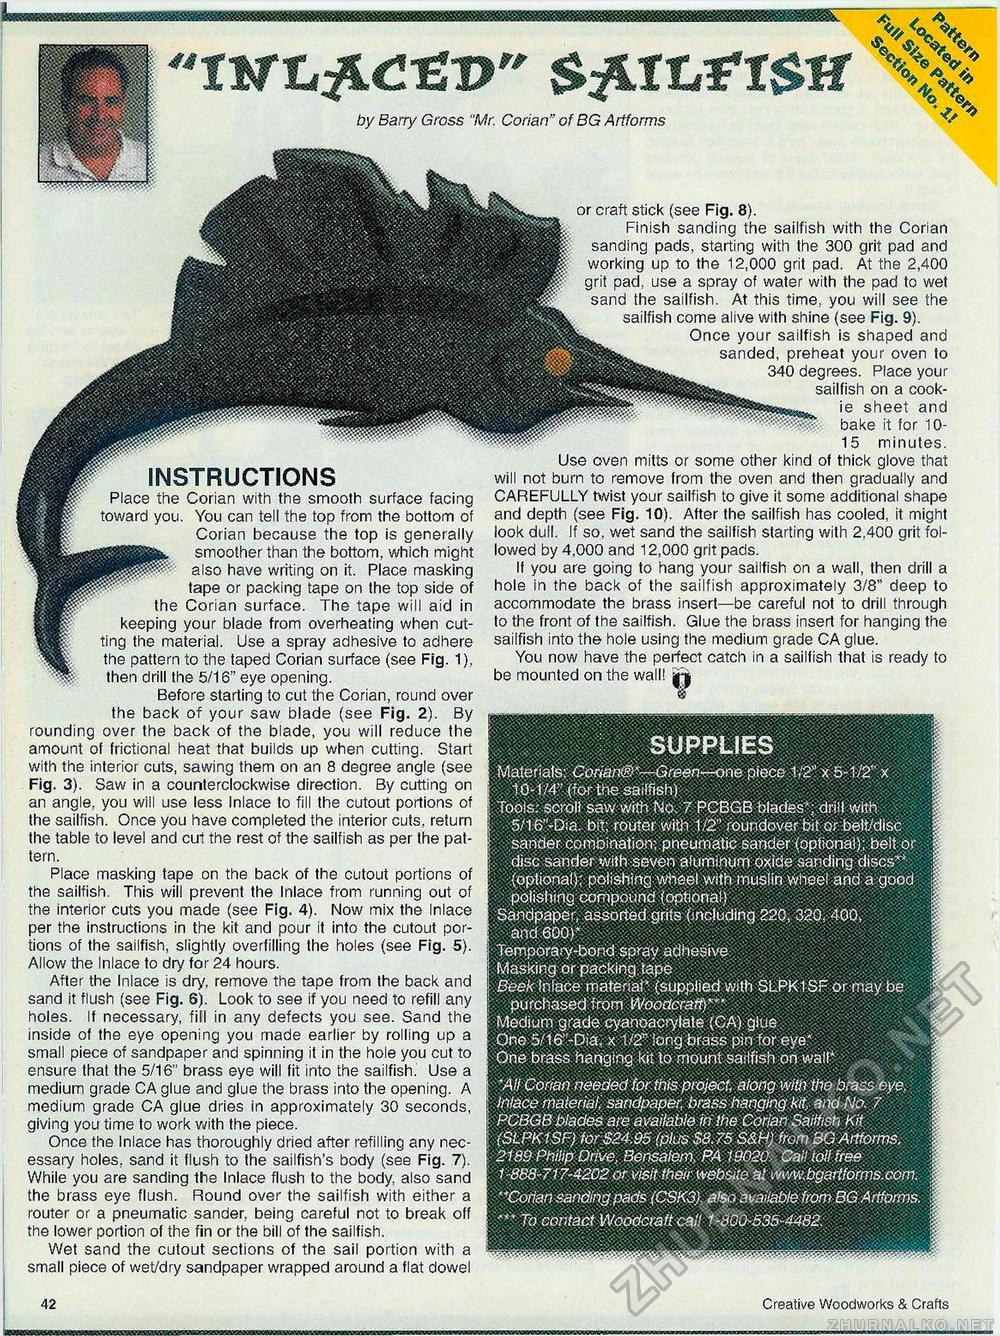
SUPPLIES Materials: Coriani?/'—Green—one piece 1/2" x 5-1/2" x 10-1/4" (for the saiffish) Tools: scroll saw with No, 7 PCBGB blades4; drill with 5/16' -D:a. bit; router with 1/2" roundover bit or belt/disc sander combination: pneumatic sander (optional): belt or . disc sander with seven aluminum oxide sanding discs*' ■ (optional); polishing wheel with muslin vvheei and a good polishing compound (optional) Sandpaper, assorted grits (including 220, 320, 400, and 600)* Temporary-bond spray adhesive Masking or packing tape Beek Inlace material" (supplied with SLPK1SF or may be purchased from Woodcraft)'" Medium grade cyanoacrylate (CA) glue One 5/16-Dia. x 1/2" long brass pin for eye* One brass hanging kit to mount .sai lfish on wall* 'AH Corian needed for this project, along with the brass eye. inlacc material, sandpaper, brass hanging ktf: and No. 7 PCBGB blades are available in the Corian Sailfish Kit (SLPK1SF) for$24.95 (plus$8.75 S&H) fromBGArtforms. 2189 Philip Drive, Bensalom. PA 19020 Call toll free 1 -888-717-4202 or visit their website a! www.bgat1forms.com. "Corian sanding pads (CSK3), also available from BGArtforms. to contact Woodcraft call 1-8Q0-535-4482. ' INSTRUCTIONS Place the Corian with the smooth surface facing toward you. You can tell the top from the bottom of Corian because the top is generally smoother than the bottom, which might also have writing on it. Place masking tape or packing tape on the top side of the Corian surface. The tape will aid in keeping your blade from overheating when cutting the material. Use a spray adhesive to adhere the pattern to the taped Corian surface (see Fig. 1), then drill the 5/16" eye opening. Before starting to cut the Corian, round over the back of your saw blade (see Fig. 2). By rounding over the back of the blade, you will reduce the amount of frictional heat that builds up when cutting. Start with the interior cuts, sawing them on an 8 degree angle (see Fig. 3). Saw in a counterclockwise direction. By cutting on an angle, you will use less Inlace lo fill the cutout portions of the sailfish. Once you have completed the interior cuts, return the table to level and cul the rest of the sailfish as per the pattern. Place masking tape on the back of the cutout portions of the sailfish. This will prevent the Inlace from running out of the interior cuts you made (see Fig. 4). Now mix the Inlace per the instructions in the kit and pour it into the cutout portions of the sailfish, slightly overfilling the holes (see Fig. 5). Allow the Inlace lo dry for 24 hours. After the Inlace is dry, remove the tape from the back and sand it flush (see Fig. 6). Look to see if you need to refill any holes. If necessary, fill in any defects you see. Sand the inside of the eye opening you made earlier by rolling up a small piece of sandpaper and spinning it in the hole you cut to ensure that the 5/16" brass eye will fit into the sailfish. Use a medium grade CA glue and glue the brass into the opening. A medium grade CA glue dries in approximately 30 seconds, giving you time to work with the piece. Once the Inlace has thoroughly dried after refilling any necessary holes, sand it flush to the sailfish's body (see Fig. 7). While you are sanding the Inlace flush to the body, also sand the brass eye flush. Round over the sailfish with either a router or a pneumatic sander, being careful not to break off the lower portion of the fin or the bill of the sailfish. Wet sand the cutout sections of the sail portion with a small piece of wet/dry sandpaper wrapped around a flat dowel 42 by Barry Gross "Mr. Corian" of BG Artforms or craft stick (see Fig. 8). Finish sanding the sailfish with the Corian sanding pads, starting with the 300 grit pad and working up to the 12,000 grit pad. At the 2,400 grit pad, use a spray of water with the pad to wet sand the sailfish. At this time, you will see the sailfish come alive wilh shine (see Fig. 9). Once your sailfish is shaped and sanded, preheat your oven lo 340 degrees. Place your sailfish on a cookie sheet and bake it for 10-15 minutes. Use oven mitts or some other kind of thick glove that will not burn to remove from the oven and then gradually and CAREFULLY twist your sailfish to give it some additional shape and depth (see Fig. 10). After the sailfish has cooled, it might look dull. If so, wet sand the sailfish starting wilh 2,400 grit followed by 4,000 and 12,000 grit pads. If you are going to hang your sailfish on a wall, then drill a hole in the back of the sailfish approximately 3/8" deep to accommodate the brass insert—be careful not to drill through to the front of the sailfish. Glue the brass insert for hanging the sailfish into the hole using the medium grade CA glue. You now have the perfect catch in a sailfish that is ready to be mounted on the wall! ri Creative Woodworks & Crafts |


