Creative Woodworks & crafts 2001-04, страница 28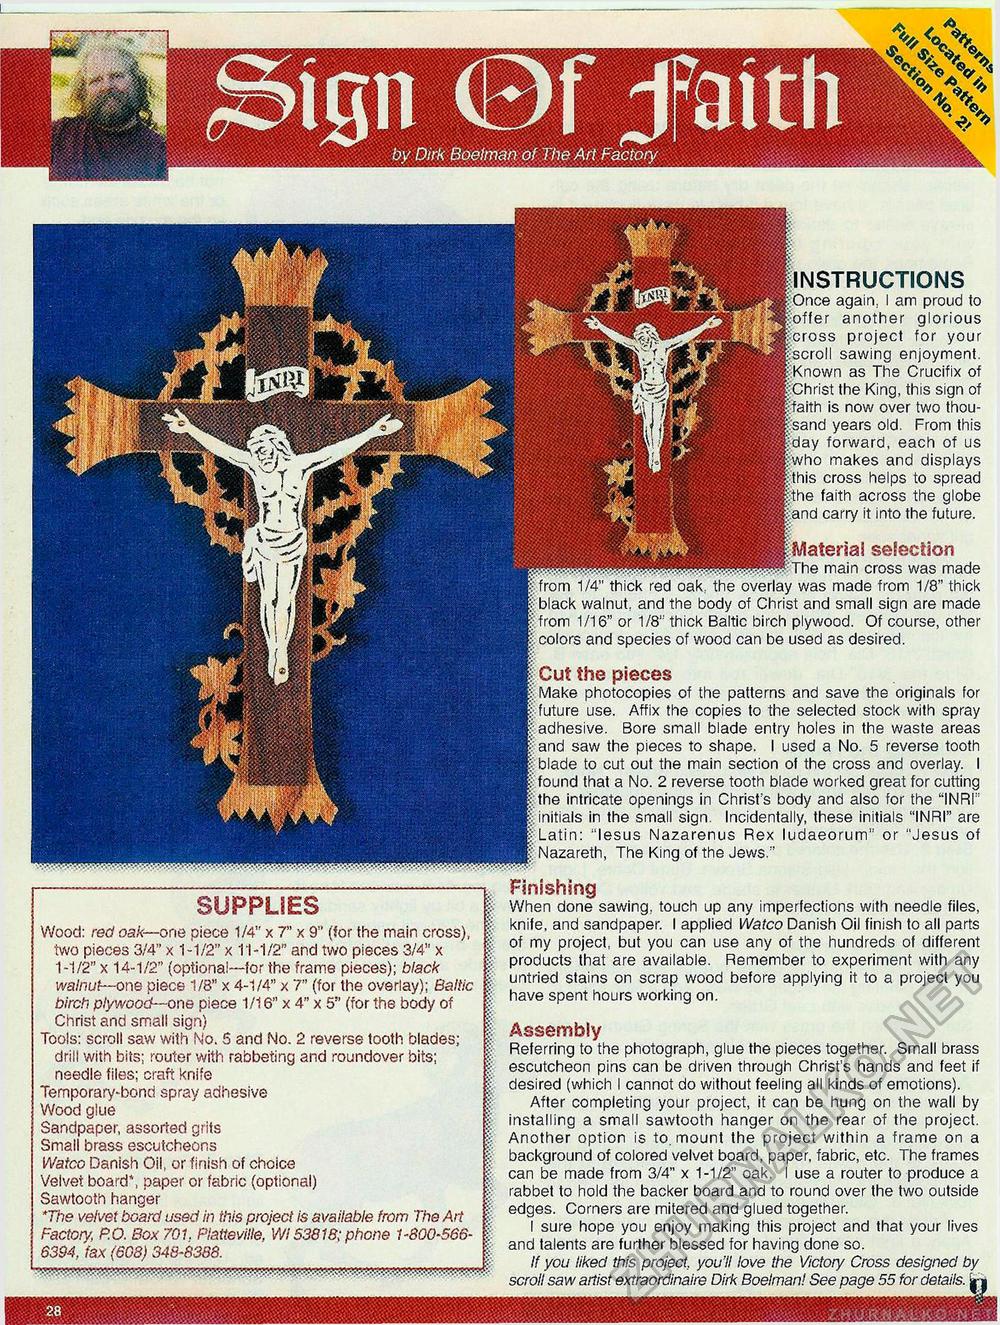
SUPPLIES I Wood: red oak—one piece 1/4" x 7" x 9" (for the main cross), % two pieces 3/4" x 1-1/2" x 11-1/2" and two pieces 3/4" x I 1-1/2" x 14-1/2" (optional—for the frame pieces); black i walnut—one piece 1/8" x 4-1/4" x 7" (for the overlay); Baltic | birch plywood— one piece 1/16" x 4" x 5" (for the body of | Christ and small sign) | Tools: scroll saw with No, 5 and No. 2 reverse tooth blades; | drill with bits; router with rabbeting and roundover bits; | needle files; craft knife i Temporary-bond spray adhesive | Wood glue | Sandpaper, assorted grits | Small brass escutcheons f Watco Danish Oil, or finish of choice £ Velvet board*, paper or fabric (optional) | Sawtooth hanger I "The velvet board used in this project is available from The Art i Factory, P.O. Sox 701. Platieviiie. Wi 53818; phone 1-800-566- i. 6394, fax (608) 348-8388. I Finishing When done sawing, touch up any imperfections with needle files, knife, and sandpaper. I applied Watco Danish Oil finish to all parts of my project, but you can use any of the hundreds of different products that are available. Remember to experiment with any untried stains on scrap wood before applying it to a project you have spent hours working on. Assembly Referring to the photograph, glue the pieces together. Small brass escutcheon pins can be driven through Christ's hands and feet if desired (which I cannot do without feeling all kinds of emotions). After completing your project, it can be hung on the wall by installing a small sawtooth hanger on the rear of the project. Another option is to. mount the project within a frame on a background of colored velvet board, paper, fabric, etc. The frames can be made from 3/4" x 1-1/2" oak. I use a router to produce a rabbet to hold the backer board and to round over the two outside edges. Corners are mitered and glued together. I sure hope you enjoy making this project and that your lives and talents are further blessed for having done so. If you liked this project, you'll love the Victory Cross designed by scroll saw artist extraordinaire Dirk Boelman! See page 55 for details. Materia! selection ■The main cross was made : from 1/4" thick red oak, the overlay was made from 1/8" thick If black walnut, and the body of Christ and small sign are made If from 1/16" or 1/8" thick Baltic birch plywood. Of course, other £ colors and species of wood can be used as desired. Ij Cut the pieces Make photocopies of the patterns and save the originals for future use. Affix the copies to the selected stock with spray • adhesive. Bore small blade entry holes in the waste areas and saw the pieces to shape. I used a No. 5 reverse tooth blade to cut out the main section of the cross and overlay. I found that a No. 2 reverse tooth blade worked great for cutting li the intricate openings in Christ's body and also for the "INRI" H initials in the small sign. Incidentally, these initials "INRI" are Latin: "lesus Nazarenus Rex ludaeorum" or "Jesus of I; Nazareth, The King of the Jews." instructions Once again, I am proud to offer another glorious cross project for your scroll sawing enjoyment. Known as The Crucifix of Christ the King, this sign of faith is now over two thousand years old. From this day forward, each of us who makes and displays this cross helps to spread the faith across the globe and carry it into the future. 28 |


