Creative Woodworks & crafts 2001-06, страница 50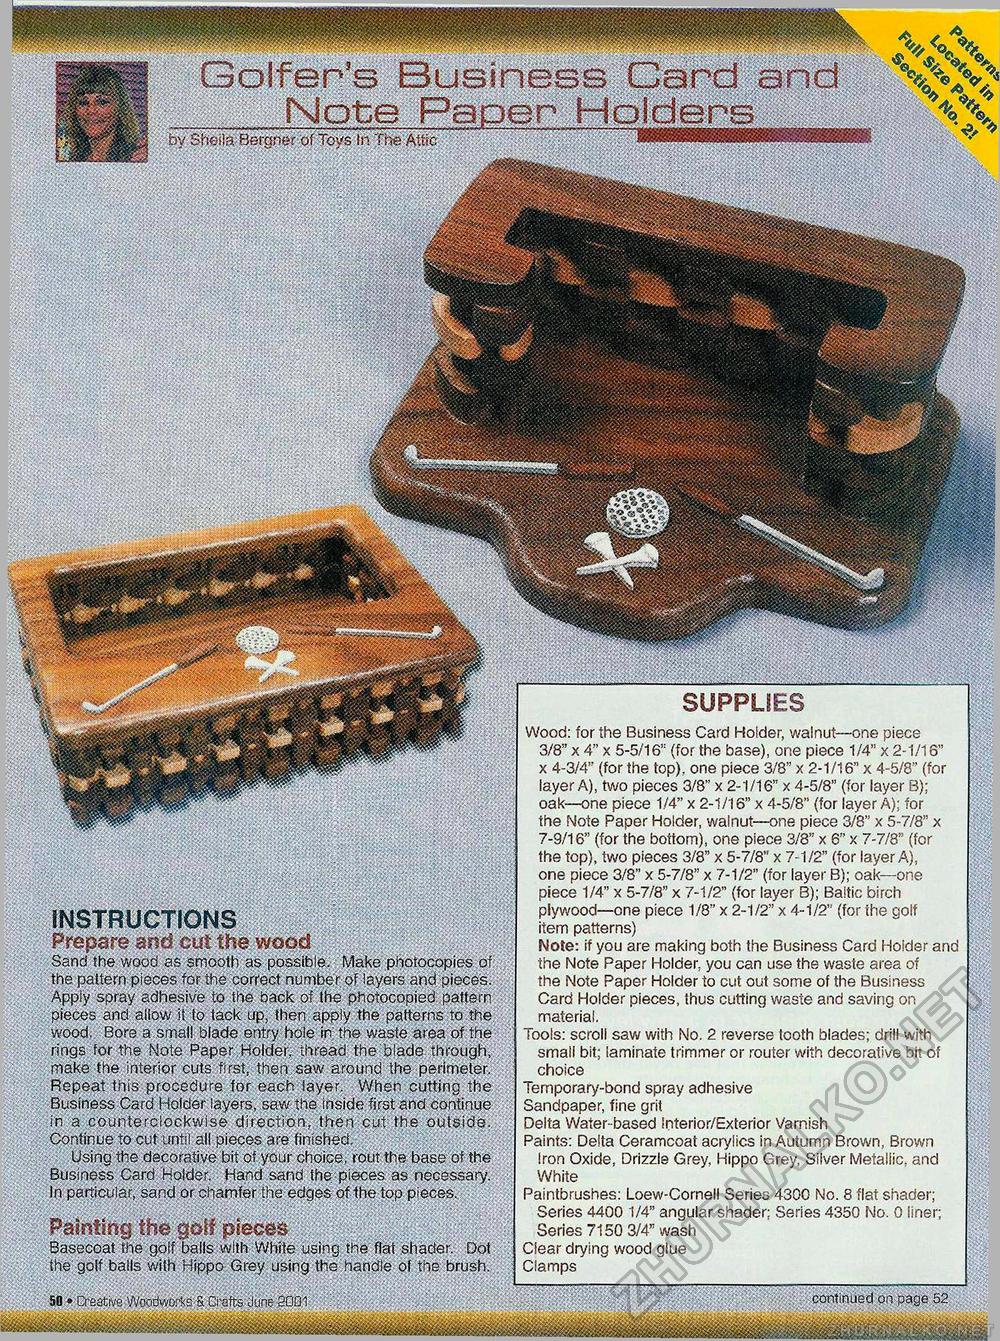
by Sbefla Bergner of Toys In The Attfe' SUPPLIES Wood: for the Business Card Holder, walnut—one piece 3/8" x 4" x 5-5/16" (for the base), one piece 1/4" x 2-1/16" x 4-3/4" (for the top), one piece 3/8" x 2-1/16" x 4-5/8" (for layer A), two pieces 3/8" x 2-1/16" x 4-5/8" (for layer B); oak—one piece 1/4" x 2-1/16" x 4-5/8" (for layer A); for the Note Paper Holder, walnut—one piece 3/8" x 5-7/8" x 7-9/16" (for the bottom), one piece 3/8" x 6" x 7-7/8" (for the top), two pieces 3/8" x 5-7/8" x 7-1/2" (for layer A), one piece 3/8" x 5-7/8" x 7-1/2" (for layer B); oak—one piece 1/4" x 5-7/8" x 7-1/2" (for layer B); Baltic birch plywood—one piece 1/8" x 2-1/2" x 4-1/2" (for the golf item patterns) Note: if you are making both the Business Card Holder and the Note Paper Holder, you can use the waste area of the Note Paper Holder to cut out some of the Business Card Holder pieces, thus cutting waste and saving on material. Tools: scroll saw with No. 2 reverse tooth blades; drill with small bit; laminate trimmer or router with decorative bit of choice Temporary-bond spray adhesive Sandpaper, fine grit Delta Water-based interior/Exterior Varnish Paints: Delta Ceramcoat acrylics in Autumn Brown, Brown Iron Oxide, Drizzle Grey. Hippo Grey, Silver Metallic, and White Paintbrushes: Loew-Cornell Series 4300 No. 8 flat shader; Series 4400 1/4" angular shader; Series 4350 No. 0 liner; Series 7150 3/4" wash Clear drying wood glue Clamps INSTRUCTIONS Prepare and cut the wood Sand the wood as smooth as possible. Make photocopies of the pattern pieces for the correct number of layers and pieces. Apply spray adhesive to the back of the photocopied pattern pieces and allow it to tack up, then apply the patterns to the. wood. Bore a small blade entry hole in the waste area of the rings for the Note Paper Holder, thread the blade through, make the interior cuts first, then saw around the perimeter. Repeat this procedure for each layer. When cutting, the Business Card Holder layers, saw .the inside first and continue in a counterclockwise direction, then cut the outside. Continue to cut until all pieces are finished. Using the decorative bit of your choice, rout the base of the Business Card Holder. Hand sand the pieces as necessary. In particular, sand or chamfer the edges of the top pieces. PaintingJ&tf Basecoat the golf; bails with White using the flat shader. Dot the golf bails with Hippo Grey using the handle of the brush. 50 * Creative Woodworks & Crafts June 2001 continued on page 52 |


