Creative Woodworks & crafts 2001-06, страница 52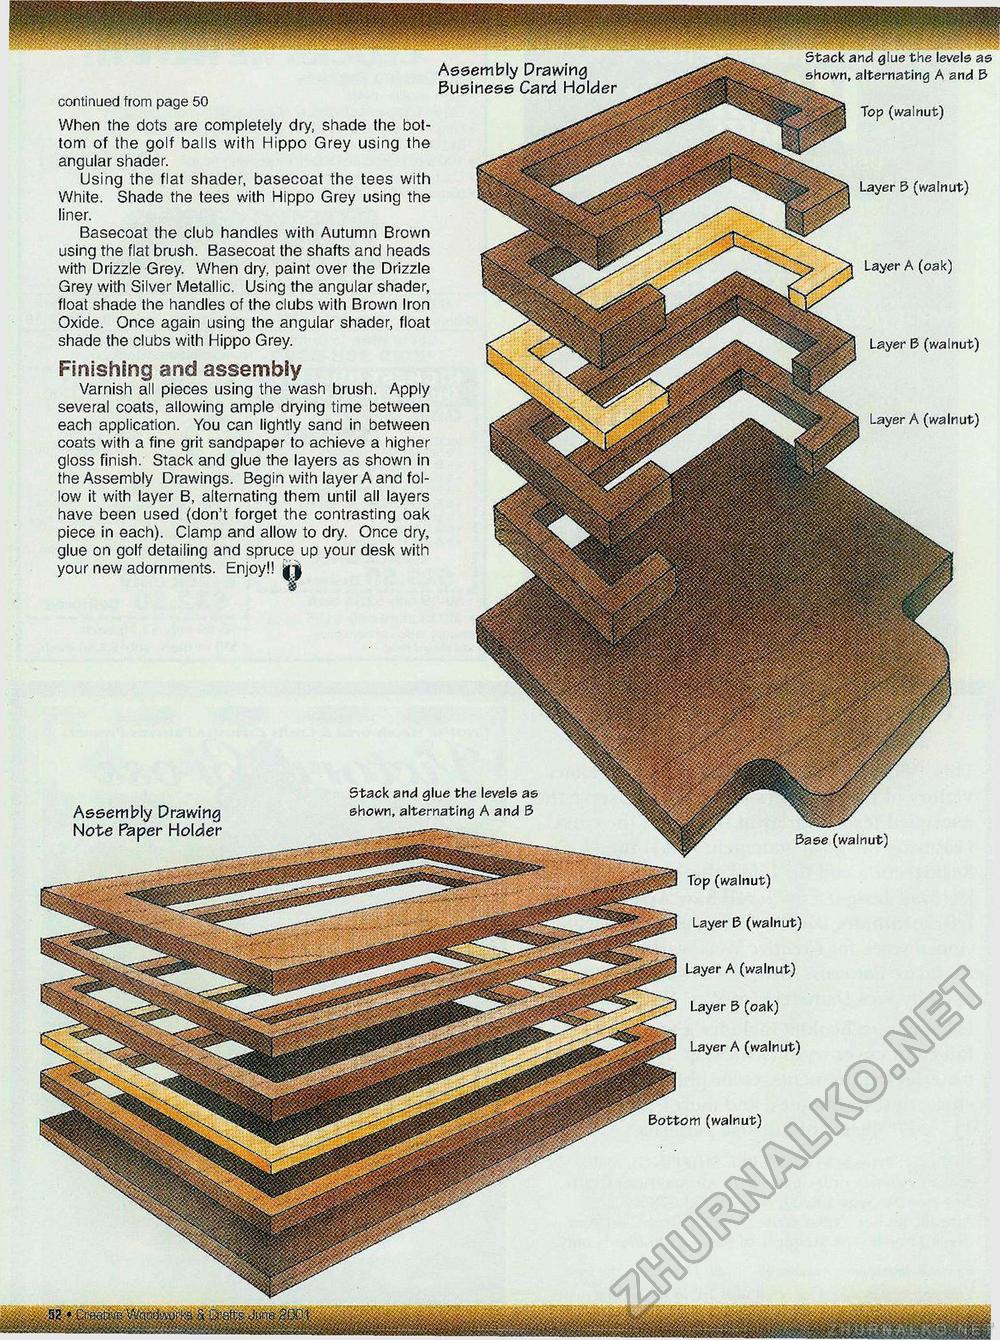
Layer A (walnut) Layer B(oak) Layer A (walnut) continued from page 50 When the dots are completely dry, shade the bottom of the golf balls with Hippo Grey using the angular shader. Using the flat shader, basecoat the tees with White. Shade the tees with Hippo Grey using the liner. Basecoat the club handles with Autumn Brown using the flat brush. Basecoat the shafts and heads with Drizzle Grey. When dry, paint over the Drizzle Grey with Silver Metallic. Using the angular shader, float shade the handles of the clubs with Brown Iron Oxide. Once again using the angular shader, float shade the clubs with Hippo Grey. Finishing and assembly Varnish all pieces using the wash brush. Apply several coats, allowing ample drying time between each application. You can lightly sand in between coats with a fine grit sandpaper to achieve a higher gloss finish. Stack and glue the layers as shown in the Assembly Drawings. Begin with layer A and follow it with layer B, alternating them until all layers have been used (don't forget the contrasting oak piece in each). Clamp and allow to dry. Once dry, glue on golf detailing and spruce up your desk with your new adornments. Enjoy!! Layer 5 (walnut) Layer A (oak) Layer 6 (walnut) Layer A (walnut) Assembly Drawing Note Paper Holder Base (walnut) Top (walnut) Layer B (walnut) Bottom (walnut) Assembly Drawing Business Card Holder Stack and glue the levels as shown, alternating A and B as shown, alternating A and B Top (walnut) |


