Creative Woodworks & crafts 2001-06, страница 54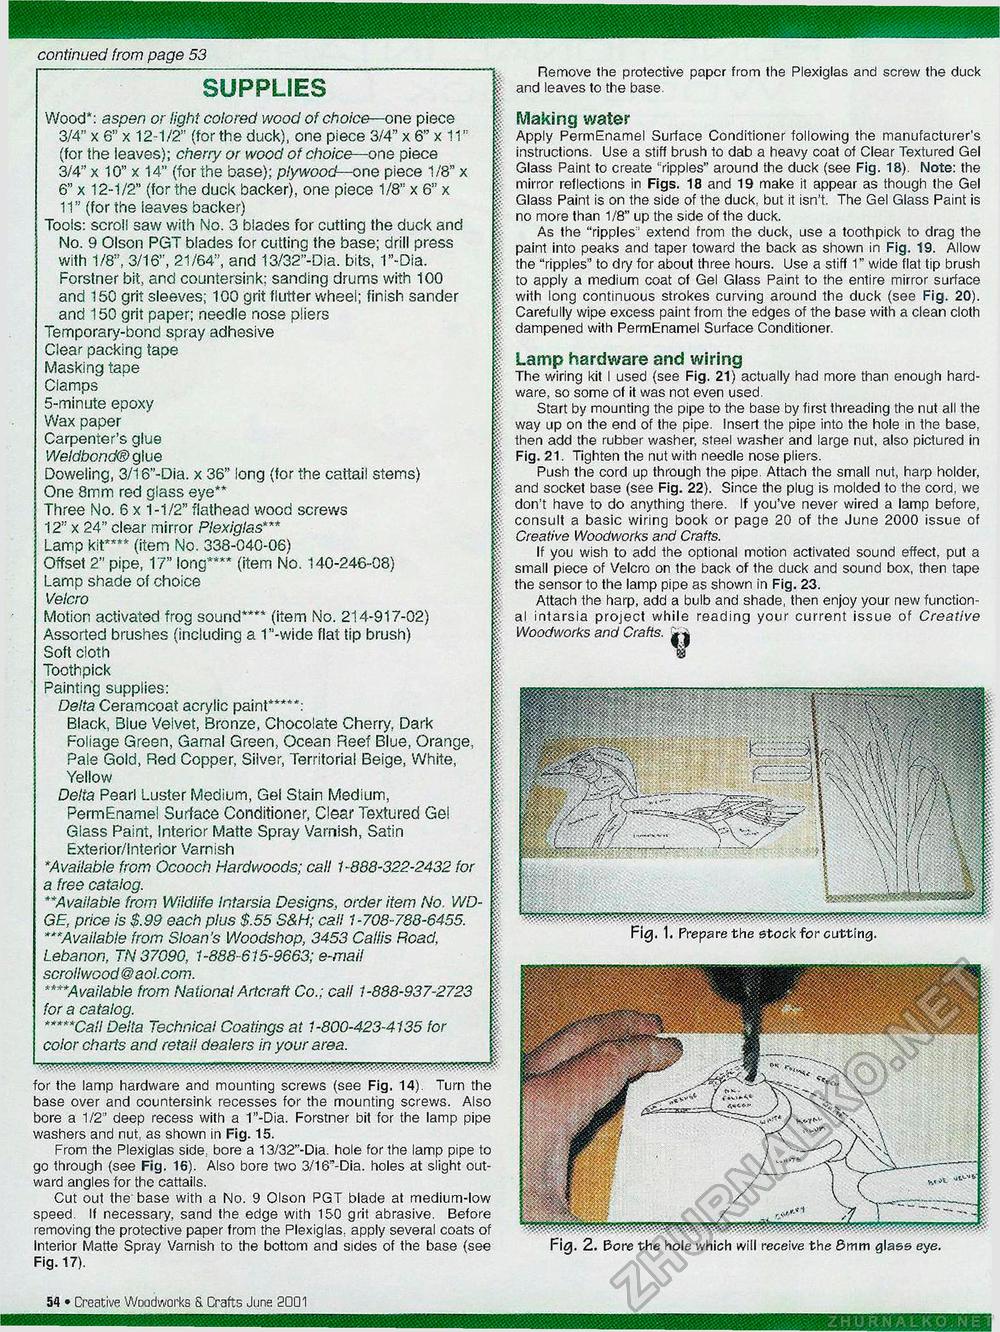
continued from page 53 _ SUPPLIES | Wood": aspen or light colored wood of choice—one piece 3/4" x 6" x 12-1/2" (for the duck), one piece 3/4" x 6" x 11" | (for the leaves); cherry or wood of choice—one piece 3/4" x 10" x 14" (for the base); plywood—one piece 1/8" x % 6" x 12-1/2" (forthe duck backer), one piece 1/8" x 6" x 11" (for the leaves backer) | Tools: scroll saw with No. 3 blades for cutting the duck and ft No. 9 Olson PGT blades tor cutting the base; drill press with 1/8", 3/16", 21/64", and 13/32"-Dia. bits, 1"-Dia. Forstner bit, and countersink: sanding drums with 100 and 150 grit sleeves; 100 grit flutter wheel; finish sander and 150 grit paper; needle nose pliers Temporary-bond spray adhesive I Clear packing tape Masking tape | Clamps ft 5-minute epoxy % Wax paper | Carpenter's glue | Weldbond® glue ft Doweling, 3/16"-Dia. x 36" long (for the cattail stems) One 8mm red glass eye** | Three No. 6 x 1-1/2" flathead wood screws 12" x 24" clear mirror Plexiglas*** I Lamp kit**** (item No. 338-040-06) | Offset 2" pipe, 17" long**** (item No. 140-246-08) Lamp shade of choice | Velcro | Motion activated frog sound**** (item No. 214-917-02) | Assorted brushes (including a 1"-wide flat tip brush) Soft cloth Toothpick Painting supplies: | Delta Ceramcoat acrylic paint*****: | Black, Blue Velvet, Bronze, Chocolate Cherry, Dark K Foliage Green, Gamal Green, Ocean Reef Blue, Orange, ft Pale Gold, Red Copper, Silver, Territorial Beige, White, Yellow ji Delta Pearl Luster Medium, Gel Stain Medium, PermEnamel Surface Conditioner, Clear Textured Gel Glass Paint, Interior Matte Spray Varnish, Satin Exterior/Interior Varnish % 'Available from Ocooch Hardwoods; call 1-888-322-2432 for | a free catalog. **Available from Wildlife Intarsia Designs, order item No. WD- > GE, price is $.99 each plus $.55 S&H; call 1-708-788-6455. I *"Available from Sloan's Woodshop, 3453 Callis Road, Lebanon, TN 37090, 1-888-615-9663; e-mail scrollwood@aol.com. ft """Available from National Artcraft Co.; call 1-888-937-2723 | for a catalog. ?• *****Call Delta Technical Coatings at 1-800-423-4135 for color charts and retaii dealers in your area. for the lamp hardware and mounting screws (see Fig. 14). Turn the base over and countersink recesses for the mounting screws. Also bore a 1/2" deep recess with a 1"-Dia. Forstner bit for the lamp pipe washers and nut, as shown in Fig. 15. From the Plexiglas side: bore a 13/32"-Dia. hole for the lamp pipe to go through (see Fig. 16). Also bore two 3/16"-Dia. holes at slight outward angles for the cattails. Cut out the'base with a No. 9 Olson PGT blade at medium-low speed- If necessary, sand the edge with 15-0 grit abrasive. Before removing the protective paper from the Plexiglas, apply several coats of Interior Matte Spray Varnish to the bottom and sides of the base (see Fig. 17). Remove the protective paper from the Plexiglas and screw the duck and leaves to the base. Making water Apply PermEnamel Surface Conditioner following the manufacturer's instructions. Use a stiff brush to dab a heavy coat of Clear Textured Gel Glass Paint to create "ripples" around the duck (see Fig. 18). Note: the mirror reflections in Figs. 18 and 19 make it appear as though the Gel Glass Paint is on the side of the duck, but it isn't. The Gel Glass Paint is no more than 1/8" up the side of the duck. As the "ripples" extend from the duck, use a toothpick to drag the paint into peaks and taper toward the back as shown in Fig. 19. Allow the "ripples" to diy for about three hours. Use a stiff 1" wide flat tip brush to apply a medium coat of Gel Glass Paint to the entire mirror surface with long continuous strokes curving around the duck (see Fig. 20). Carefully wipe excess paint from the edges of the base with a clean cloth dampened with PermEnamel Surface Conditioner. Lamp hardware arid wiring The wiring kit I used (see Fig. 21) actually had more than enough hardware, so some of it was not even used. Start by mounting the pipe to the base by first threading the nut all the way up on the end of the pipe. Insert the pipe into the hole in the base, then add the rubber washer, steel washer and large nut. also pictured in Fig. 21. Tighten the nut with needle nose pliers. Push the cord up through the pipe Attach the small nut, harp holder, and socket base (see Fig. 22). Since the plug is molded to the cord, we don't have to do anything there. If you've never wired a lamp before, consult a basic wiring book or page 20 of the June 2000 issue of Creative Woodworks and Crafts. If you wish to add the optional motion activated sound effect, put a small piece of Velcro on the back of the duck and sound box, then tape the sensor to the lamp pipe as shown in Fig. 23. Attach the harp, add a bulb and shade, then enjoy your new functional intarsia project while reading your current issue of Creative Woodworks and Crafts. ** Fig. 1. Prepare the stock for cutting, KM*-1' M >s>>>.WlW+fW. Fig. 2. Bo re the hole which will receive the 8mm glass eye, IB * Creative Woodworks S. drafts June 2001 |


