Creative Woodworks & crafts 2002-01, страница 39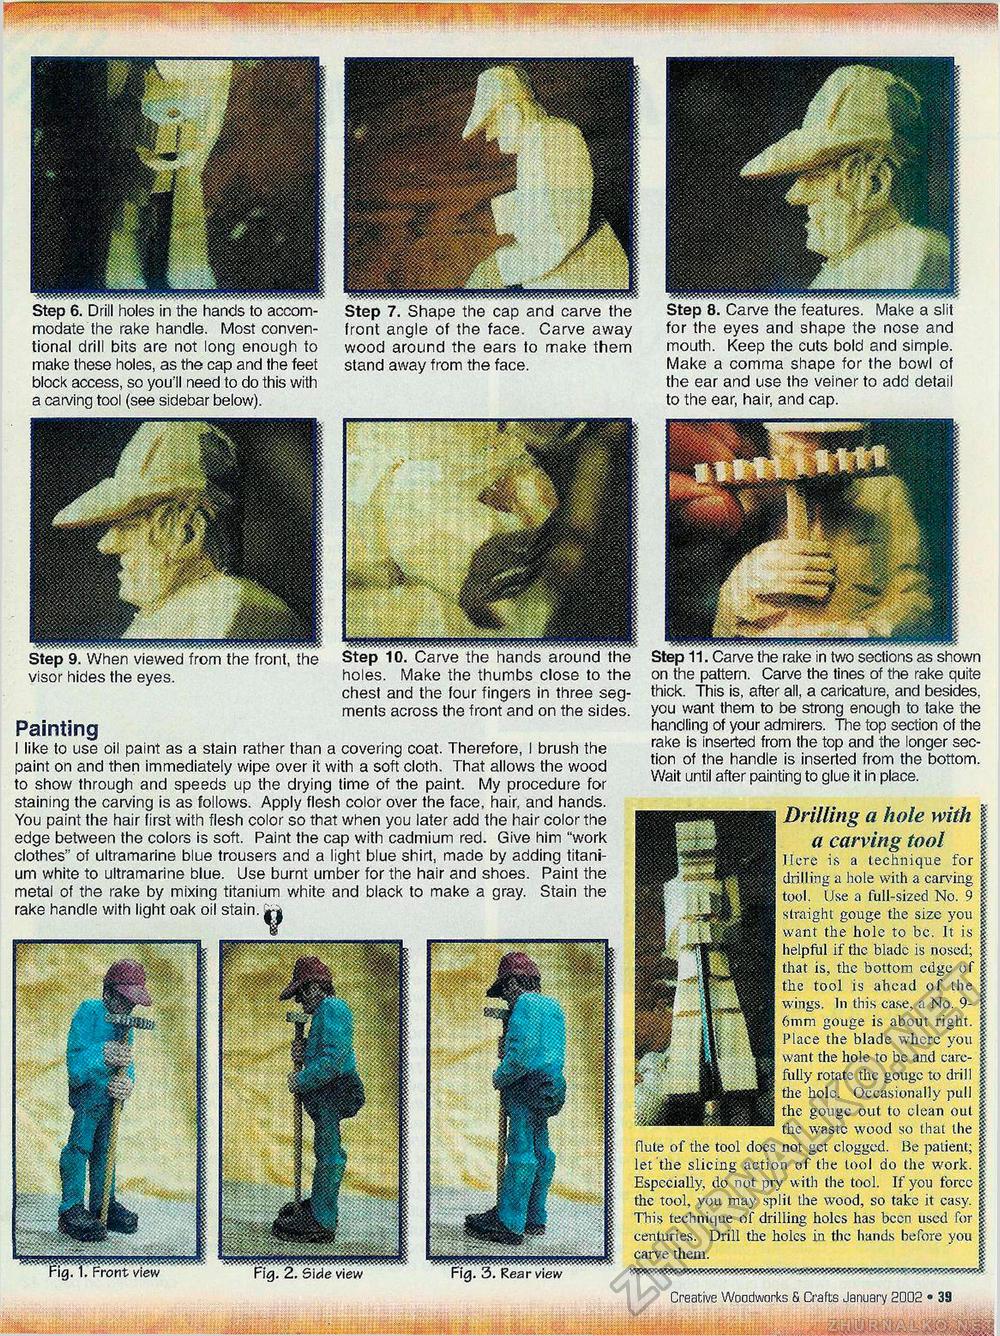
visor hides the eyes. holes. Make the thumbs close to the chest and the four fingers in three segments across the front and on the sides. Painting I like to use oil paint as a stain rather than a covering coat. Therefore, I brush the paint on and then immediately wipe over it with a soft cloth. That allows the wood to show through and speeds up the drying time of the paint. My procedure for staining the carving is as follows. Apply flesh color over the face, hair, and hands. You paint the hair first with flesh color so that when you later add the hair color the edge between the colors is soft. Paint the cap with cadmium red. Give him "work clothes" of ultramarine blue trousers and a light blue shirt, made by adding titanium white to ultramarine blue. Use burnt umber for the hair and shoes. Paint the metal of the rake by mixing titanium white and black to make a gray. Stain the rake handle with light oak oil stain. \ Step 11. Carve the rake in two sections as shown on the pattern. Carve the tines of the rake quite thick. This is, after all, a caricature, and besides, you want them to be strong enough to take the handling of your admirers. The top section of the rake is inserted from the top and the longer section of the handle is inserted from the bottom. Wait until after painting to glue it in place. jjjfs^l^ .-.-wijyftssfl^^^^B w in&s. In this case, a No. the waste" wood so that the flute of the tool does not get clogged. Be patient; let the slicing action of the tool do the work. Especially, do not pry with the tool. If you force the tool, you may split the wood, so take it easy f This technique of drilling holes has been used for | centuries. Drill the holes in the hands before you £ carve them. | Step 7. Shape the cap and carve the front angle of the face. Carve away wood around the ears to make them stand away from the face. Step 8. Carve the features. Make a slit for the eyes and shape the nose and mouth. Keep the cuts bold and simple. Make a comma shape for the bowl of the ear and use the veiner to add detail to the ear, hair, and cap. Step 6. Drill holes in the hands to accommodate the rake handle. Most conventional drill bits are not long enough to make these holes, as the cap and the feet block access, so you'll need to do this with a carving tool (see sidebar below). Creative Woodworks S. Crafts January 2002 • 39 |


