Creative Woodworks & crafts 2002-01, страница 42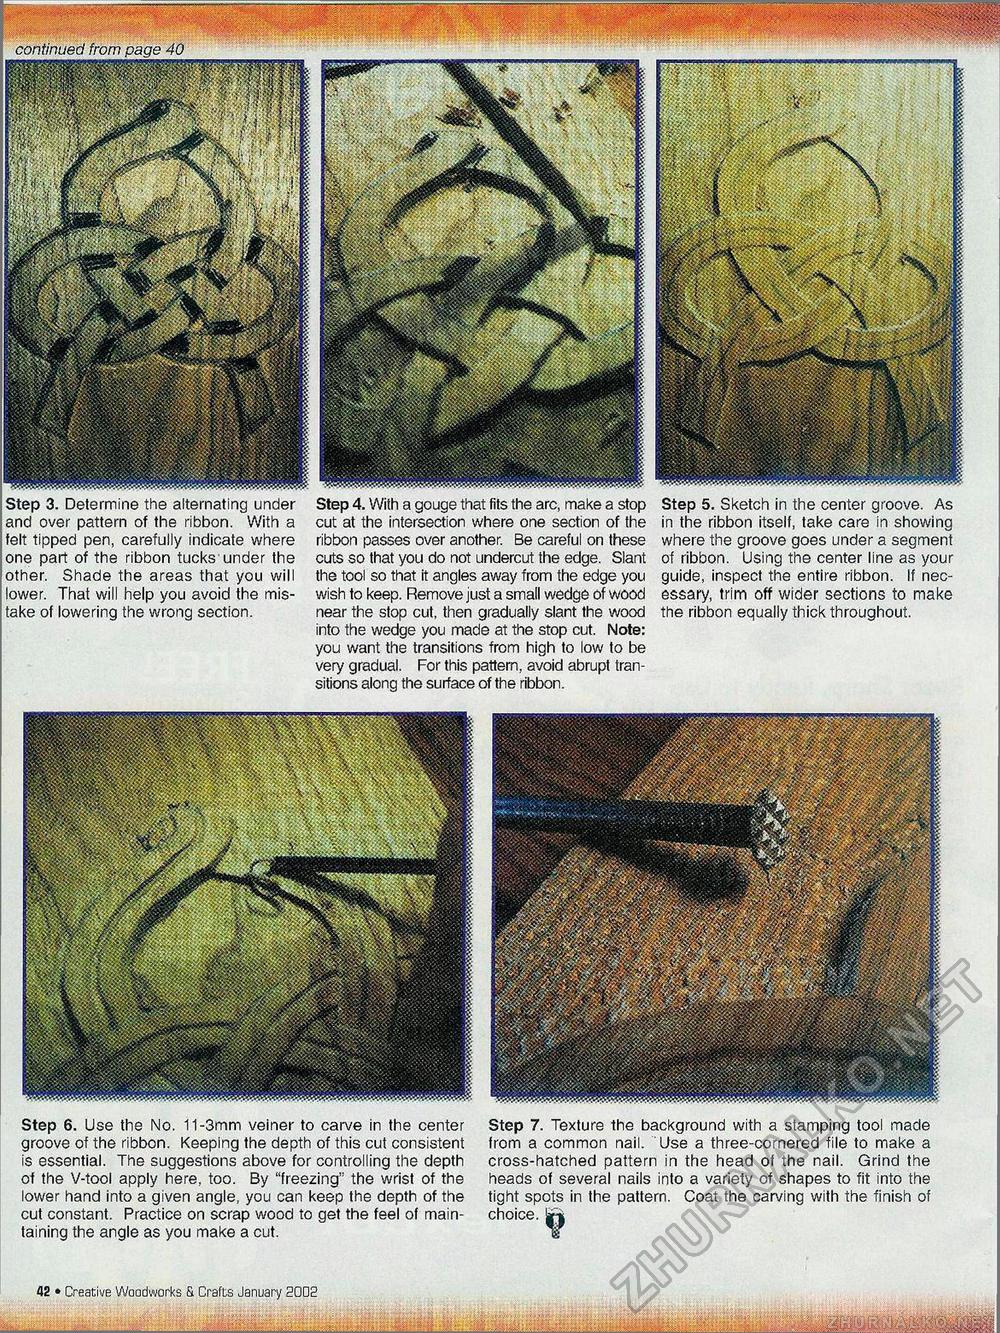
continued from page 40 Step 3. Determine the alternating under and over pattern of the ribbon. With a felt tipped pen, carefully indicate where one part of the ribbon tucks'under the other. Shade the areas that you will lower. That will help you avoid the mistake of lowering the wrong section. Step 4. With a gouge that fits the arc, make a stop cut at the intersection where one section of the ribbon passes over another. Be careful on these cuts so that you do not undercut the edge. Slant the tool so that it angles away from the edge you wish to keep. Remove just a small wedge of wood near the stop cut, then gradually slant the wood into the wedge you made at the stop cut. Note: you want the transitions from high to low to be very gradual. For this pattern, avoid abrupt transitions along the surface of the ribbon. Step 5. Sketch in the center groove. As in the ribbon itself, take care in showing where the groove goes under a segment of ribbon. Using the center line as your guide, inspect the entire ribbon. If necessary, trim off wider sections to make the ribbon equally thick throughout. Step 6. Use the No. 11-3mm veiner to carve in the center groove of the ribbon. Keeping the depth of this cut consistent is essential. The suggestions above for controlling the depth of the V-tool apply here, too. By "freezing" the wrist of the lower hand into a given angle, you can keep the depth of the cut constant. Practice on scrap wood to get the feel of maintaining the angle as you make a cut. Step 7. Texture the background with a stamping tool made from a common nail. Use a three-cornered file to make a cross-hatched pattern in the head of the nail. Grind the heads of several nails into a variety of shapes to fit into the tight spots in the pattern. Coat the carving with the finish of choice. |ri 42 • Creative Woodworks is Uratts January 2002 |


