Creative Woodworks & crafts 2002-01, страница 37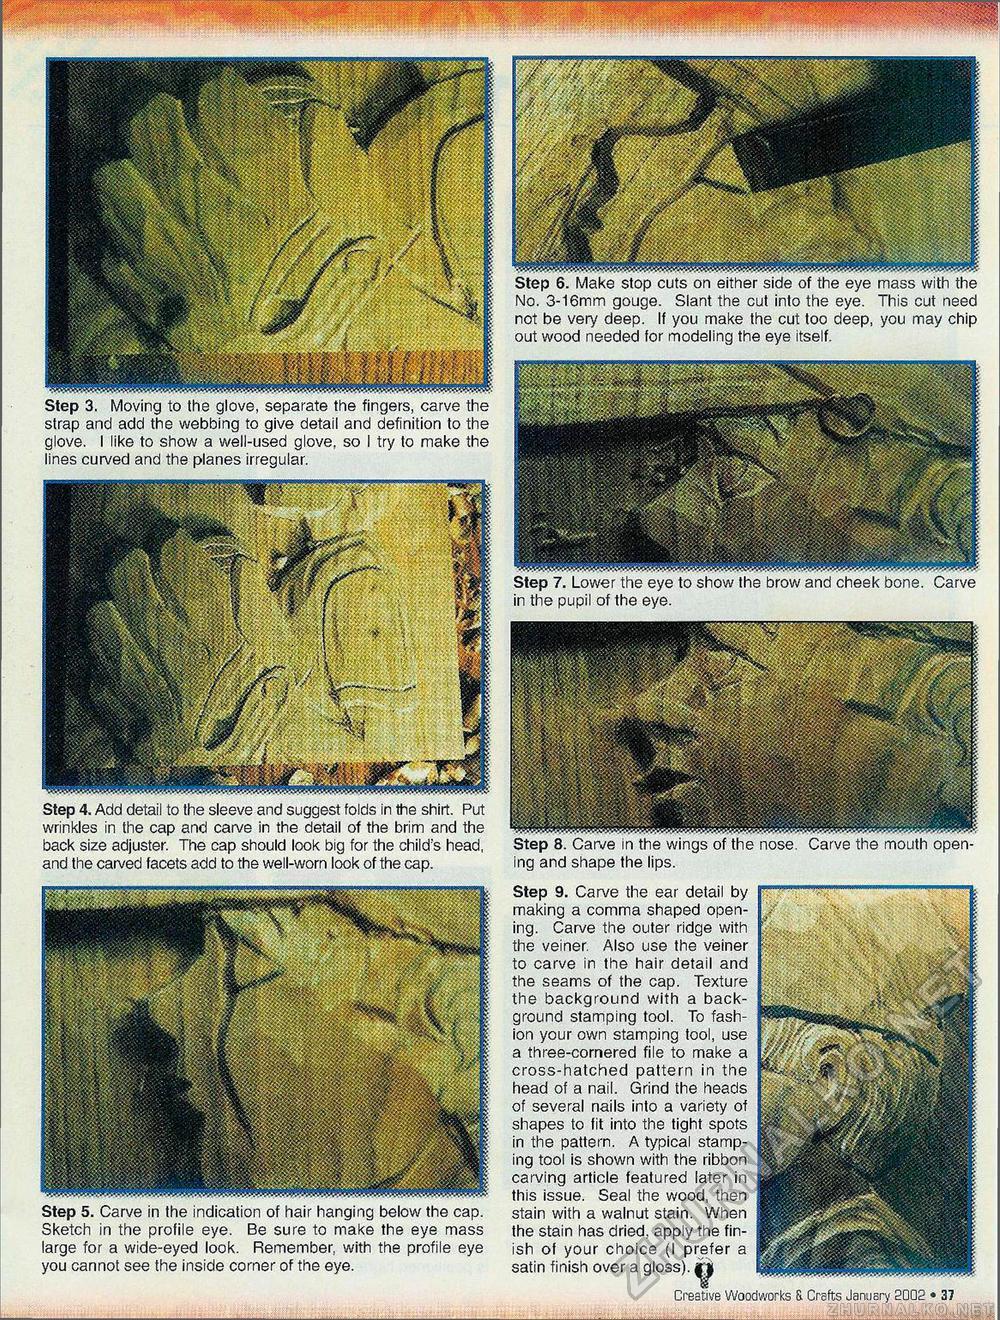
Step 7. Lower the eye to show the brow and cheek bone. Carve in the pupil of the eye. No. 3-16mm gouge. Slant the cut into the eye. This cut need not be very deep. If you make the cut too deep, you may chip out wood needed for modeling the eye itself. e nose. Carve the mouth open- Step 3. Moving to the glove, separate the fingers, carve the strap and add the webbing to give detail and definition to the glove. I like to show a well-used glove, so I try to make the lines curved and the planes irregular. Step 4. Add detail to the sleeve and suggest folds in the shirt. Put wrinkles in the cap and caive in the detail of the brim and the back size adjuster. The cap should look big for the child's head, and the carved facets add to the well-worn look of the cap. Step 5. Carve in the indication of hair hanging below the cap. Sketch in the profile eye. Be sure to make the eye mass large for a wide-eyed look. Remember, with the profile eye you cannot see the inside comer of the eye. Step 9. Carve the ear detail by making a comma shaped opening. Carve the outer ridge with the veiner. Also use the veiner to carve in the hair detail and the seams of the cap. Texture the background with a background stamping tool. To fashion your own stamping tool, use a three-cornered file to make a cross-hatched pattern in the head of a nail. Grind the heads of several nails into a variety of shapes to fit into the tight spots in the pattern. A typical stamping tool is shown with the ribbon carving article featured later in this issue. Seal the wood, then stain with a walnut stain. When the stain has dried, apply the finish of your choice (I prefer a satin finish over a gloss). ^ Creative Woodworks S. Crafts January 2002 • 37 |


