Creative Woodworks & crafts 2002-01, страница 36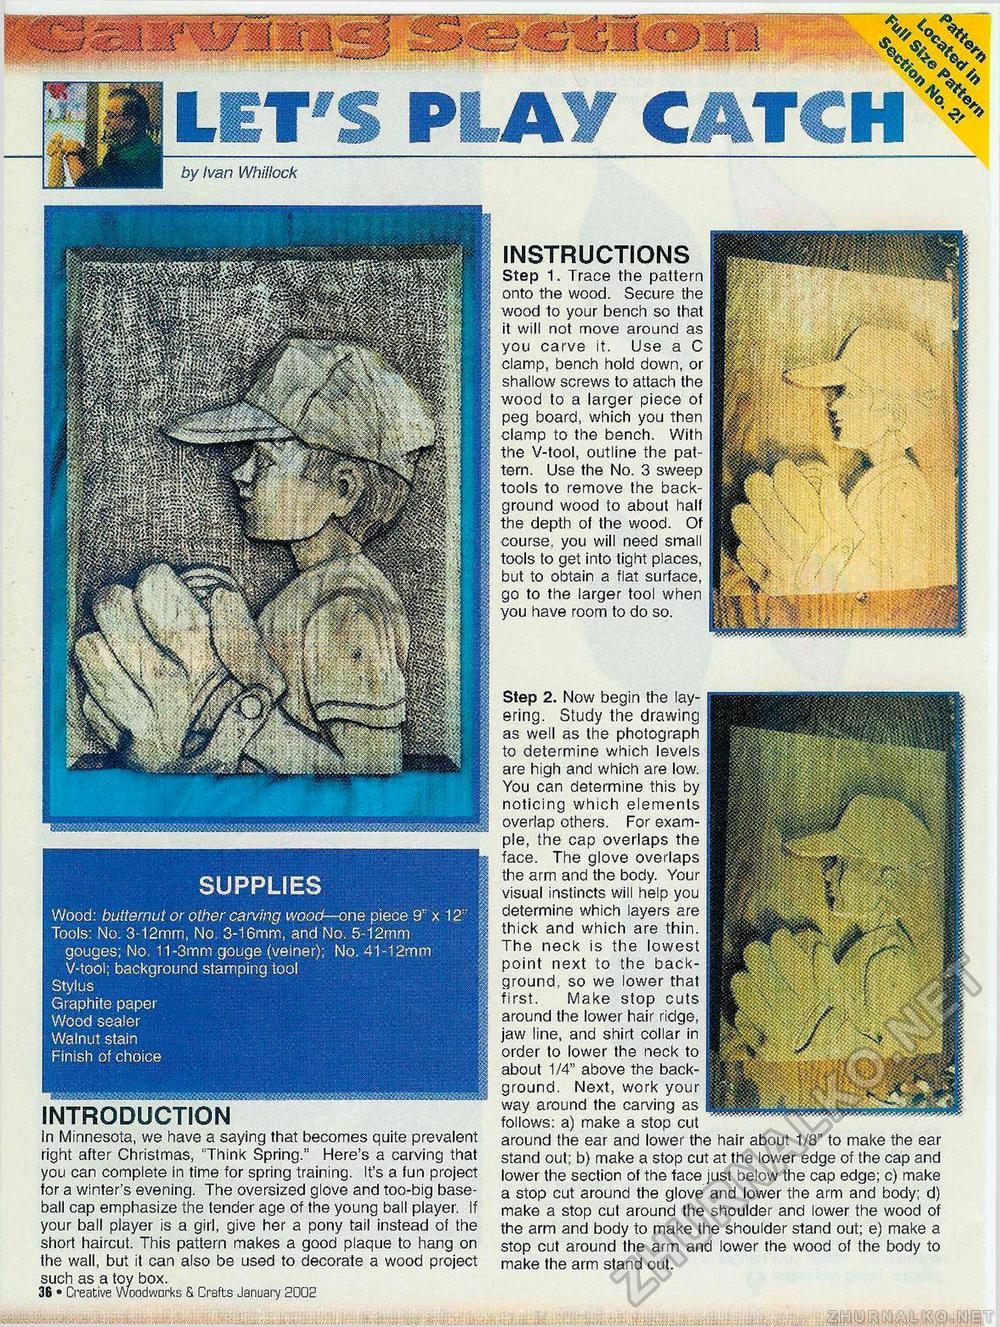
by Ivan Whillock INSTRUCTIONS Step 1. Trace the pattern onto the wood. Secure the wood to your bench so that it will not move around as you carve it. Use a C clamp, bench hold down, or shallow screws to attach the wood to a larger piece of peg board, which you then clamp to the bench. With the V-tool, outline the pattern. Use the No. 3 sweep tools to remove the background wood to about half the depth of the wood. Of course, you will need small tools to get into tight places, but to obtain a flat surface, go to the larger tool when you have room to do so. INTRODUCTION In Minnesota, we have a saying that becomes quite prevalent right after Christmas, 'Think Spring." Here's a carving that you can complete in time for spring training. It's a fun project for a winter's evening. The oversized glove and too-big baseball cap emphasize the tender age of the young ball player. If your ball player is a girl, give her a pony tail instead of the short haircut. This pattern makes a good plaque to hang on the wall, but it can also be used to decorate a wood project such as a toy box. 36 • Creative Woodworks & Crafts January 2002 Step 2. Now begin the layering. Study the drawing as well as the photograph to determine which levels are high and which are low. You can determine this by noticing which elements overlap others. For example, the cap overlaps the face. The glove overlaps the arm and the body. Your visual instincts will help you determine which layers are thick and which are thin. The neck is the lowest point next to the background, so we lower that first. Make stop cuts around the lower hair ridge, jaw line, and shirt collar in order to lower the neck to about 1/4" above the background. Next, work your way around the carving as follows: a) make a stop cut around the ear and lower the hair about 1/8" to make the ear stand out; b) make a stop cut at the lower edge of the cap and lower the section of the face just below the cap edge; c) make a stop cut around the glove and lower the arm and body; d) make a stop cut around the shoulder and lower the wood of the arm and body to make the shoulder stand out; e) make a stop cut around the arm and lower the wood of the body to make the arm stand out. SUPPLIES Wood: butternut or other carving wood—one piece 9' x 12 Tools: No. 3-12mm, No. 3-16mm, and No. 5-12mm gouges; No. 11-3mm gouge (veiner); No. 41-12mm V-tool; background stamping tool Stylus Graphite paper Wood sealer Walnut stain Finish of choice |


