Creative Woodworks & crafts 2002-03, страница 42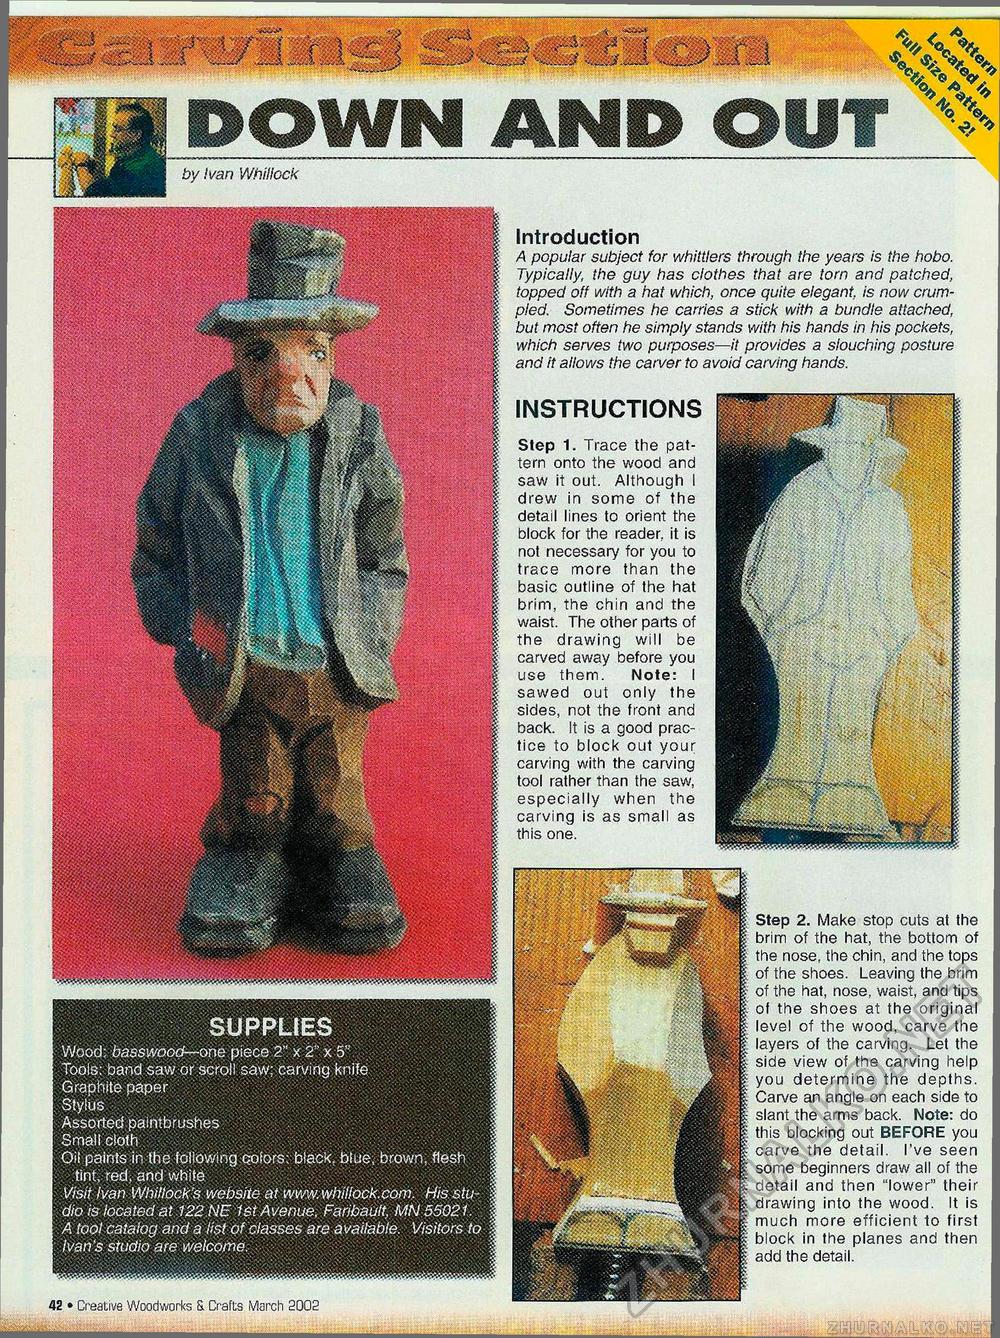
SUPPLIES Wood: basswood—one piece 2" x 2" x 5" Tools: band saw or scroll saw; carving knife Graphite paper Stylus ■ Assorted paintbrushes Small cloth . :/ ■"".•■ -,'v- Oil paints in the following colors: black, blue, brown, flesh tint, red, and white Visit Ivan Whillock's website at www.whillock.com. His stu dio is located at 122 NE 1st Avenue, Faribault, MN 55021. A tool catalog and a list of classes are available. Visitors to Ivan's studio are welcome. ,. 5 r * /~1 c } . > <~V r.....1 . • V r ; S<0c\ w M am ^'« -.S-ja..... ■.......•■' ......aim..........■■-1:/ .....% ^ \ DOWN MM® OUT ^ by !van Whillock Introduction A popular subject for whittlers through the years is the hobo. Typically, the guy has clothes that are torn and patched, topped off with a hat which, once quite elegant, is now crumpled. Sometimes he carries a stick with a bundle attached, but most often he simply stands with his hands in his pockets, which serves two purposes—it provides a slouching posture and it allows the carver to avoid carving hands. INSTRUCTIONS Step 1. Trace the pattern onto the wood and saw it out. Although I drew in some of the detail lines to orient the block for the reader, it is not necessary for you to trace more than the basic outline of the hat brim, the chin and the waist. The other parts of the drawing will be carved away before you use them. Note: I sawed out only the sides, not the front and back. It is a good practice to block out your carving with the carving tool rather than the saw, especially when the carving is as small as this one. Step 2. Make stop cuts at the brim of the hat, the bottom of the nose, the chin, and the tops of the shoes. Leaving the brim of the hat, nose, waist, and tips of the shoes at the original level of the wood, carve the layers of the carving. Let the side view of the carving help you determine the depths. Carve an angle on each side to slant the arms back. Note: do this blocking out BEFORE you carve the detail. I've seen some beginners draw all of the detail and then "lower" their drawing into the wood. It is much more efficient to first block in the planes and then add the detail. 24 • Creative Wnnriwnrks & Crafts March 2002 |


