Creative Woodworks & crafts 2002-03, страница 43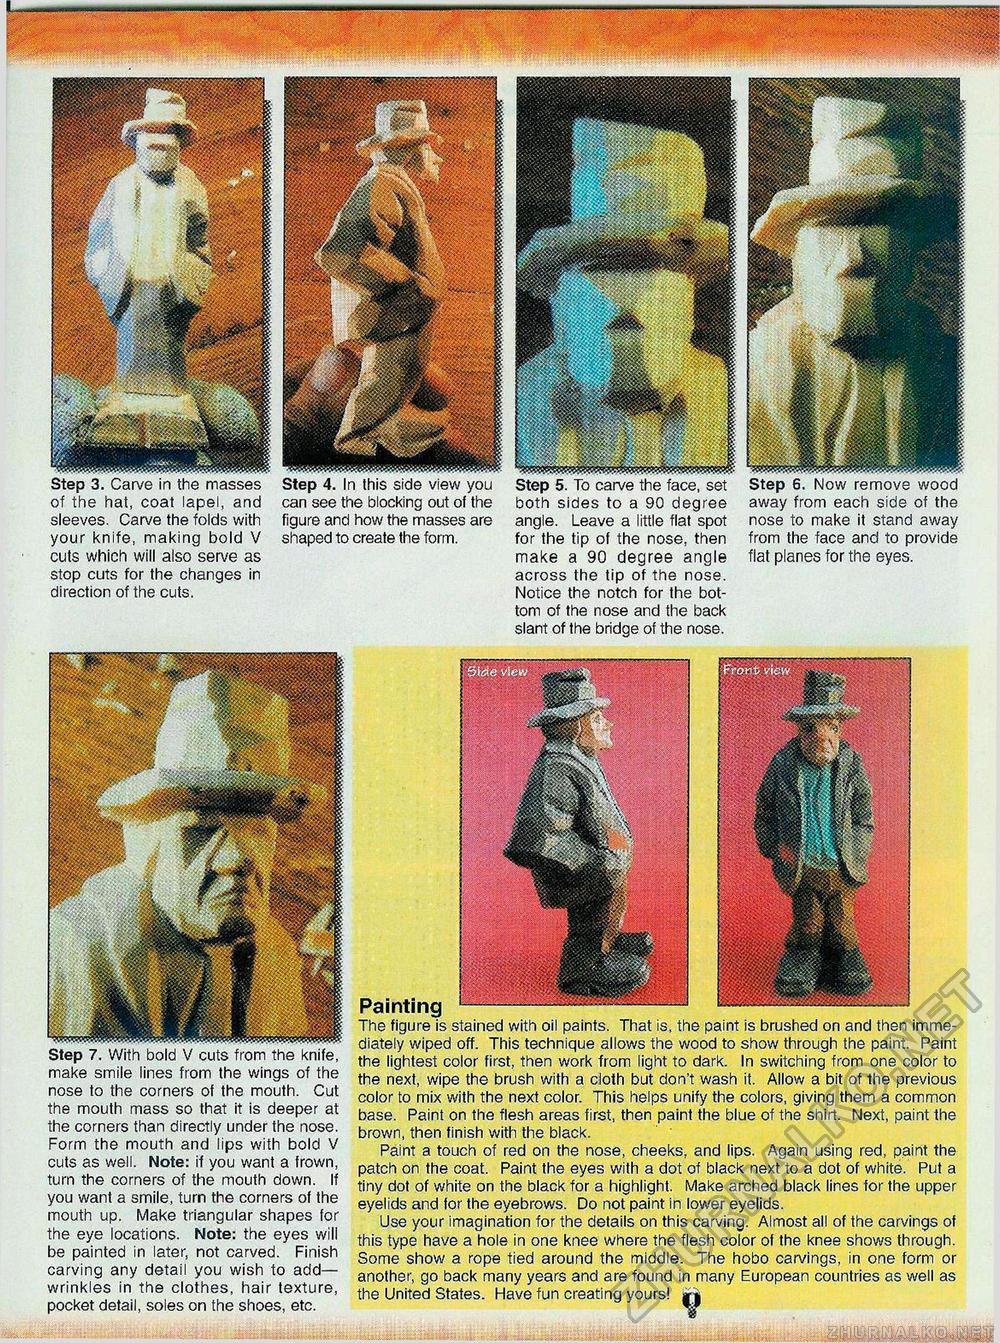
Step 3. Carve in the masses of the hat, coat lapel, and sleeves. Carve the folds with your knife, making bold V cuts which will also serve as stop cuts for the changes in direction of the cuts. can see the blocking out of the figure and how the masses are shaped to create the form. both sides to a 90 degree angle. Leave a little flat spot for the tip of the nose, then make a 90 degree angle across the tip of the nose. Notice the notch for the bottom of the nose and the back slant of the bridge of the nose. Step 6. Now remove wood away from each side of the nose to make it stand away from the face and to provide flat planes for the eyes. Step 7. With bold V cuts from the knife, make smile lines from the wings of the nose to the corners of the mouth. Cut the mouth mass so that it is deeper at the corners than directly under the nose. Form the mouth and lips with bold V cuts as well. Note: if you want a frown, turn the corners of the mouth down. If you want a smile, turn the corners of the mouth up. Make triangular shapes for the eye locations. Note: the eyes will be painted in later, not carved. Finish carving any detail you wish to add— wrinkles in the clothes, hair texture, pocket detail, soles on the shoes, etc. Painting The figure is stained with oil paints. That is, the paint is brushed on and then immediately wiped off. This technique allows the wood to show through the paint. Paint the lightest color first, then work from light to dark. In switching from one color to the next, wipe the brush with a cloth but don't wash it. Allow a bit of the previous color to mix with the next color. This helps unify the colors, giving them a common base. Paint on the flesh areas first, then paint the blue of the shirt. Next, paint the brown, then finish with the black. Paint a touch of red on the nose, cheeks, and lips. Again using red, paint the patch on the coat. Paint the eyes with a dot of black next to a dot of white. Put a tiny dot of white on the black for a highlight. Make arched black lines for the upper eyelids and for the eyebrows. Do not paint in lower eyelids. Use your imagination for the details on this carving. Almost all of the carvings of this type have a hole in one knee where the flesh color of the knee shows through. Some show a rope tied around the middle. The hobo carvings, in one form or another, go back many years and are found in many European countries as well as the United States. Have fun creating yours! |


