Creative Woodworks & crafts 2002-03, страница 41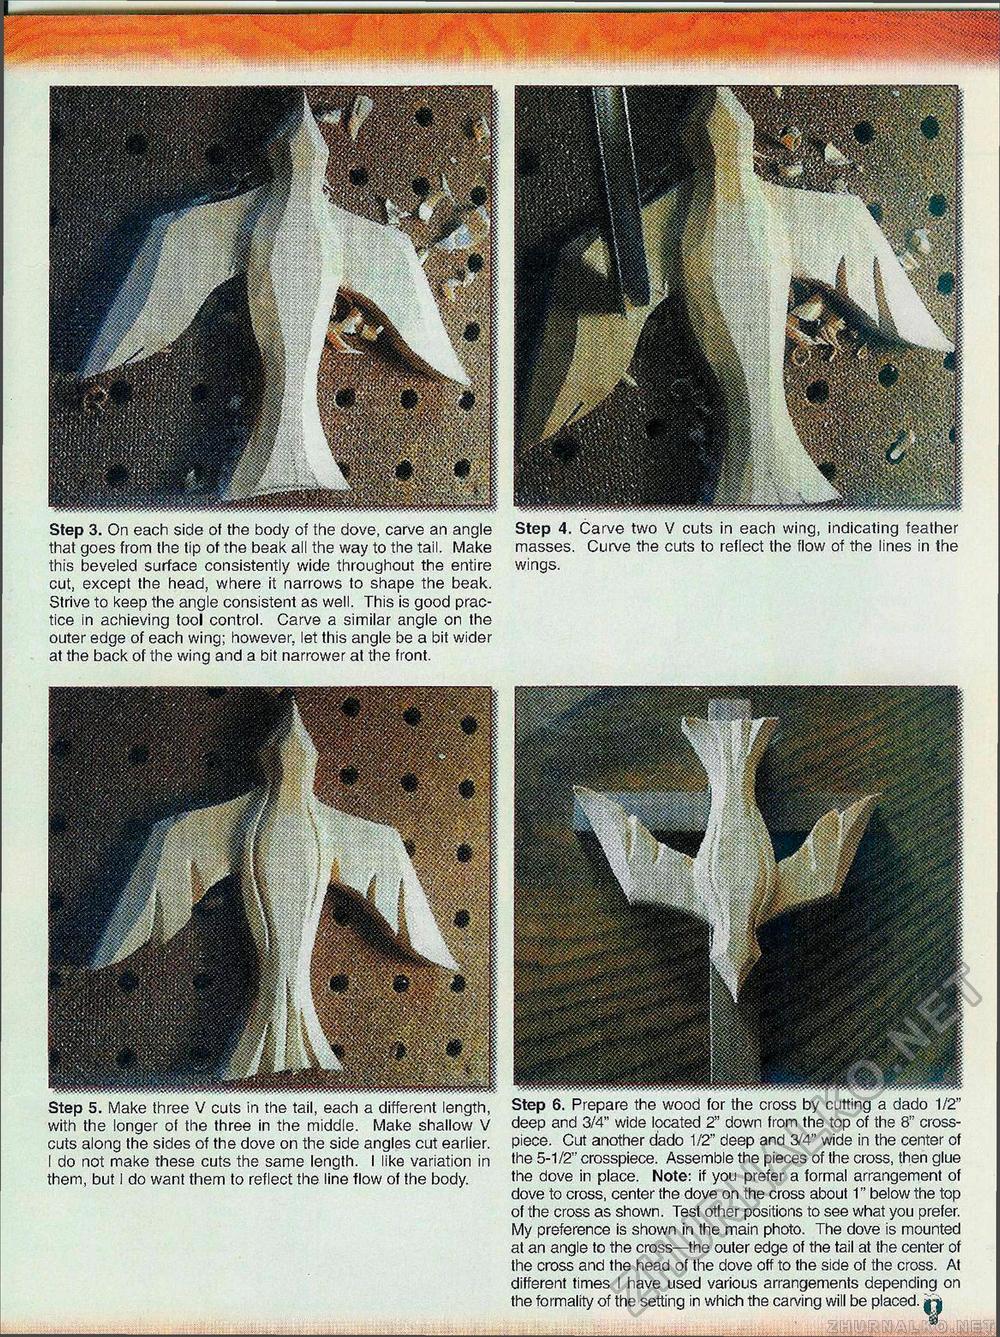
— Step 3. On each side of the body of the dove, carve an angle that goes from the tip of the beak all the way to the tail. Make this beveled surface consistently wide throughout the entire cut, except the head, where it narrows to shape the beak. Strive to keep the angle consistent as well. This is good practice in achieving tool control. Carve a similar angle on the outer edge of each wing; however, let this angle be a bit wider at the back of the wing and a bit narrower at the front. Step 4. Carve two V cuts in each wing, indicating feather masses. Curve the cuts to reflect the flow of the lines in the wings. Step 5. Make three V cuts in the tail, each a different length, with the longer of the three in the middle. Make shallow V cuts along the sides of the dove on the side angles cut earlier. I do not make these cuts the same length. I like variation in them, but I do want them to reflect the line flow of the body. Step 6. Prepare the wood for the cross by cutting a dado 1/2" deep and 3/4" wide located 2" down from the top of the 8" cross-piece. Cut another dado 1/2" deep and 3/4" wide in the center of the 5-1/2" crosspiece. Assemble the pieces of the cross, then glue the dove in place. Note: if you prefer a formal arrangement of dove to cross, center the dove on the cross about 1" below the top of the cross as shown. Test other positions to see what you prefer. My preference is shown in the main photo. The dove is mounted at an angle to the cross—the outer edge of the tail at the center of the cross and the head of the dove off to the side of the cross. At different times I have used various arrangements depending on the formality of the setting in which the carving will be placed, jfj |


