Creative Woodworks & crafts 2002-03, страница 60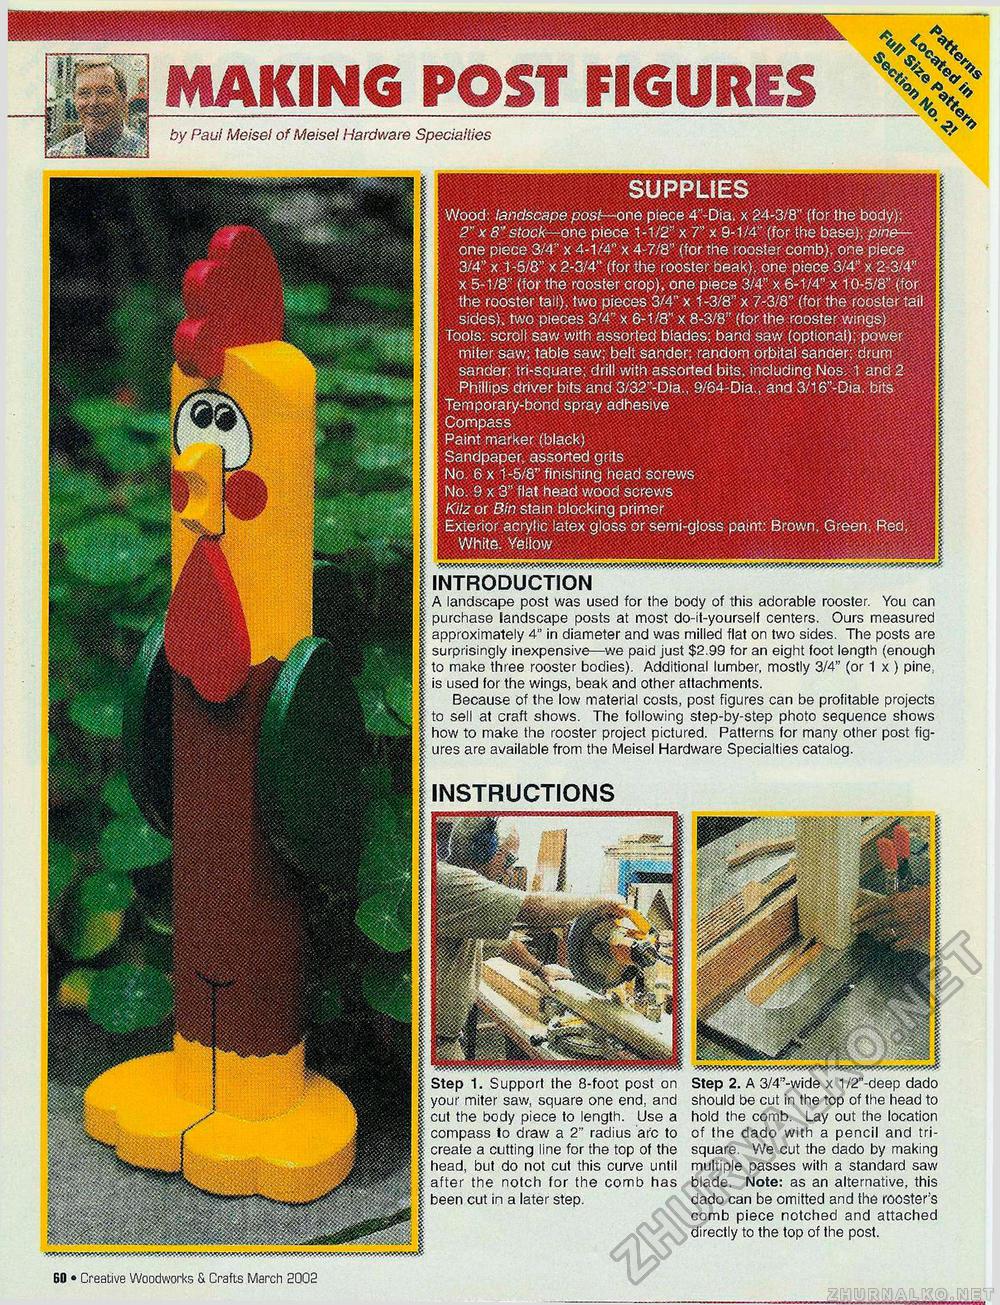
SUPPLIES Wood: landscape post— one piece 4"-Dia. x 24-3/8" (for the body); 2" x 8" stock— one piece 1-1/2" x 7" x 9-1/4" (for the base); pine-one piece 3/4" x 4-1/4" x 4-7/8" (for the rooster comb), one piece 3/4" x 1-5/8" x 2-3/4" (for the rooster beak), one piece 3/4" x 2-3/4" x 5-1/8" (for the rooster crop), one piece 3/4" x 6-1/4" x 10-5/8" (for the rooster tail), two pieces 3/4" x 1-3/8" x 7-3/8" (for the rooster tail sides), two pieces 3/4" x 6-1/8" x 8-3/8" (for the rooster wings) Tools: scroll saw with assorted blades; band saw (optional); power miter saw; table saw; belt sander; random orbital sander; drum sander; tri-square; drill with assorted bits, including Nos. 1 and 2 Phillips driver bits and 3/32"-Dia., 9/64-Dia., and 3/16"-Dia. bits Temporary-bond spray adhesive Compass Paint marker (black) Sandpaper, assorted grits No. 6 x 1-5/8" finishing head screws No. 9 x 3" flat head wood screws KHz or Bin stain blocking primer Exterior acrylic latex gloss or semi-gloss paint: Brown. Green. Red, White, Yellow INTRODUCTION A landscape post was used for the body of this adorable rooster. You can : purchase landscape posts at most do-it-yourself centers. Ours measured ■ approximately 4" in diameter and was milled flat on two sides. The posts are surprisingly inexpensive—we paid just $2.99 for an eight foot length (enough to make three rooster bodies). Additional lumber, mostly 3/4" (or 1 x ) pine, is used for the wings, beak and other attachments. Because of the low material costs, post figures can be profitable projects : to sell at craft shows. The following step-by-step photo sequence shows how to make the rooster project pictured. Patterns for many other post figures are available from the Meisel Hardware Specialties catalog. INSTRUCTIONS MAKING POST FIGURES by Paul Meisel of Meisel Hardware Specialties %<0\ - o ro. Step 2. A 3/4"-wide x 1/2"-deep dado should be cut in the top of the head to hold the comb. Lay out the location of the dado with a pencil and tri-square. We cut the dado by making multiple passes with a standard saw blade. Note: as an alternative, this dado can be omitted and the rooster's comb piece notched and attached directly to the top of the post. Step 1. Support the 8-foot post on your miter saw, square one end, and cut the body piece to length. Use a compass to draw a 2" radius arc to create a cutting line for the top of the head, but do not cut this curve until after the notch for the comb has been cut in a later step. 24 • Creative Wnnriwnrks & Crafts March 2002 |


