Creative Woodworks & crafts 2002-06, страница 18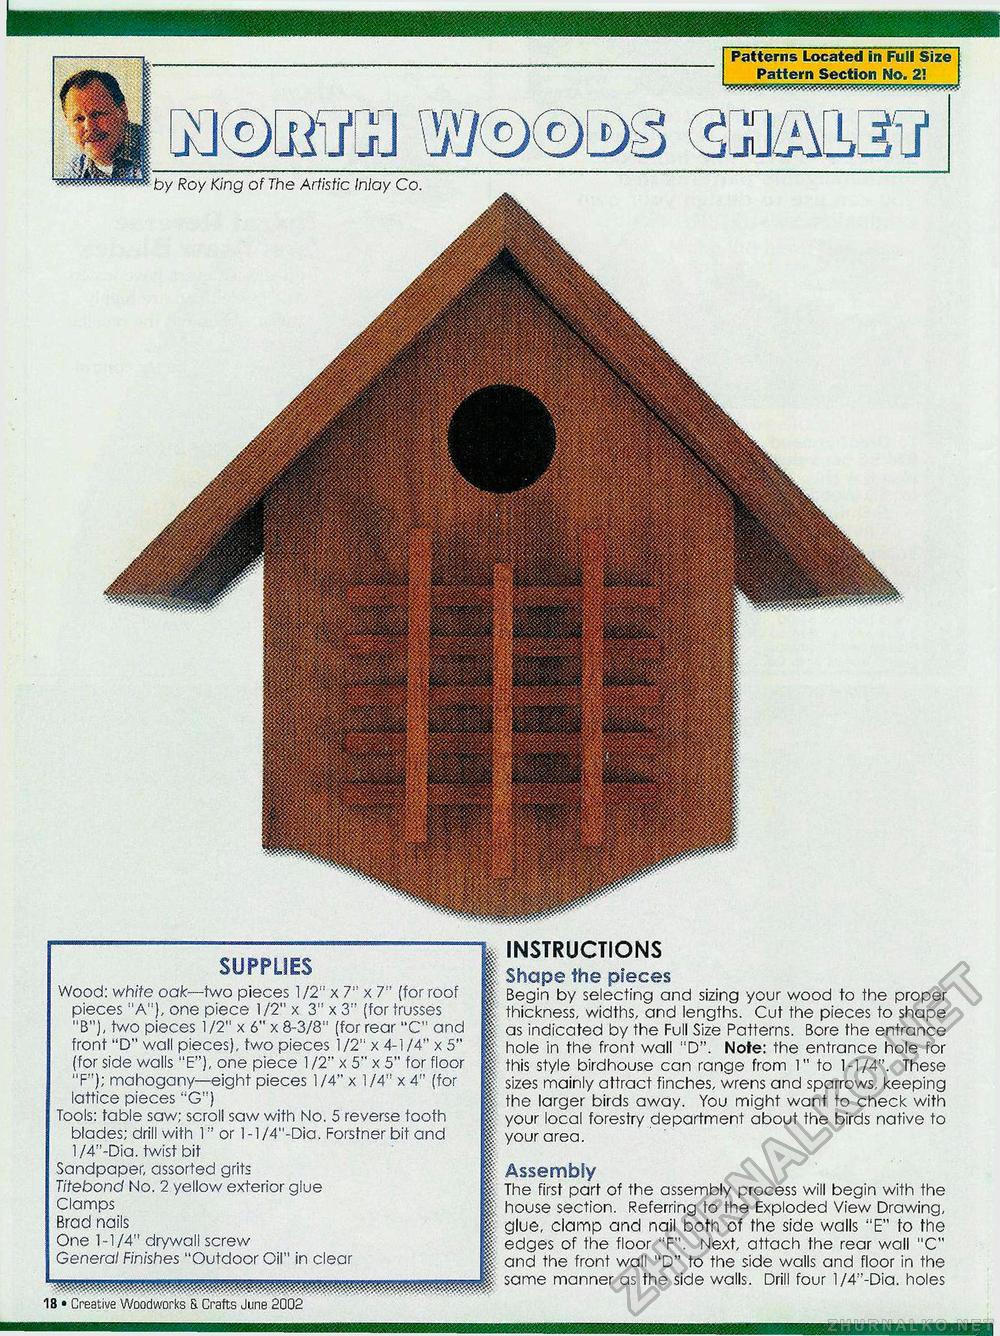
Patterns Located in Full Size Pattern Section No. 1! c by Roy King of The Artistic inlay Co. SUPPLIES Wood: white oak—two pieces 1/2" x 7" x 7" (for roof pieces :'A"), one piece 1/2" x 3" x 3" (for trusses "B"), two pieces 1/2" x 6" x 8-3/8" (for rear "C" and front "D" wall pieces), two pieces 1/2" x 4-1 /4" x 5" (for side walls "E"), one piece 1 /2" x 5" x 5" for floor "F"); mahogany—eight pieces 1/4" x 1/4" x 4" (for lattice pieces "G") Tools: table saw; scroll saw with No, 5 reverse tooth blades; drill with 1" or l-l/4"-Dia. Forsfnerbit and 1 /4"-Dia. twist bit Sandpaper, assorted grits Titeboncl No. 2 yellow exterior glue Clamps Brad nails One 1-1/4" drywall screw General Finishes "Outdoor Oil" in clear WMwswmw NSTRUCTIONS Shape the pieces Segin by selecting and sizing your wood to the proper hickness, widths, and lengths. Cut the pieces to shape indicated by the Full Size Patterns. Bore the entrance lole in the front wall "D". Note: the entrance hole for lis style birdhouse can range from 1" to 1-1/4". These zes mainly attract finches, wrens and sparrows, keeping ie larger birds away. You might want to check with our local forestry department about the birds native to our area. Assembly he first part of the assembly process will begin with the ouse section. Referring to the Exploded View Drawing, lue, clamp and nail both of the side walls "E" to the dges of the floor "F". Next, attach the rear wall "C" nd the front wall "D" to the side walls and floor in the ame manner as the side walls. Drill four l/4"-Dia. holes 18 • Creative Woodworks & Crafts June 2002 |


