Creative Woodworks & crafts 2002-06, страница 19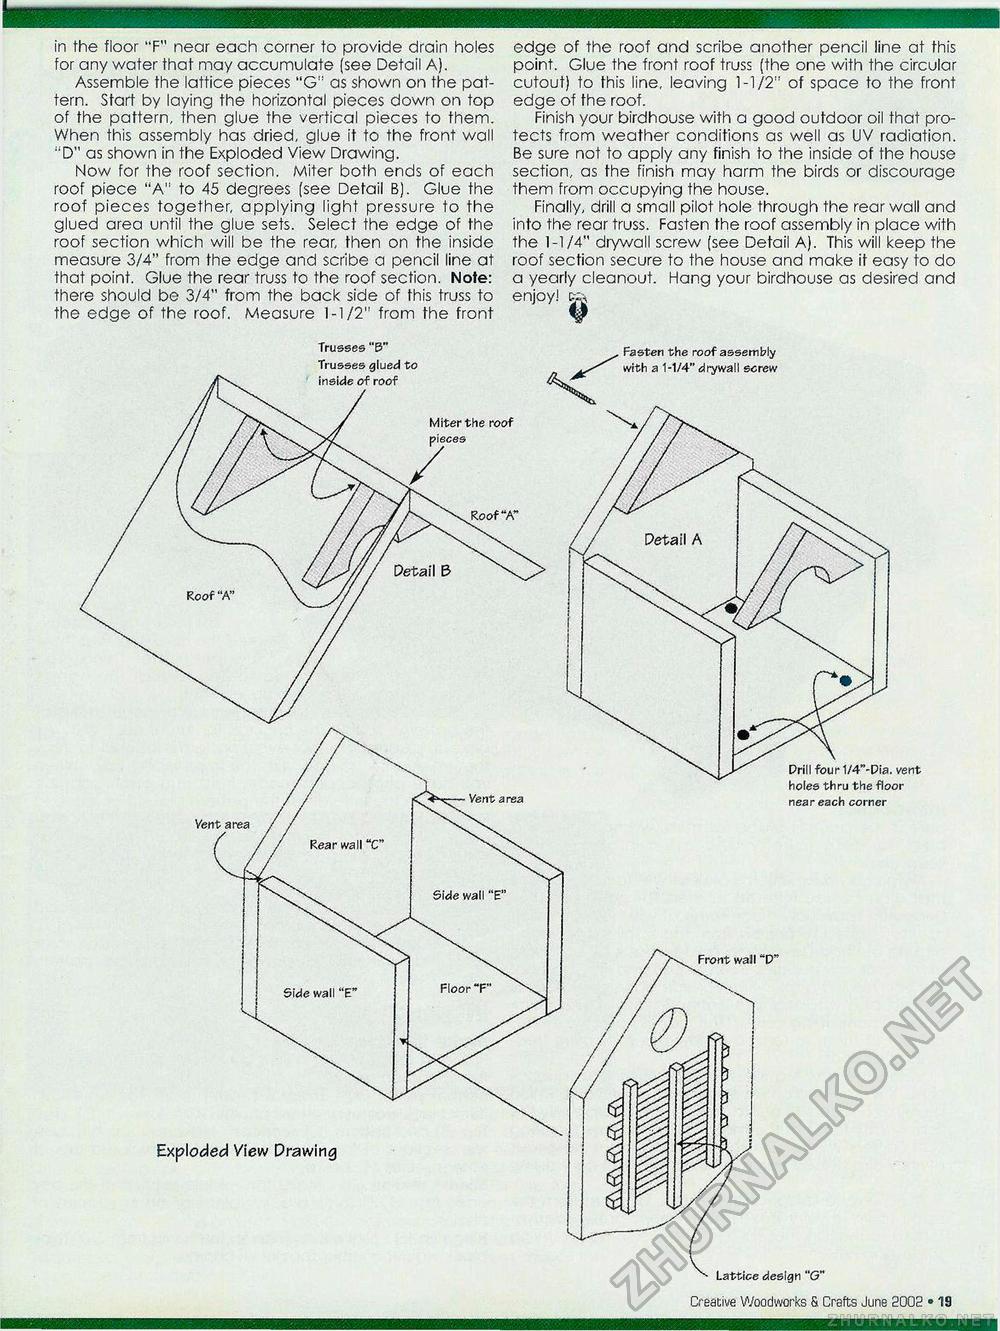
in the floor "F" near each corner to provide drain holes for any water that may accumulate (see Detail A). Assemble the lattice pieces "G" as shown on the pattern. Start by laying the horizontal pieces down on top of the pattern, then glue the vertical pieces to them. When this assembly has dried, glue it to the front wall "D" as shown in the Exploded View Drawing. Now for the roof section. Miter both ends of each roof piece "A': to 45 degrees (see Detail B). Glue the roof pieces together, applying light pressure to the glued area until the glue sets. Select the edge of the roof section which will be the rear, then on the inside measure 3/4" from the edge and scribe a pencil line at that point. Glue the rear truss to the roof section. Note: there should be 3/4" from the back side of this truss to the edge of the roof. Measure 1-1/2" from the front edge of the roof and scribe another pencil line at this point. Glue the front roof truss (the one with the circular cutout) to this line, leaving 1-1/2" of space to the front edge of the roof. Finish your birdhouse with a good outdoor oil that protects from weather conditions as well as UV radiation. Be sure not to apply any finish to the inside of the house section, as the finish may harm the birds or discourage them from occupying the house. Finally, drill a small pilot hole through the rear wall and into the rear truss. Fasten the roof assembly in place with the 1-1/4" drywall screw (see Detail A). This will keep the roof section secure to the house and make it easy to do a yearly cleanout. Hang your birdhouse as desired and enjoy! Trusses "B" Trusses glued to Fasten the roof assembly with a 1-1/4" drywall screw Prill four 1/4"-Pia. vent holes thru the floor near each corner Exploded View Drawing Lattice design "G" Creative Woodworks S Crafts June 2002 • 19 |


