Creative Woodworks & crafts 2002-06, страница 30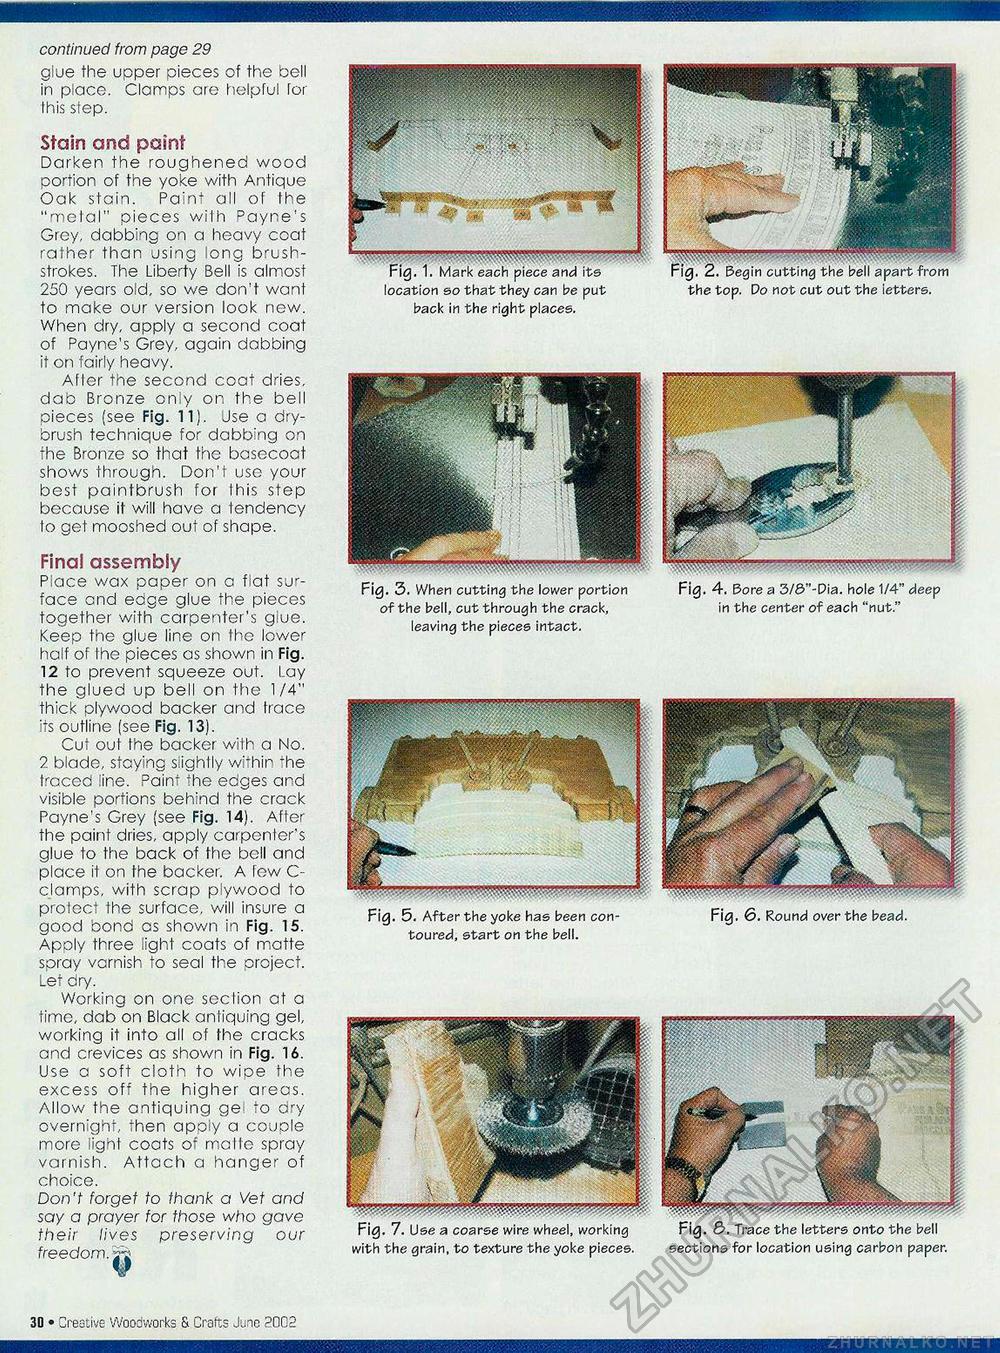
continued from page 29 glue the upper pieces of the bell in place. Clamps are helpful for this step. Stain and paint Darken the roughened wood portion of the yoke with Antique Oak stain. Paint all of the "metal" pieces wilh Payne's Grey, dabbing on a heavy coat rather than using long brushstrokes. The Liberty Bell is almost 250 years old, so we don't want to make our version look new. When dry, apply a second coat of Payne's Grey, again dabbing it on fairly heavy. After the second coat dries, dab Bronze on!y on the bell pieces (see Fig. 11). Use a dry-brush technique for dabb;ng on the Bronze so that the basecoat shows through. Don't uso your best paintbrush for Ihis step bccause it will have a tendency to get mooshed out of shape. Final assembly Place wax paper on a flat surface end eoge glue the pieces together with carpenter's glue. Keep the glue line on tho lower half of the pieces as shown in Fig. 12 to prevent squeeze out. Lay the glued up bell on the 1/4" thick plywood backer and trace its outline (see Fig. 13). Cut out the backer with a No. 2 blade, staying Slightly wifhir "he traced :ine. Paint the edges and visible portions behind the crack Payne's Grey (see Fig. 14). After the paint dries, apply carpenter's glue to the back of the boll and place it on the backer. A few C~ clamps, with scrap plywood to protect the surface, will insure a good bond os shown in Fig. 15. Apoly three light coats of matte spray varnish to seal the project. Let dry. Working on one sec lion at a time, dab on Black anliquing gel, working it into all of the cracks and crevices as shown in Fig. 16. Use a soft cloth to wipe the excess off the higher areas. Allow the antiquing ge to dry overnight, then apoiy a couple more iight coots of matte spray varnish. Attach a hanger of choice. Don't forget to thank a Vet and say a prayer for those who gave their lives preserving our freedom. ^ Fig. 3. When cutting the lower portion Fig. 4. Bore a 3/0"-Dia. hole 1/4" deep of the bell, cut through the crack, in the center of each "nut." leaving the pieces intact. Fig. 5. After the yoke has been contoured, start on the bell. Fig. 6. Round over the bead. Fig. 7. Use a coarse wire wheel, working Fig. 8>. Trace the letters onto the bell with the grain, to texture the yoke pieces. sections for location using carbon paper. location so that they can be put back in the right places. the top. Do not cut out th< 30 • Creative Wuodworks & Crafts Junn 2002 |


