Creative Woodworks & crafts 2002-06, страница 49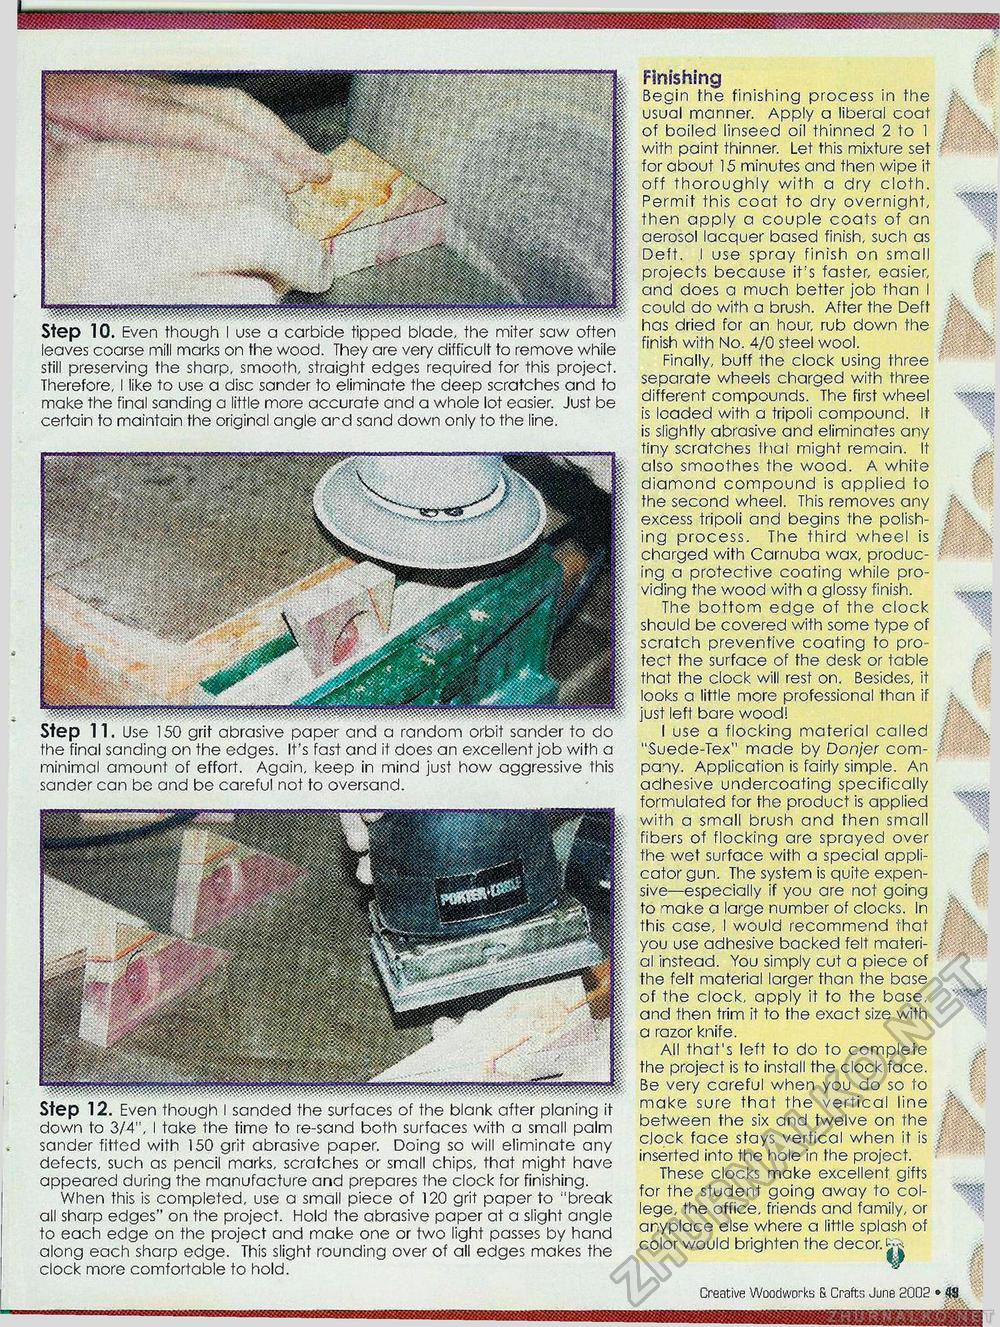
Step 10. Even though I use a carbide tipped blade, the miter saw often leaves coarse mill marks on the wood. They are very difficult to remove while still preserving the sharp, smooth, straight edges required for this project. Therefore, I like to use a disc sander to eliminate the deep scratches and to make the final sanding a little more accurate and a whole lot easier. Just be certain to maintain the original angle ard sand down only to the line. Step 11. Use 150 grit abrasive paper and a random orbit sander to do the final sanding on the edges. It's fast and it does an excellent job with a minimal amount of effort. Again, keep in mind just how aggressive this sander can be and be careful not to oversand. Step 12. Even though I sanded the surfaces of the blank after planing it down to 3/4", I take the time to re-sand both surfaces with a small palm sander fitted with 150 grit abrasive paper. Doing so will eliminate any defects, such as pencil marks, scratches or small chips, that might have appeared during the manufacture and prepares the clock for finishing. When this is completed, use a small piece of 120 grit paper to :'break all sharp edges" on the project. Hold the abrasive paper at a slight angle to each edge on the project and make one or two light passes by hand along each sharp edge. This slight rounding over of all edges makes the clock more comfortable to hold. Finishing Begin the finishing process in the usual manner. Apply a liberal coat of boiled linseed oil thinned 2 to 1 with paint thinner. Let this mixture set for about 15 minutes and then wipe it off thoroughly with a dry cloth. Permit this coat to dry overnight, then apply a couple coats of an aerosol lacquer based finish, such as Deft. I use spray finish on small projects because it's faster, easier, and does a much better job than I could do with a brush. After the Deft has dried for an hour, rub down the finish with No. 4/0 steel wool. Finally, buff the clock using three separate wheels charged with three different compounds. The first wheel is leaded with a tripoli compound. It is slightly abrasive and eliminates any tiny scratches that might remain. It also smoothes the wood. A white diamond compound is applied to the second wheel. This removes any excess tripoli and begins the polishing process. The third wheel is charged with Carnuba wax, producing a protective coating while providing the wood with a glossy finish. The bottom edge of the clock should be covered with some type of scratch preventive coating to protect the surface of the desk or table that the clock will rest on. Besides, it looks a little more professional than if just left bare wood! I use a flocking material called "Suede-Tex" made by Donjer company. Application is fairly simple. An adhesive undercoating specifically formulated for the product is applied with a small brush and then small fibers of flocking are sprayed over the wet surface with a special applicator gun. The system is quite expensive—especially if you are not going to make a large number of clocks. In this case, I would recommend that you use adhesive backed felt material instead. You simply cut a piece of the felt material larger than the base of the clock, apply it to the base, and then trim it to the exact size with a razor knife. All that's left to do to complete the project is to install the clock face. Be very careful when you do so to make sure that the vertical line between the six and twelve on the clock face stays vertical when it is inserted into the hole in the project. These clocks make excellent gifts for the student going away to college, the office, friends and family, or anyplace else where a little splash of color would brighten the decor. ^ 49 • Creative Wuodworks & Crafts Junn 2002 |


