Creative Woodworks & crafts 2002-06, страница 58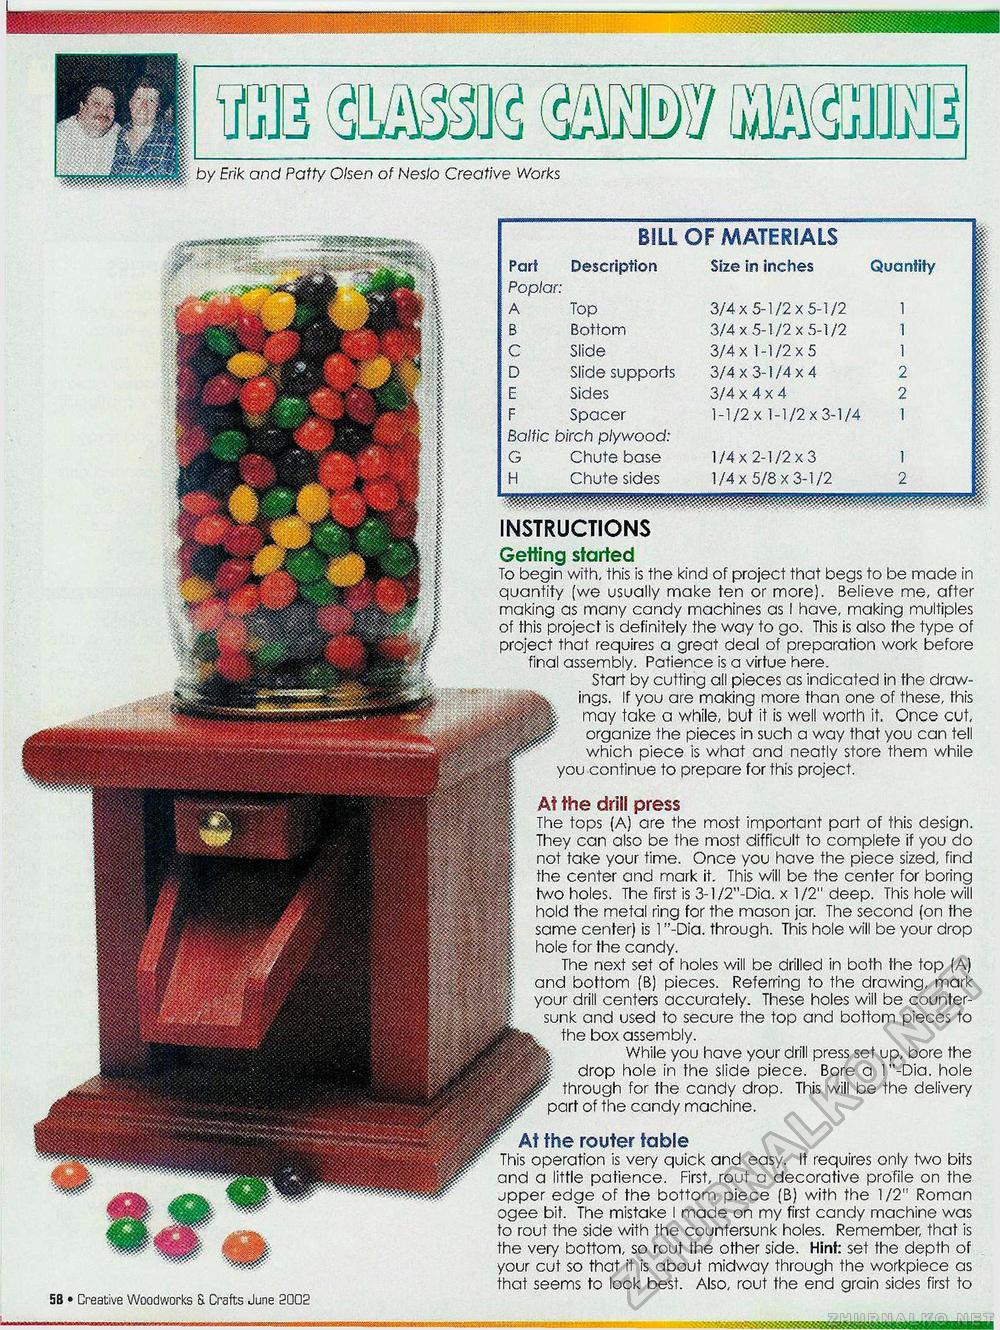
At the drill press The tops (A) ore the most important part of this design. They can also be the most difficult to complete if you do not take your time. Once you have the piece sized, find the center and mark it. This will be the center for boring two holes. The first is 3-1/2"-Dia. x 1/2" deep. This hole will hold the metal ring for the mason jar. The second (on the same center) is 1 "-Dia. through. This hole will be your drop hole for the candy. The next set of holes will be drilled in both the top (A) and bottom (B) pieces. Referring to the drawing, mark your drill centers accurately. These holes will be countersunk and used to secure the top and bottom pieces to the box assembly. While you have your drill press set up, bore the drop hole in the slide piece. Bore a 1 "-Dia. hole through for the candy drop. This will be the delivery part of the candy machine. At the router table This operation is very quick and easy. It requires only two bits and a little patience. First, rout a decorative profile on the jpper edge of the bottom piece (B) with the 1/2" Roman ogee bit. The mistake I made on my first candy machine was to rout the side with the countersunk holes. Remember, that is the very bottom, so rout the other side. Hint: set the depth of your cut so that it is about midway through the workpiece as that seems to look best. Also, rout the end grain sides first to 58 • Creative Woodworks 8. Crafts June 3002 INSTRUCTIONS Getting started To begin with, this is the kind of project that begs to be made in quantity (we usually make ten or more). Believe me, after making as many candy machines as I have, making multiples of this project is definitely the way to go. This is also the type of project that requires a great deal of preparation work before final assembly. Patience is a virtue here. Start by cutting all pieces as indicated in the drawings. If you are making more than one of these, this may take a while, but it is well worth it. Once cut, organize the pieces in such a way that you can tell which piece is what and neatly store them while you continue to prepare for this project. |
||||||||||||||||||||||||||||||||||||


