Creative Woodworks & crafts 2002-08, страница 60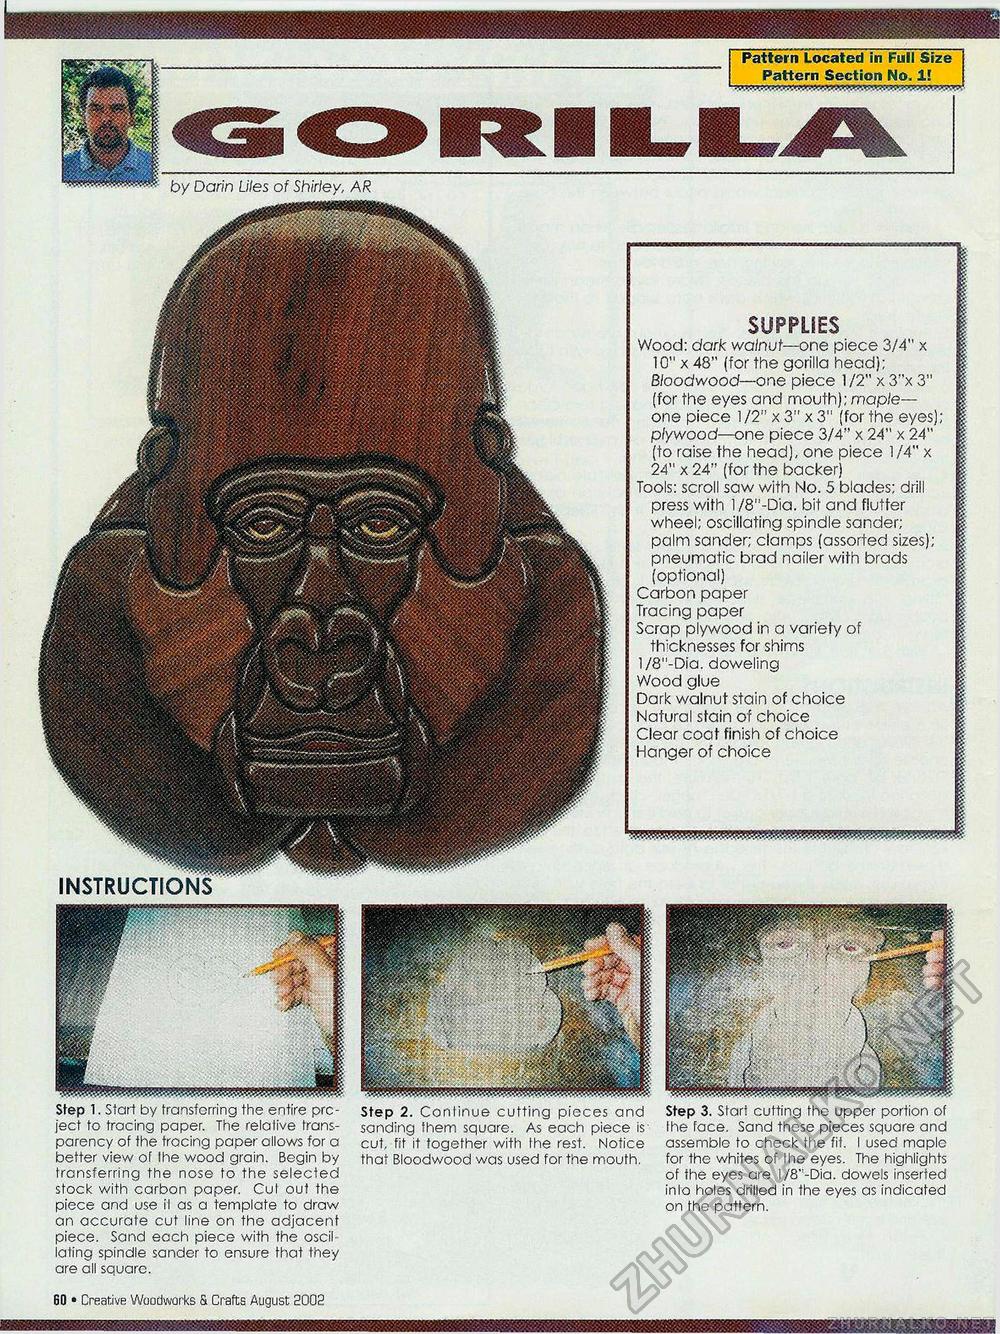
Pattern Located in Full Size Pattern Section No. 1! Step 1. Start by transferring the entire project to tracing paper. The relalive transparency of the tracing paper allows for a better view of Ihe wood grain. Begin by transferring the nose to the selected stock with carbon paper. Cut out the piece and use il as a template to draw an accurate cut line on the adjacent piece. Sand ecch piece with the oscil lating spindle sander to ensure that they are all square. Step 2. Continue cutting pieces and sanding them square. As each piece is cut, fit it together with the rest. Notice that Bloodwood was used for the mouth. Step 3. Start cutting the upper portion of the face. Sand these pieces square and assemble to check the fit. I used maple for the whites of the eyes. The highlights of the eyes are l/8"-Dia. dowels inserted info holes drilled in the eyes as indicated on the pattern. SUPPLIES Wood: dark walnut—one piece 3/4" x 10" x 48" (for the gorilla head); Bloodwood—one piece 1/2" x 3"x 3" (for the eyes and mouth); maple— one piece 1/2" x3" x3" (for the eyes); plywood—one piece 3/4" x 24" x 24" (to raise the head), one piece 1/4" x 24" X 24" (for the backer) Tools: scroll saw with No. 5 blades; drill press with l/8"-Dia. bit and flutter wheel; oscillating spindle sander; palm sander; clamps (assorted sizes); pneumatic brad nailer with brads (optional) Carbon paper Tracing paper Scrap plywood in a variety of thicknesses for shims l/8"-Dia. doweling Wood glue Dark walnut stain of choice Natural stain of choice Clear coat finish of choice Hanger of choice by Darin Liles of Shirley, AR 18 • Creative Woodworks S. Crafts August 2002 |


