Creative Woodworks & crafts 2002-08, страница 63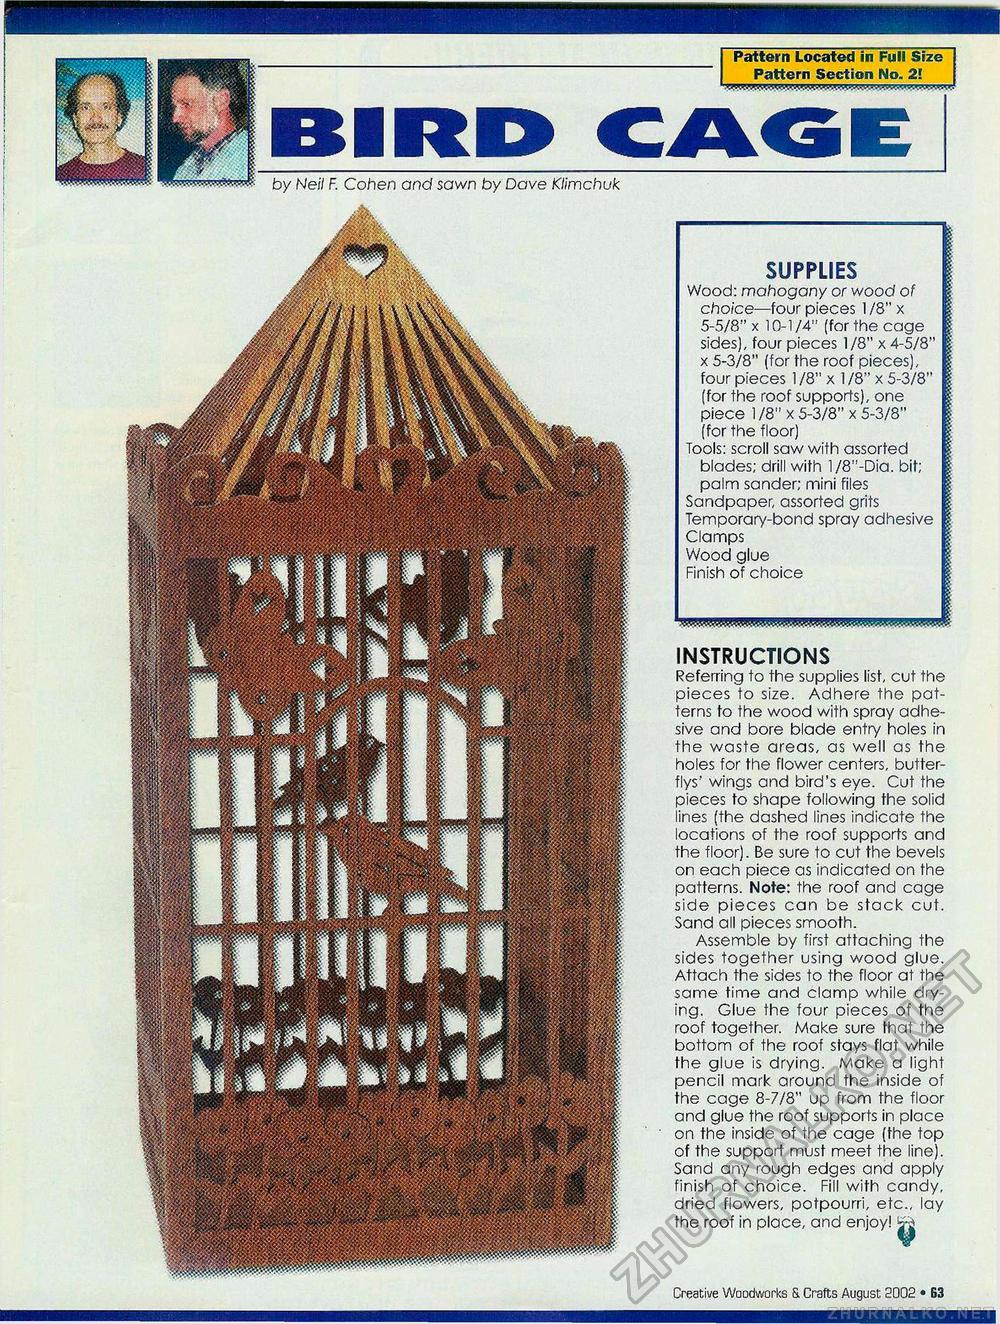
SUPPLIES Wood: mahogany or wood of choice—four pieces 1 /8" x 5-5/8" x 10-1/4" (for the cage sides), four pieces 1/8" x 4-5/8" x 5-3/8" (for the roof pieces), four pieces 1 /8" x 1 /8" x 5-3/8" (for the roof supports), one piece 1 /8" x 5-3/8" x 5-3/8" (for the floor) Tools: scroll saw with assorted blades; drill with l/8"-Dia. bit; palm sander; mini files Sandpaper, assorted grits Temporary-bond spray adhesive Clamps Wood glue Finish of choice INSTRUCTIONS Referring to the supplies list, cut the pieces to size. Adhere the patterns to the wood with spray adhesive and bore blade entry holes in the waste areas, as well as the holes for the flower centers, butter-flys' wings and bird's eye. Cut the pieces to shape following the solid lines (the dashed lines indicate the locations of the roof supports and the floor). Be sure to cut the bevels on each piece as inbicated on the patterns. Note: the roof and cage side pieces can be stack cut. Sand all pieces smooth. Assemble by first attaching the sides together using wood glue. Attach the sides to the floor at the same time and clamp while drying. Glue the four pieces of the roof together. Make sure that the bottom of the roof stays flat while the glue is drying. Make a light pencil mark around the inside of the cage 8-7/8" up from the floor and glue the roof supports in place on the inside of the cage (the top of the support must meet the line). Sand any rough edges and apply finish of choice. Fill with candy, dried flowers, potpourri, etc., lay the roof in place, and enjoy! jjrS Pattern Located in Full Size Pattern Section No. 2! BIRD CAGE by Neil F. Cohen and sawn by Dave Klimchuk 18 • Creative Woodworks S. Crafts August 2002 |


