Creative Woodworks & crafts 2002-08, страница 61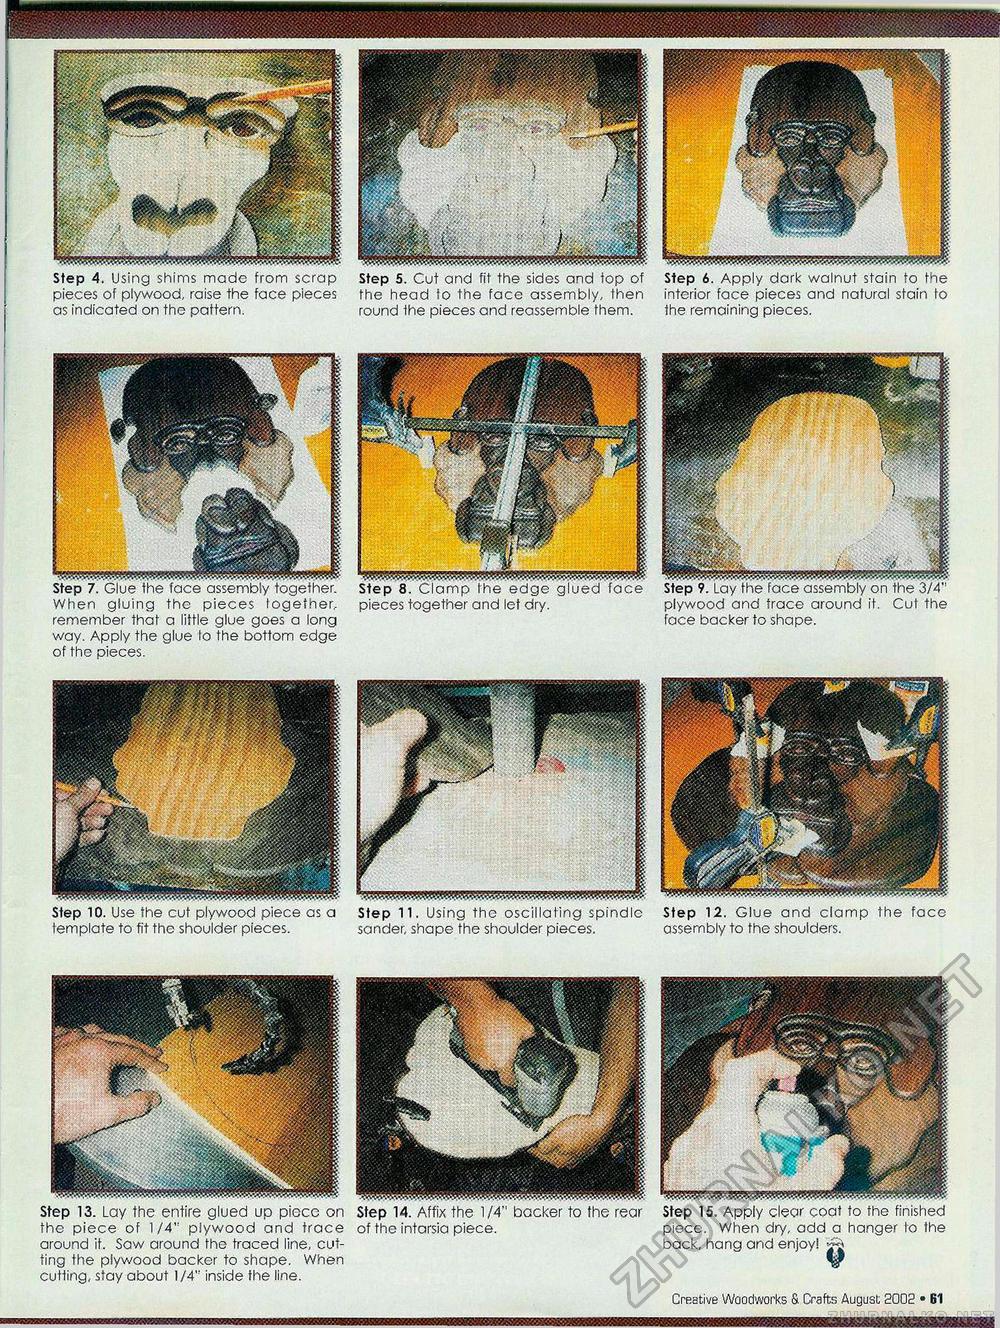
Step 4. Using shims made from scrap pieces of plywood, raise the face pieces as indicated on the pattern. Step 5. Cut and fit the sides and top of the head to the face assembly, then round the pieces and reassemble them. Step 6. Apply dark walnut stain to the interior face pieces and natural stain to the remaining pieces. When gluing the pieces together, remember that a little glue goes a long way. Apply the glue to the bottom edge of the pieces. plywood and trace around it. Cut the face backer to shape. Step 10. Use the cut plywood piece as a Step 11. Using the oscillating spindle Step 12. Glue and clamp the face template to fit the shoulder pieces. sander, shape the shoulder pieces. assembly to the shoulders. 18 • Creative Woodworks S. Crafts August 2002 Step 13. Lay the entire glued up piccc on the piece of 1/4': plywood and trace around it. Saw around the traced line, cutting the plywood backer to shape. When cutting, stay about 1/4" inside the line. Step 14. Affix the 1/4" backer to the rear of the intarsia piece. Step 15. Apply clear coat to the finished piece. When dry, add a hanger lo the back, hang and enjoy! jj |


