Creative Woodworks & crafts 2002-08, страница 62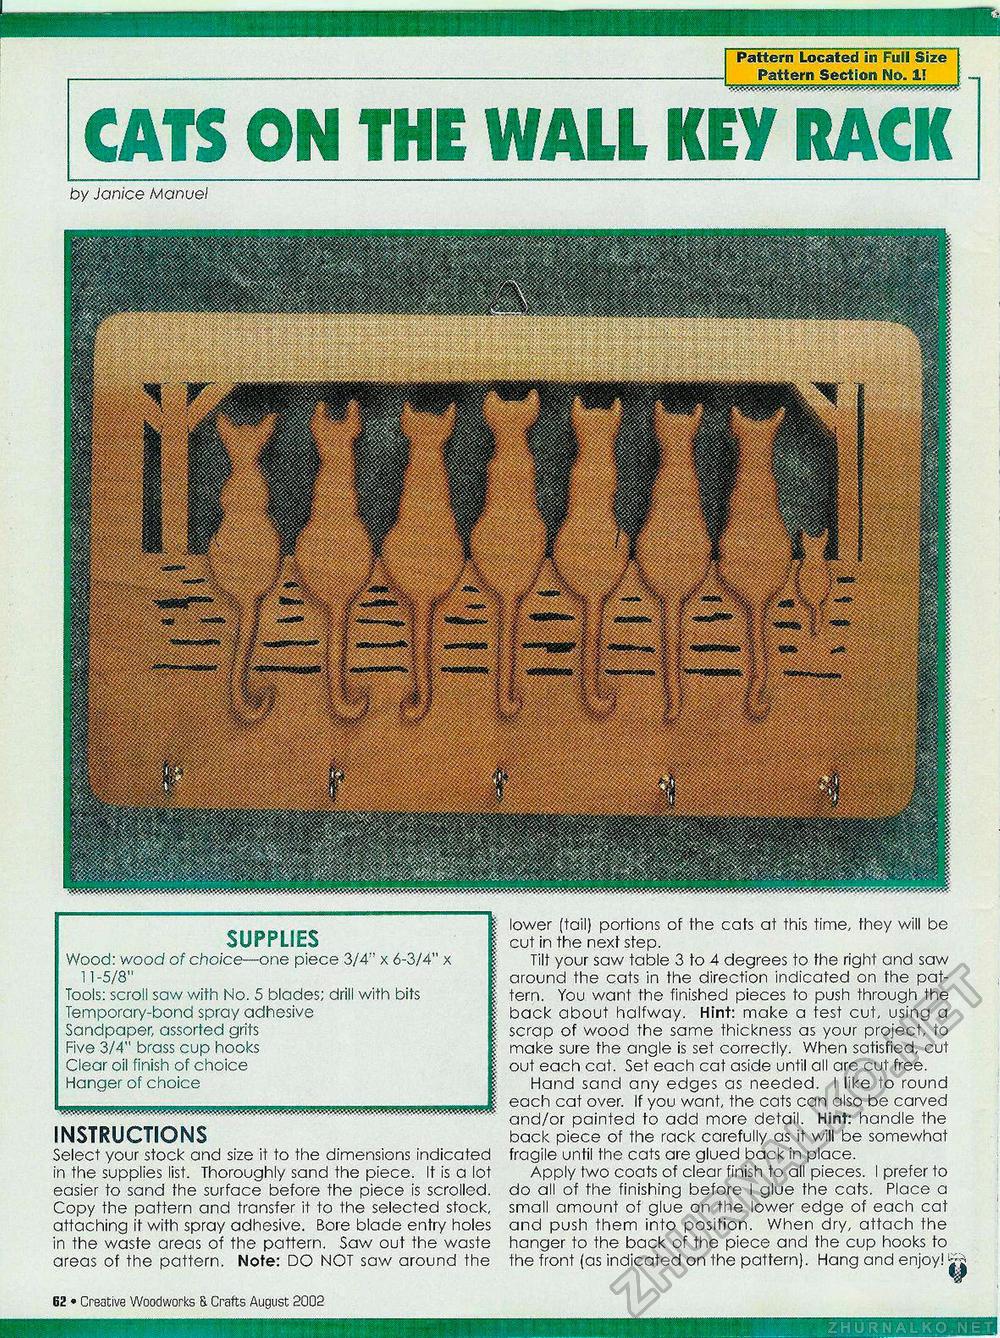
I Pattern Located in Full Size 1 ................... Pattern Section No. If nwww? CATS ON THE WALL KEY RACKby Janice Manuel SUPPLIES Wood: wood of choice—one piece 3/4" x 6-3/4" x 11-5/8" Tools: scroll saw with Ho. 5 blades; drill with bits Temporary-bond spray adhesive Sandpaper, assorted grits Five 3/4" brass cup hooks Clear oil finish of choice Hanger of choice INSTRUCTIONS Select your stock and size it to the dimensions indicated in the supplies list. Thoroughly sand the piece. It is a lot easier to sand the surface before the piece is scrolled. Copy the pattern and transfer it to the selected stock, attaching it with spray adhesive. Bore blade entry holes in the waste areas of the pattern. Saw out the waste areas of the pattern. Note: DO NOT saw around the lower (tail) portions of the cats at this time, they will be cut in the next step. Tilt your saw table 3 to 4 degrees to the right and saw around the cats in the direction indicated on the pattern. You want the finished pieces to push through the back about halfway. Hint: make a test cut, using a scrap of wood the same thickness as your project, to make sure the angle is set correctly. When satisfied, cut out each cat. Set each cat aside until all are cut free. Hand sand any edges as needed. I like to round each cat over. If you want, the cats can also be carved and/or painted to add more detail. Hint: handle the back piece of the rack carefully as it will be somewhat fragile until the cats are glued back in place. Apply two coats of clear finish to all pieces. I prefer to do all of the finishing before I glue the cats. Place a small amount of glue on the lower edge of each cat and push them into position. When dry, attach the hanger to the back of the piece and the cup hooks to the front (as indicated on the pattern). Hang and enjoy! 18 • Creative Woodworks S. Crafts August 2002 |


